Create an Efficient Data Entry Sheet in Excel Now

Creating an efficient data entry sheet in Microsoft Excel isn't just about organizing your data; it's about setting up a system that enhances productivity, minimizes errors, and simplifies data analysis. Excel, a versatile tool widely used in business, academia, and personal finance, offers a plethora of features to streamline your data management process. Let's delve into the steps and techniques for setting up a data entry sheet that's both efficient and user-friendly.
1. Plan Your Layout

Before diving into Excel:
- Identify the kind of data you’ll be entering.
- Consider how you want the data to be organized (by date, by category, etc.)
- Decide on the essential fields needed for each data point.
Design Tips:

- Keep it clean: Avoid overcrowded sheets by using appropriate row heights and column widths.
- Use color coding for different types of data or to denote data status.
- Utilize bold headings for clarity and make them easy to understand.
2. Setting Up the Sheet

Now, let’s actually set up the sheet:
- Freeze Panes: To keep headers visible, go to View > Freeze Panes and select Freeze Top Row or Freeze First Column as needed.
- Format Cells: Right-click on a cell or select a range of cells, choose Format Cells, and set the data types like dates, numbers, or text.
- Named Ranges: For complex data sets, define named ranges (Formulas > Name Manager) to make referencing easier.
Conditional Formatting:

- To highlight errors, go to Home > Conditional Formatting > New Rule. Choose Format only cells that contain, and set conditions like “Cell Value” with specific criteria.
- Apply color scales for visualizing data trends directly in the sheet.
3. Data Validation

This is crucial to ensure accuracy:
- Select a range of cells where you want to apply validation.
- Go to Data > Data Validation. Here you can:
- Set up drop-down lists for categorical data.
- Prevent duplicate entries by checking “Prevent duplicates” under the “Error Alert” tab.
- Set custom rules using formulas like =AND(A1>0, A1<100) to validate numbers within a range.
Table of Validation Rules:

| Validation Type | Usage Example |
|---|---|
| List | Drop-down lists for categories like Departments, Statuses, etc. |
| Whole Number | Entries must be whole numbers (e.g., quantity) |
| Date | Ensure correct date format is entered |
| Custom | Complex rules using Excel formulas (e.g., checking for a date before today) |

⚠️ Note: Data Validation prevents errors but doesn't replace the need for careful entry. Review entries periodically.
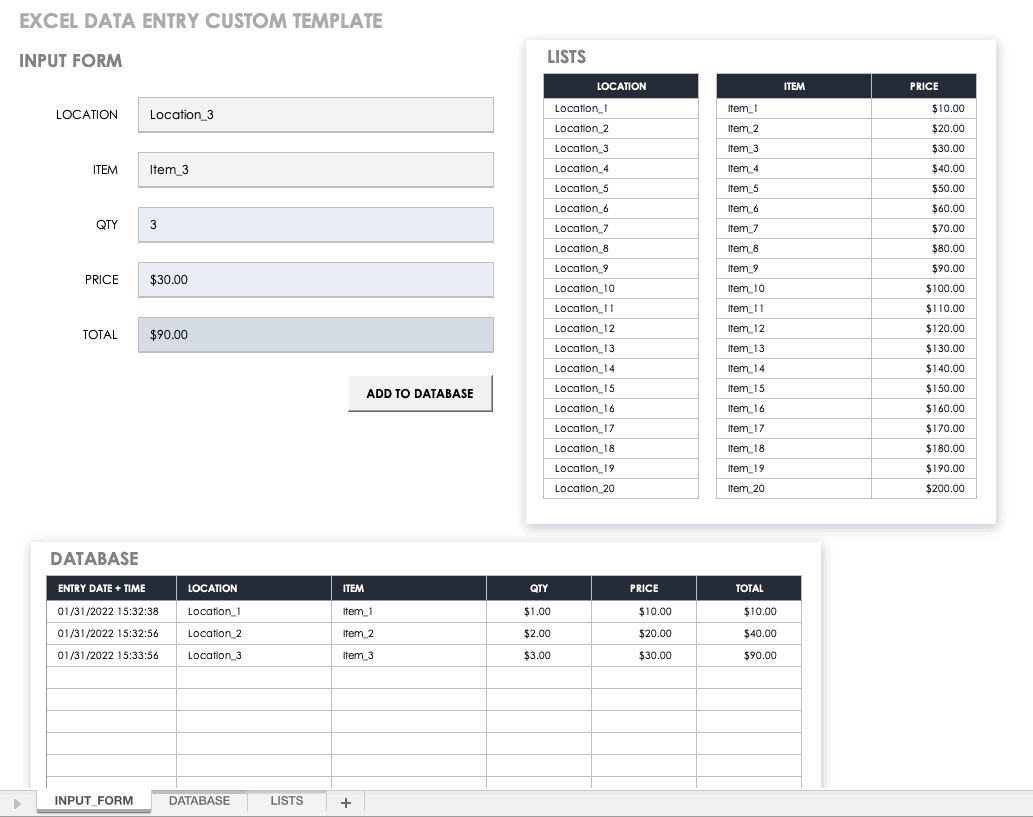
4. Forms for Data Entry

To streamline data entry:
- Use Developer > Insert > Form Controls to add buttons, check boxes, or drop-down lists.
- Create a macro (Alt + F11 to open VBA) to automate form entry or data validation processes.
- Design forms for complex data inputs, reducing the risk of mistakes during entry.
VBA Example:

Sub AddNewData()
    Range(“A” & Rows.Count).End(xlUp).Offset(1).Select
    ActiveSheet.ShowDataForm
End Sub
📝 Note: Learning VBA can significantly enhance Excel's functionality, but take care not to overcomplicate with too many macros.
5. Advanced Tips for Efficiency

- Table Feature: Convert your data to a table (Ctrl + T) for better data management and auto-expansion.
- Use Excel Formulas: Functions like VLOOKUP, XLOOKUP, SUMIFS, and COUNTIFS can automate data calculation and verification.
- Pivot Tables: For quick analysis, use Insert > Pivot Table to summarize your data based on different criteria.
- Shortcuts: Master shortcuts like Ctrl + Shift + L (apply/remove filters), Ctrl + T (insert table), or Alt + E, S, V (paste values) to save time.
By following these steps and applying the techniques mentioned, you'll have an Excel data entry sheet that not only streamlines the process of data entry but also ensures data integrity, reduces errors, and makes analysis and reporting much more efficient.
In this guide, we've explored how to plan, set up, and enhance an Excel sheet for effective data management. From freezing panes for better visibility, to conditional formatting for data highlighting, to data validation for error prevention, we've covered key aspects to create an efficient data entry environment. Remember, the key to success with Excel is not just in knowing the tools, but in how you organize and utilize these tools to match your workflow and data requirements.
What are the benefits of freezing panes in Excel?

+
Freezing panes allows you to keep certain rows or columns visible while scrolling through your data, making navigation easier, especially in large datasets.
Can I automate data entry in Excel?

+
Yes, through VBA (Visual Basic for Applications) scripting. You can create macros to automate repetitive tasks, including data entry or validation, enhancing efficiency.
How can I ensure data accuracy during entry?

+
Use Data Validation rules to restrict what data can be entered, set up custom validation formulas, and review data periodically for accuracy.
Is it necessary to use all the features mentioned?

+
Not necessarily. Use features according to your needs. For simple data entry, basic formatting and validation might suffice, while complex datasets might benefit from more advanced features.


