5 Essential Steps to Create Excel Data Sheets

Creating an Excel data sheet can be instrumental in organizing and analyzing data effectively. Whether you're tracking personal finances, managing business inventory, or analyzing research data, knowing how to properly set up an Excel data sheet ensures accuracy and ease of use. Here's a step-by-step guide on how to create an Excel data sheet that meets your data management needs.
Step 1: Planning Your Data Sheet

- Define the Purpose: What do you want to track or analyze? Your goal will shape the structure of your data sheet.
- Identify Columns: List out what information you need to capture for each entry. Each column should represent a variable or category.
- Data Types: Determine the type of data for each column (e.g., numbers, dates, text) to ensure proper formatting.
📌 Note: A clear plan helps in creating a more functional and user-friendly data sheet.
Step 2: Setting Up Your Excel Workbook

- Open Microsoft Excel and start with a new blank workbook.
- Decide on the number of sheets you need. Multiple sheets can be used for different datasets or analyses.
- Name your sheets appropriately by double-clicking on the sheet tab at the bottom.
- Use the ‘Ctrl + S’ shortcut to save your work regularly. Choose a logical file name and location.
💡 Note: Saving your work frequently prevents data loss and helps in maintaining a backup.
Step 3: Inputting Data

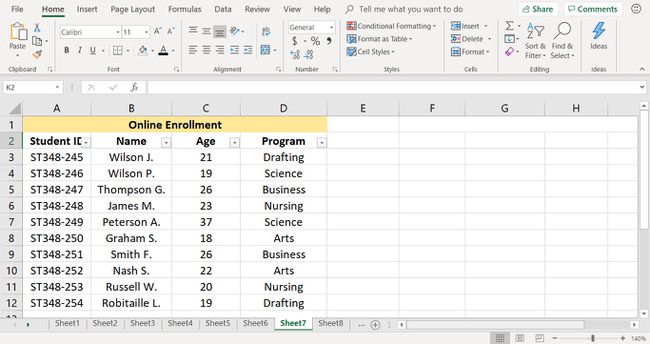
- Headers: Start with column headers. These should be descriptive and can include units or notes where necessary.
- Validation: Set up data validation rules to ensure data consistency and accuracy. For example, you might restrict data entry in a date column to only valid date formats.
- Formatting: Use Excel’s formatting options to make data more readable (e.g., bold text, color coding, conditional formatting).
- Data Entry: Enter your data accurately. If importing data, use the ‘Get & Transform’ feature for better control.
🔍 Note: Accurate data entry is crucial for reliable analysis later on.
Step 4: Structuring and Organizing Data

| Aspect | Description |
|---|---|
| Sorting | Sort your data based on a column to view information in a logical sequence. |
| Filtering | Apply filters to view specific subsets of your data. |
| Grouping | Group rows or columns for hierarchical data analysis or to simplify viewing large datasets. |
| Freeze Panes | Freeze header rows or columns to keep them visible while scrolling through large datasets. |
| Cell Locking | Protect specific cells or worksheets to prevent accidental changes to your data. |

🛠️ Note: Proper data organization enhances efficiency and analysis capabilities.
Step 5: Finalizing and Protecting Your Data Sheet

- Validation Check: Before considering your data sheet final, run through your data to validate entries and formatting consistency.
- Protection: Protect your workbook or specific sheets to prevent unauthorized changes.
- Documentation: Add a ‘Read Me’ or ‘Notes’ sheet explaining the dataset’s structure, purpose, and any necessary instructions for future users or analysts.
- Backup: Ensure you have backup versions of your data sheet to safeguard against data loss.
📄 Note: Documentation is key for long-term data management and for team collaboration.
In wrapping up your journey through the creation of an Excel data sheet, you’ve equipped yourself with a powerful tool for data management. By planning, setting up, inputting, organizing, and finally securing your data, you’ve not only organized information but set a foundation for insightful analysis. Whether for personal or professional use, these sheets provide clarity, allowing for better decision-making and analysis. Remember, the structure of your data sheet directly impacts the ease with which you can draw insights from your data. With these steps in mind, you’re now ready to explore the depths of your data, turning raw numbers into meaningful information.
What should I do if I need to update data frequently?

+
Consider using an external database or data connection if updates are frequent. This allows Excel to pull data in real-time, reducing manual updates.
How can I ensure data accuracy when multiple users are working on the same sheet?

+
Use Excel’s ‘Change Tracking’ or ‘Workbook Sharing’ feature. Alternatively, cloud-based collaboration tools like Google Sheets or OneDrive can provide version control and simultaneous editing capabilities.
What’s the best way to handle large datasets?

+
Consider splitting large datasets into multiple sheets or using Power Query for data management. Also, employing PivotTables can help summarize and analyze large datasets efficiently.
How do I make my data sheet more visually appealing?

+
Use conditional formatting, charts, and tables for visual appeal. Employ Excel themes, custom formats, and data bars to highlight important data points visually.


