Lock Your Excel Sheet in 5 Easy Steps

Securing an Excel workbook is more than just a means of protecting your data from unauthorized access; it's a vital step towards maintaining the integrity of your work. If you've ever shared an Excel document with your team, only to find crucial formulas altered or sensitive data compromised, you understand the importance of safeguarding your spreadsheets. This guide will walk you through five simple yet effective steps to lock your Excel sheet, ensuring your hard work remains unaltered and your data confidential.
Step 1: Open Your Excel Workbook

Start by opening the Excel workbook you wish to secure. This could be an existing file or a new document, depending on your needs. Remember, the process can be applied to both .xlsx and .xls files, but for the purpose of this tutorial, we’ll assume you’re using Microsoft Excel for Office 365.
Step 2: Select the Sheet

Before locking, decide which sheets you want to protect. If you have multiple sheets within your workbook, click on the tab of the sheet you wish to secure. Remember, each sheet can be locked independently, allowing for customized access control across different sections of your workbook.
Step 3: Initiate Sheet Protection

To begin protecting your sheet:
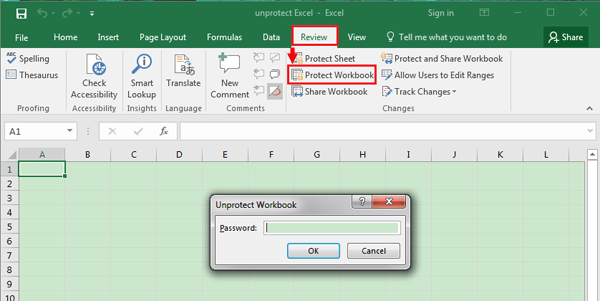
- Go to the ‘Review’ tab in the ribbon.
- Click on ‘Protect Sheet’ or ‘Protect Sheet…’.
This action brings up the Protect Sheet dialog box where you can set permissions.
Step 4: Set Permissions

In the dialog box, you’ll have several options to define what users can and cannot do:
- Enter a password if you want to restrict access further.
- Select what actions users are allowed, like ‘Select locked cells’, ‘Select unlocked cells’, ‘Format cells’, etc.
Keep in mind that you can customize these permissions to suit your needs:
| Action | Description |
|---|---|
| Select locked cells | Users can click on locked cells but not edit them. |
| Select unlocked cells | Users can select and edit cells left unprotected. |
| Insert rows/columns | Ability to add new rows or columns. |
| Delete rows/columns | Ability to remove rows or columns. |
| Format cells | Changing cell appearance but not contents. |

Step 5: Confirm Protection

Click ‘OK’ or ‘Protect Sheet’ to apply the settings. If you set a password, you will need to confirm it. Ensure you remember this password; if you forget it, you’ll need to contact Excel support for recovery options.
🛡️ Note: Protecting a sheet doesn't prevent users from viewing the data, only editing it. For more comprehensive security, consider protecting the workbook itself.
To wrap up, securing your Excel sheets with these five steps ensures your data is protected from unauthorized changes while still allowing for certain level of interaction. By controlling permissions, you maintain control over your workbook, keeping your critical data intact. Always backup your workbook before applying protection, just in case something goes awry. Remember, Excel's protection is not foolproof, but it serves as a significant deterrent and organizational tool in managing your spreadsheets' security.
What happens if I forget the password?

+
If you forget the password, you won’t be able to unprotect the sheet through standard Excel features. You might need to contact Microsoft support for assistance, though there’s no guaranteed recovery for lost passwords.
Can I protect parts of the sheet?

+
Yes, you can selectively protect cells within a sheet. Unlock the cells you want to be editable before protecting the sheet.
Will sheet protection prevent others from viewing data?

+
No, protection only restricts editing. To prevent viewing of data, consider using workbook protection or password protecting the file itself.


