Unlock Specific Cells in Excel: Step-by-Step Guide

Excel is an incredibly versatile tool that can manage complex data sets with ease, but sometimes, you need to control access to certain parts of your spreadsheet. This is where protecting specific cells or ranges becomes invaluable. In this comprehensive guide, we'll walk through the process of unlocking specific cells in Excel, which is especially useful when you want to share your workbook but keep some parts editable.
Why Lock and Unlock Cells in Excel?

Before diving into the steps, understanding why you would want to lock or unlock cells in Excel can provide context to the process:
- Data Integrity: Protecting cells ensures that critical formulas or data entries aren't altered accidentally or intentionally.
- Security: You can lock sensitive information to prevent unauthorized changes.
- Collaboration: In collaborative environments, unlocking certain cells allows others to input or modify data in designated areas.
Step-by-Step Guide to Unlocking Specific Cells in Excel

Here are the steps you'll need to follow to unlock cells in an Excel worksheet:
1. Prepare Your Worksheet

First, ensure that your workbook is in a state where you’re ready to start modifying cell permissions:
- Open your Excel workbook.
- Select the worksheet you wish to work on.
💡 Note: Always save a backup of your workbook before making significant changes.
2. Understand Excel’s Default Protection Settings

By default, all cells in an Excel worksheet are locked, but this setting has no effect until you protect the sheet. Here’s how to proceed:
3. Select the Cells to Unlock

Choose the cells you want to remain editable:
- Click on the cell or drag over a range of cells you wish to unlock.
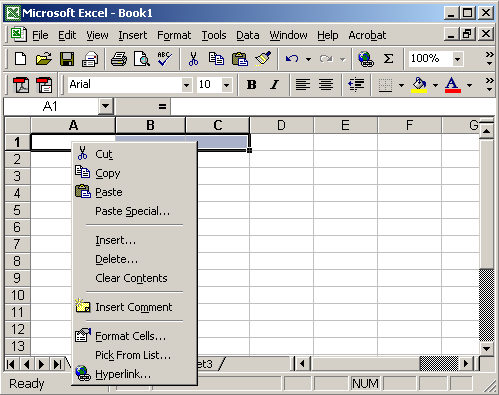
- Right-click and select “Format Cells,” or use the shortcut Ctrl + 1 on Windows, or Command + 1 on macOS.
Inside the Format Cells dialog:
- Navigate to the “Protection” tab.
- Uncheck the “Locked” checkbox.
4. Protecting the Worksheet

Once you’ve set the cells you want unlocked, it’s time to protect the sheet:
- Go to the “Review” tab on the Ribbon.
- Click “Protect Sheet.”
- In the “Protect Sheet” dialog, you can specify what actions users can take on the sheet:
- Set a password if you want to control who can unprotect the sheet.
- Allow or disallow options like selecting locked or unlocked cells, formatting cells, inserting or deleting rows/columns, etc.
- Click “OK” to apply the protection.
🔒 Note: Remember your password if you set one. Losing it means you won't be able to unlock the sheet!
5. Verify the Protection

Try to edit cells to ensure they behave as expected:
- Attempt to edit a locked cell (you should get a warning).
- Try to edit an unlocked cell (it should be editable).
6. Unprotecting the Sheet

To make changes later or to remove cell restrictions:
- Return to the “Review” tab.
- Click “Unprotect Sheet.”
- If you set a password, enter it now.
When you unprotect the sheet, all cells revert to being unlocked, allowing you to reset permissions if necessary.
Tips for Efficient Cell Locking

- Name Ranges: Use named ranges to manage cells or groups that need to be locked/unlocked frequently.
- Consistent Formatting: Apply consistent cell styles or formatting to visually distinguish locked from unlocked cells.
- Table: Here's a quick reference for common protection options:
Option Description Locked Prevents editing of cell contents. Hidden Hides formulas in protected sheets to prevent viewing. 
Wrapping Up Your Excel Protection Journey

This guide has detailed the steps necessary to unlock specific cells in Excel, ensuring your data's integrity while allowing for collaboration. Remember, the key to effective cell protection is understanding when and how to apply it, balancing security with user needs. By following these steps, you can confidently manage access to your data, reducing the risk of errors or unauthorized changes.
Can I lock cells without protecting the entire sheet?

+
Locking cells only takes effect when you protect the worksheet. If the sheet isn’t protected, all cells will behave as if they were unlocked.
How do I know which cells are locked or unlocked?

+
By default, cells are marked as locked in the “Format Cells” dialog. However, visually distinguishing locked vs. unlocked cells isn’t possible without protection. Use naming conventions or formatting to keep track.
Is it possible to unlock cells for a specific user?

+
Excel does not support user-specific permissions at the cell level. However, you can create different worksheets for different users with appropriate permissions.
What happens if I forget the password to protect/unprotect a sheet?

+
Excel does not provide a built-in method to recover lost passwords. Always keep a record of your passwords or have a backup of unprotected sheets.
How can I unlock cells in Excel using VBA?
+You can use VBA to automate the process. Here’s a simple example:
        Sub UnlockSpecificCells()
            With ActiveSheet
                .Unprotect Password:="YourPassword"
                .Range("A1:B10").Locked = False
                .Protect Password:="YourPassword"
            End With
        End Sub


