Easily Fit Your Excel Sheet to One Page: Expert Tips

Understanding Page Layout

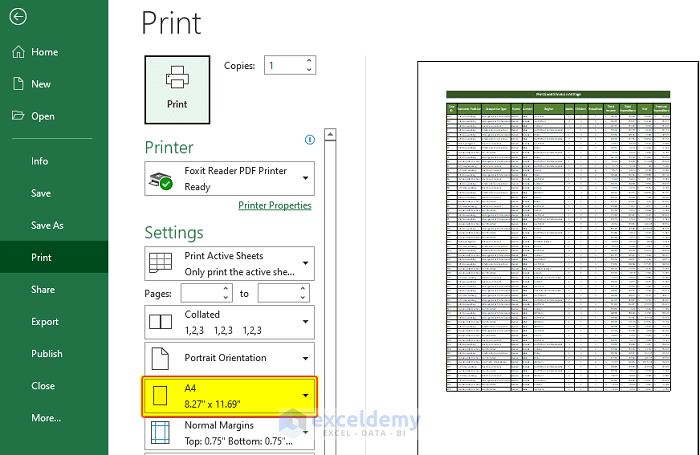
Before we dive into the specific techniques for fitting your Excel sheet onto one page, it’s essential to understand how Excel’s page layout functions. Excel organizes data into pages through a combination of page size, margins, and scaling options. Here’s a quick primer:
- Page Size: This refers to the physical dimensions of the paper you’re printing on, such as A4, Letter, or Legal.
- Margins: The blank space around the edge of the page that provides a border for the content. Excel allows you to adjust these margins to optimize space.
- Scaling: This is perhaps the most crucial feature when you’re trying to fit all your data onto a single page. Excel offers several scaling options, including Fit to Page, where you can specify how many pages wide and tall your worksheet should be.

By grasping these basics, you can more effectively manipulate your spreadsheet to ensure your data prints without spilling over onto multiple pages.
1. Adjusting Margins

One of the simplest yet often overlooked methods to fit more data on a page is adjusting the margins. Here’s how:
- Go to the Page Layout tab: Click on Margins. You can choose from preset options like Normal, Narrow, or Wide, or opt for Custom Margins.
- Custom Margins: Click on the Custom Margins option at the bottom of the Margins menu. A dialog box will appear where you can manually set the margins.
- Top and Bottom: Keep these at a minimum of 0.5 inches to avoid cropping headers or footers.
- Left and Right: You might want to reduce these margins significantly, perhaps down to 0.25 inches. Remember, while this gives you more space, readability could be affected.
By minimizing margins, you can significantly increase the printable area without altering the data or its appearance on screen.
💡 Note: Reducing margins too much can make your printout look cluttered. Aim for balance between space and readability.
2. Scaling Options

Excel’s scaling options can be a godsend when trying to fit large datasets into a single page:
Fit to Width: Select this option to scale your sheet to fit to a specific width. Go to Page Layout > Scale to Fit > Width and choose the number of pages wide you want your spreadsheet to print on.
Fit to Height: Similarly, you can scale your document to fit onto a specific number of pages tall.
Fit to One Page: For simplicity, you can check the ‘Fit Sheet on One Page’ option, which automatically scales your sheet to fit on one page, both width and height.
Here is a table summarizing scaling options:
| Scaling Option | Description |
|---|---|
| Fit to Width | Scales your sheet to fit within the specified number of pages wide. |
| Fit to Height | Scales your sheet to fit within the specified number of pages tall. |
| Fit to One Page | Automatically scales both width and height to fit all data on one page. |

Be cautious with scaling; while it’s effective for reducing pages, it can also make your data less readable if not done judiciously.
3. Adjusting Column Widths and Row Heights

Fitting your Excel sheet onto one page often involves reducing the size of your cells:
Column Widths: Right-click the column heading and choose ‘Column Width’ to manually set the width. Smaller widths can help fit more data horizontally.
- Here are a few tips:
- Use the AutoFit feature to adjust columns to their content by double-clicking the boundary line at the right of the column header.
- If columns are unnecessarily wide, manually adjust them to the narrowest possible width without truncating your data.
- Here are a few tips:
Row Heights: Similar to columns, right-click the row number and select ‘Row Height’. Reducing row height can increase the number of rows that can fit on a page.
- Font Size: Sometimes, decreasing the font size can help. Go to Home > Font Size and select a smaller size.
Be mindful that changing these settings affects readability. Excel will usually prevent you from making rows or columns so small they become unreadable, but it’s important to balance space and clarity.
📝 Note: AutoFit works well, but sometimes manual adjustments are necessary for the perfect fit.
4. Grouping and Freezing Panes

If your data is too large to fit onto one page, consider grouping:
Grouping: This allows you to collapse and expand sections of your data, reducing the amount of information that needs to fit on a page. Here’s how to group:
- Select the rows or columns you wish to group.
- Go to Data > Group. An outline will appear.
- Use the toggle buttons to collapse or expand the group.
Freezing Panes: Freezing panes keeps headers or rows/columns in place while scrolling through your data. This can be useful for reference, but not directly for fitting onto one page. Here’s how:
- Go to View > Freeze Panes, then choose ‘Freeze Top Row’ or ‘Freeze First Column’.

While grouping can reduce the visual footprint of your data, it doesn’t change the print layout. Freezing panes helps with navigation but not with fitting data onto one page.
5. Hiding Unnecessary Data

Sometimes, not all data needs to be printed:
- Hide Rows or Columns: Right-click on the row or column header you wish to hide and select ‘Hide’. This reduces the amount of data that needs to fit on the page.
- Hide Sheets: If some sheets in your workbook are irrelevant, right-click on the sheet tab and select ‘Hide’.
Keep in mind that while hiding data won’t help with fitting onto one page, it can make your printout more focused on the essential information.
6. Adjusting Header and Footer

Headers and footers can eat into your available space:
- Page Layout: Go to the Page Layout tab > Header/Footer to customize or remove headers and footers.
- Custom Header/Footer: Click on ‘Custom Header’ or ‘Custom Footer’ to input text or page numbers.
- Remove: Simply delete the content or uncheck the Header/Footer option if not needed.
Here are some tips:
- Keep headers and footers minimal or consider using them only for essential information like page numbers or report titles.
In summary, understanding and applying these page layout adjustments, scaling options, cell sizing, grouping, freezing, data hiding, and header/footer management can significantly help you to fit your Excel data onto one page. Whether it’s for a presentation, report, or data review, these techniques ensure your data is presented clearly and concisely.
Frequently asked questions might address common scenarios users face when trying to fit Excel sheets onto one page:
Can scaling options make my data unreadable?

+
Yes, if you scale too aggressively, the printout might become too small to read. It’s important to find a balance between fitting data and maintaining readability.
How do I ensure my headers don’t get cut off when scaling?

+
Ensure your headers are within the printable area by adjusting margins or using the Print Preview feature to check where they will appear on the printed page.
What should I do if my data is too large to fit even with all these techniques?

+
Consider summarizing your data, printing only essential sections, or using multiple sheets for different parts of the data if fitting everything onto one page isn’t feasible.


