3 Simple Tricks to Lock Data in Excel

Microsoft Excel, a cornerstone in the productivity suite of tools, offers an array of functions for data management, analysis, and collaboration. However, with great power comes great responsibility, especially when it comes to securing sensitive information. Ensuring that your data in Excel is protected from unauthorized changes or eyes is paramount in various professional environments. In this detailed guide, we will explore three simple yet effective tricks to lock data in Excel, thereby ensuring your information remains both accurate and secure.
Understanding Excel Data Protection

Before we delve into the methods of locking data, let's understand the core principles of data protection in Excel:
- Password Protection: This feature allows you to secure your entire workbook or specific sheets with a password.
- Cell Locking: You can lock individual cells or ranges to prevent editing.
- Sheet Protection: Protects the structure of the worksheet, including cell editing, formatting, and other features.
Trick 1: Using Workbook and Sheet Protection

One of the most straightforward methods to lock data in Excel is by protecting your workbook and sheets.
Protecting an Entire Workbook

To protect your entire workbook:
- Go to File > Info.
- Click on Protect Workbook.
- Choose Encrypt with Password, enter your password, and confirm it.
This will encrypt the workbook file, requiring a password to open it.
Protecting a Specific Sheet

If you want to lock just certain sheets, follow these steps:
- Right-click the sheet tab you want to protect, then select Protect Sheet.
- Set a password if you want, and decide what users can do with the sheet. Options include allowing them to select cells, format cells, insert/delete rows or columns, etc.
- Click OK to apply the protection.
⚠️ Note: Remember that passwords can be forgotten, so keep a backup in a secure place.
Trick 2: Locking Specific Cells

Sometimes, you don’t need to lock the entire sheet; you might only want to protect certain data entries. Here’s how:
Steps to Lock Cells:

- Select the cells you want to lock. Right-click and choose Format Cells.
- In the Protection tab, ensure Locked is checked (it’s checked by default).
- Then protect the sheet as described above. This will now only apply to the locked cells.
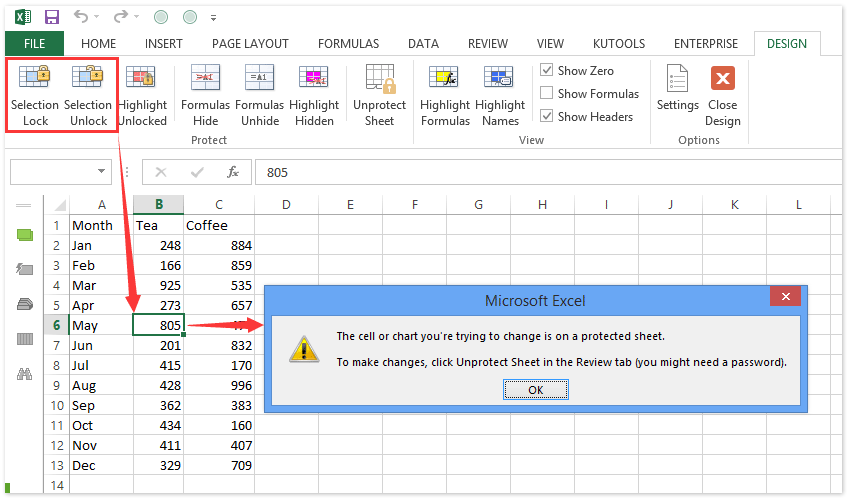
🔐 Note: Users can't edit locked cells, but they can still view them unless you hide the content.
Trick 3: Hiding Formulas for Confidentiality

In business settings, some formulas are sensitive and should be kept confidential. Here’s how to hide them:
Hiding Formulas:

- Select the cells with formulas you want to hide.
- Go to Format Cells again, but this time, in the Protection tab, check Hidden.
- Now, when you protect the sheet, the formulas in those cells will not be visible in the formula bar or through cell inspection.
Combining Tricks for Enhanced Security

By combining these tricks, you can create a highly secure Excel environment:
- Password protect the workbook to secure it from unauthorized access.
- Protect specific sheets to control editing permissions.
- Lock cells with sensitive data, and hide formulas for even tighter security.
By employing these techniques, you ensure that your data remains both accurate and confidential, allowing for collaboration while maintaining control over critical data.
This comprehensive approach to data security in Excel offers peace of mind. Remember, while these methods are effective, they are not foolproof against all types of access or advanced hacking attempts. Thus, always combine Excel security with additional IT security measures.
Can I protect parts of my Excel sheet without protecting the entire sheet?

+
Yes, you can. By locking specific cells while leaving other parts of the sheet unprotected, users can interact with the sheet but not modify critical data.
What if I forget the password to my protected Excel file?

+
Unfortunately, Excel does not offer a way to recover lost passwords. You would need to use third-party recovery software or recall the password from a secure backup.
Is it possible to hide only some formulas in a worksheet?

+
Yes, by selecting the cells with the formulas you want to hide and marking them as hidden in the Protection tab before protecting the sheet, only those formulas will be concealed.