5 Ways to Seamlessly Copy Excel to Word

In the modern office environment, proficiency in using Microsoft Office tools such as Excel and Word can significantly boost productivity. Transferring data from Excel to Word is a common task, whether for reports, presentations, or documentation. Here, we explore five seamless ways to accomplish this task efficiently, ensuring that your data remains intact and presentable in Word.
1. Copy and Paste as Plain Text

Sometimes, the simplest solutions are the best. Copying data from Excel and pasting it into Word can be done in several ways:
- Basic Copy-Paste: Select the cells in Excel, right-click, choose “Copy,” navigate to Word, right-click, and select “Paste.”
- Paste as Plain Text: Use Ctrl + Alt + V (Windows) or Option + Shift + Cmd + V (Mac) to open the Paste Special dialog, then choose “Unformatted Text” to ensure no Excel formatting is carried over.
This method is perfect when you only need the data without any Excel-specific formatting or formulas.
2. Link Excel Data to Word

Linking Excel data to Word documents allows for dynamic updates:
- In Excel, select and copy the desired cells.
- In Word, position the cursor where you want the data, open the “Paste Special” dialog with Ctrl + Alt + V or Option + Shift + Cmd + V.
- Select “Paste Link” and choose the format that suits your needs, like “Microsoft Excel Worksheet Object.”
- Your Word document will now link to the Excel file. Updates in Excel will reflect in Word automatically.
💡 Note: Ensure that you keep the original Excel file accessible for the link to work correctly.
3. Embed Excel Data in Word

Embedding Excel data means inserting the actual Excel file into your Word document:
- Copy the Excel cells.
- Use “Paste Special” in Word and select “Microsoft Excel Worksheet Object,” but this time, choose “Paste.”
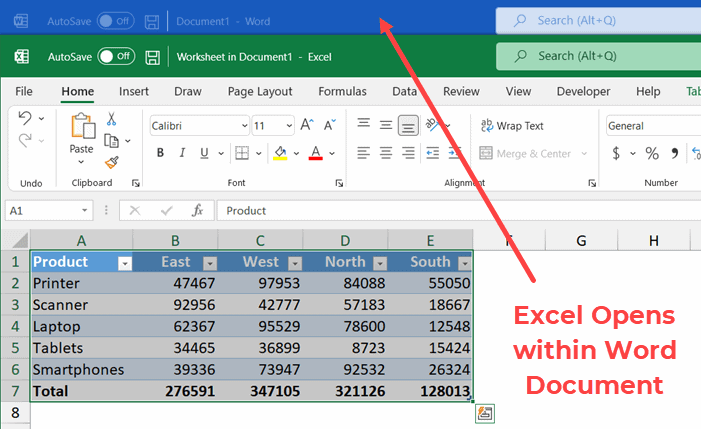
- The Excel data will be embedded, allowing you to double-click and edit it directly in Word.
💡 Note: Embedded data can increase the file size of your Word document, and it’s not linked to the original Excel file.
4. Use Object Embedding

If you need more control over how Excel data appears in Word, consider embedding the entire Excel worksheet as an object:
- Go to Word, navigate to “Insert” > “Object” > “Create from File.”
- Select your Excel file, then choose either to “Link to File” or “Display as Icon.”
Linking lets Word show the data but updates only when you manually refresh it or when the Excel file is updated. Displaying as an icon lets users open the Excel file from within Word for full functionality.
5. Advanced Features: Table of Content with Fields

For complex documents that require multiple updates from Excel, use Word’s field codes:
- Insert an Excel object into Word using “Object Embedding” (Step 4).
- Instead of the default content, create a table of content using Word’s fields. Use Ctrl + F9 (Windows) or Cmd + F9 (Mac) to insert a field bracket { }.
- Type
{ LINK “path\filename.xlsx” “SheetName!Range” }inside the field bracket and update the field to display Excel data dynamically.
To wrap up, transferring data from Excel to Word can be done in numerous ways, each with its own set of advantages. From straightforward copy-pasting to dynamic linking or embedding, the method you choose depends on the level of interactivity and document maintenance you require. Whether it's for creating static reports, dynamically updating charts, or maintaining complex data sets in Word, these techniques will ensure your documents are both functional and visually appealing.
What’s the difference between linking and embedding in Word?

+
Linking creates a dynamic connection between the Word document and the original Excel file, allowing for automatic updates in Word when the Excel data changes. Embedding, on the other hand, places the Excel data into the Word document as a static object, which does not reflect changes made in the original file.
Can I edit the Excel data after embedding it in Word?

+
Yes, you can double-click the embedded Excel object in Word to open it in an editable form within Word, although changes are not reflected in the original Excel file.
How do I ensure the link stays active when sharing documents?

+
To keep links active, ensure that the recipient has access to the original Excel file in the same relative path or use “Pack and Go” features to package files together for sharing.


