Change Excel Sheet Orientation Easily: Quick Guide

Whether you're compiling data, designing a report, or just need to fit more information onto a single page, changing the orientation of your Excel worksheet can be incredibly helpful. This guide will walk you through the steps to change the orientation of your Excel sheet from portrait to landscape, or vice versa, ensuring your data presentation meets your needs.
Understanding Page Orientation

Before diving into how to change the orientation, let's understand what page orientation means:
- Portrait Orientation: This is the default setting where the longer sides of the paper are vertical. It's ideal for documents that are taller than they are wide, like letters or certificates.
- Landscape Orientation: In this mode, the shorter sides of the paper are vertical, making the layout wider. It's perfect for wide tables, charts, or any content that benefits from a horizontal display.

Steps to Change Orientation in Microsoft Excel

For Desktop Users

Step 1: Open Page Layout View
To start changing the orientation, follow these steps:
- Open your Excel workbook.
- Go to the File menu, and click on Page Setup or Print to open the Page Layout view.
Here, you can also adjust other settings like margins, headers, footers, and print area.
Step 2: Adjust Orientation
In the Page Setup dialog box:
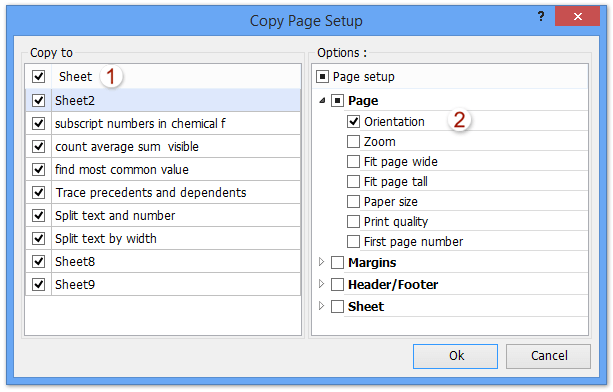
- Go to the Page tab.
- Under Orientation, select Portrait or Landscape according to your requirement.
- Click OK to apply changes.
⚠️ Note: Changing the orientation affects the current worksheet only. If you have multiple sheets, repeat the steps for each sheet or use 'Select All Sheets' feature for bulk changes.
For Mobile or Web Excel Users

Step 1: Access Page Layout
Navigate to the page layout settings in Excel:
- Open your spreadsheet on a mobile device or in a browser.
- Tap or click on the File menu and select Print or look for a printer icon.
Step 2: Change Orientation
From the Print dialog:
- Find the Orientation option.
- Toggle between Portrait and Landscape.
- Apply changes.
Additional Tips for Excel Orientation

Why Change Orientation?

- To fit more columns on one page.
- For better readability of data-rich worksheets.
- To optimize how charts and graphs are displayed.
Print Preview

Before printing, use the Print Preview feature to see how your document will look in the selected orientation. This step can save time and paper by ensuring the layout is exactly as intended.
👍 Note: Excel 2016 and later versions offer a live preview of changes, which can help visualize the effect of changing orientation before finalizing.
Customizing Paper Size

Besides orientation, consider adjusting the paper size:
- In the Page Setup dialog, navigate to the Page tab.
- Under Paper Size, select from standard or custom sizes for a perfect fit.
Understanding these options allows you to tailor your Excel worksheet to your specific printing needs, ensuring clarity and precision in your presentations or reports.
Whether you're adjusting for a single-page print or preparing a detailed report, changing the orientation in Excel is a simple process that can significantly enhance your document's readability and presentation quality. By following these steps, you can easily switch between portrait and landscape, ensuring that your data fits beautifully on the page. Remember, this is not just about fitting content but also about optimizing the visual appeal of your spreadsheet. As you tweak and adjust, always keep your audience and the final goal of your document in mind.
Does changing the orientation affect all sheets in my Excel file?

+
No, changing the orientation will only affect the active sheet. You’ll need to repeat the steps for each sheet or use the ‘Select All Sheets’ feature to apply changes across multiple sheets.
How can I change the orientation back to portrait if I’ve chosen landscape by mistake?

+
Simply follow the steps above but choose the portrait option instead of landscape. If using the ‘Print’ menu, toggle back to portrait orientation.
Can I customize the orientation for different pages within the same worksheet?

+
Excel does not offer the ability to set different orientations on the same worksheet; however, you can use the ‘Page Break Preview’ feature to control how content flows across different pages, or split your data into multiple sheets with different orientations.


