Excel Budgeting Sheet: Simple Steps to Financial Control

In today's fast-paced world, managing your finances efficiently can seem like a daunting task. With bills, savings goals, and unexpected expenses cropping up, keeping track of your financial health can easily fall by the wayside. However, the solution could be as simple as using an Excel Budgeting Sheet. Excel offers a robust platform for managing personal finances, allowing you to gain control over your money, track your spending, and plan for the future effectively. Here's how you can leverage the power of Excel for better financial management.
Why Use Excel for Budgeting?

Before diving into the steps, let’s briefly explore why Excel stands out as an excellent tool for budgeting:
- Flexibility: Excel allows for customizations to fit any budgeting needs, from simple monthly budgets to complex, multi-year financial plans.
- Accessibility: With numerous free templates available online, even those with limited Excel experience can start budgeting effectively.
- Calculation Power: Excel’s formulas ensure that all financial calculations are accurate, reducing the risk of human error.
- Visualization: You can use charts and graphs to visualize your financial situation, making it easier to understand and adjust your financial strategies.
Setting Up Your Excel Budgeting Sheet

Let’s now move on to setting up your Excel Budgeting Sheet with these simple steps:
Step 1: Planning Your Budget

First, consider what your budget should include:
- Your income sources (salary, freelance work, investments).
- All fixed expenses (rent, utilities, subscriptions).
- Variable expenses (groceries, entertainment).
- Regular savings and investments.
- Any upcoming one-time expenses or large purchases.
Make a list of these to ensure you have a comprehensive view of your financial inflows and outflows.
Step 2: Creating the Spreadsheet

Open a new Excel workbook and begin structuring your budget sheet:
- Label the first row with months or dates.
- Create columns for different categories like ‘Income,’ ‘Housing,’ ‘Food,’ ‘Transport,’ ‘Entertainment,’ etc.
- Use Excel’s SUM function to tally up each category and the total expenses.
- Set up a column for net income (Income - Total Expenses).
💡 Note: You can find numerous Excel budgeting templates online that can give you a head start. Customize these to fit your personal financial situation.
Step 3: Inputting Data

Now, enter your data:
- Start with your income at the top, followed by your expenses categorized as planned.
- Use the SUM function where necessary to calculate totals automatically.
- Regularly update the sheet with actual figures as they occur or at the end of each month.
Step 4: Analyzing Your Data

After a few months of consistent tracking:
- Use Excel charts (Pie, Bar, or Line) to visualize spending trends and income vs. expenses.
- Set up formulas to show savings rates, emergency fund growth, and investment performance.
- Highlight areas where spending exceeds budgeted amounts with conditional formatting.
Step 5: Adjusting Your Budget

Based on your analysis:
- Adjust your budget categories and allocations to better align with your financial goals and reality.
- Consider setting financial goals like saving for a vacation, reducing debt, or increasing investment contributions.
🔍 Note: Regular reviews are crucial. Quarterly reviews can help you make informed decisions on your financial strategy adjustments.
The Power of Visual Representation

Excel’s capability to create visual data representations is not just a nice-to-have; it’s a powerful tool for financial control:
Creating Visuals
- Select the data you want to visualize.
- Go to the ‘Insert’ tab and choose your chart type.
- Customize the chart to make your financial trends clear and actionable.
🎨 Note: Visuals can help in identifying patterns or anomalies in your spending that might be missed when looking at raw numbers.
Keeping Your Data Safe

Remember, your financial data is sensitive. Here are some tips:
- Password-protect your workbook through ‘Review’ > ‘Protect Sheet’ or ‘Protect Workbook.’
- Save backups on secure cloud storage or external drives.
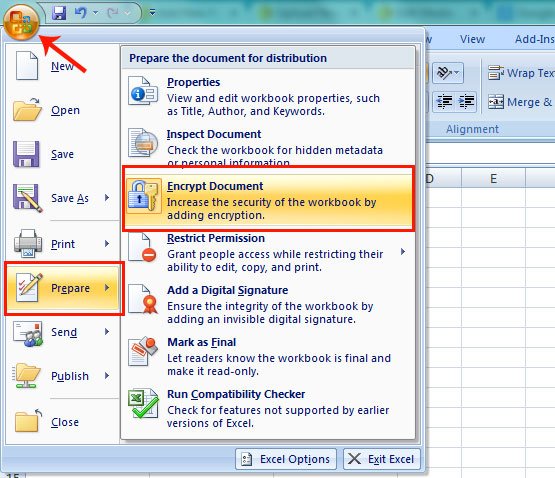
- Consider encrypting your Excel files for additional security.
To wrap up, crafting an Excel Budgeting Sheet is a dynamic process that empowers you with control over your financial life. By utilizing Excel's robust capabilities, you can track your income and expenses, visualize your financial trajectory, and adjust your strategy as needed. This not only ensures that you are spending within your means but also helps in setting and achieving financial goals, reducing financial stress, and ultimately, leading a more financially secure life.
How often should I update my Excel Budgeting Sheet?

+
For the most accurate tracking, update your budget sheet as often as possible. Ideally, you should update it at least weekly or when you have a significant expense or income event.
Can I use Excel for budgeting on my mobile device?

+
Yes, with Microsoft Excel for mobile, available on both iOS and Android, you can view and edit your budgeting sheets on the go. Cloud syncing ensures your data is up to date across devices.
What if I miss tracking some expenses?

+
If you miss an expense, try to backtrack and add it to the respective category. For future accuracy, set reminders or use financial apps that can sync with Excel to ensure all transactions are recorded.
How do I keep my budget flexible?

+
Use separate columns or sheets for unexpected expenses, saving for emergencies, or special events. Regularly review and adjust your budget to accommodate changes in income or financial goals.


