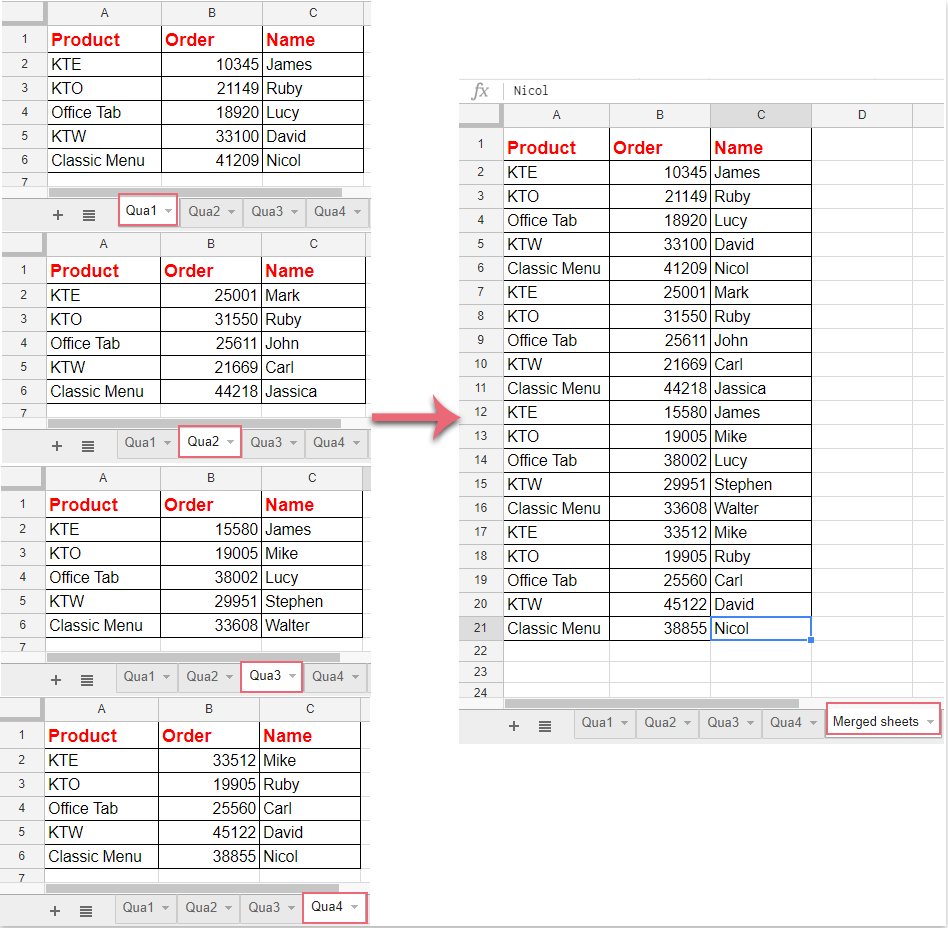
3 Easy Steps to Merge Excel 2013 Sheets into One

Merging Excel sheets can streamline your data management tasks, especially when dealing with multiple spreadsheets containing similar or related data. In Microsoft Excel 2013, combining spreadsheets can be achieved efficiently through a few straightforward steps. This post will guide you through the process of merging sheets to create a cohesive, comprehensive dataset for further analysis, reporting, or data manipulation.
Step 1: Preparation

Before you start merging Excel sheets, make sure your data is clean and uniform. Here’s how to prepare:
- Check Headers: Ensure that all sheets have identical headers for consistency.
- Data Validation: Verify the data types in each column to avoid type mismatches.
- Clean Duplicates: Remove any duplicate entries from each sheet to prevent redundancy in the merged dataset.
Step 2: Open Your Excel Workbook

Assuming you have all sheets in the same workbook:
- Open the Excel workbook where all your sheets reside.
- Look for the name tabs at the bottom of your workbook window, where each sheet is represented.
💡 Note: If your sheets are in different workbooks, you will need to copy and paste them into a single workbook or use a more advanced method like VBA (Visual Basic for Applications).
Step 3: Merge Sheets Using Excel Tools

Now, let’s delve into the actual merging process:
Using the Consolidate Function

Excel 2013 offers a ‘Consolidate’ feature which is quite useful for merging data:
- Navigate to the sheet where you want to combine all data.
- Click on Data > Consolidate from the Excel ribbon.
- In the ‘Consolidate’ dialog box:
- Select ‘Sum’ (or any other function relevant to your data).
- Choose the range from the first sheet you wish to merge.
- Click ‘Add’ to include this range.
- Repeat for each sheet you want to include, ensuring to select the same range each time.
- Check ‘Use labels in: if your headers are included in the range.
- Click ‘OK’ to merge the data.
📌 Note: Ensure that the ranges you select for each sheet are identical in terms of cells and headers to avoid misalignment.
Manual Copying

If the Consolidate feature is not suitable, you can manually copy:
- Select the data from one sheet including headers.
- Right-click and choose ‘Copy’ or press Ctrl + C.
- Move to the target sheet, select the cell where you want the data to begin, then paste using Ctrl + V.
- Repeat for all sheets, ensuring each dataset starts below the previous one.
Tips for a Smooth Merging Process

- Use Named Ranges: Define named ranges for easy selection and merging.
- Sort Data: Sorting data in each sheet beforehand can make the merging process more intuitive.
- Check for Errors: Look for errors in data to prevent issues after merging.
Merging Excel sheets can greatly enhance your data management by creating a single, comprehensive view of your data. While these steps can be followed manually, for large datasets or frequent merging tasks, consider learning about Power Query or other data manipulation tools within Excel for automation. As we've outlined above, the consolidation method suits most merging needs, but don't hesitate to explore Excel's extensive features or VBA for more complex scenarios. Understanding how to efficiently combine data will not only save time but also help in better analyzing and presenting your data.
Can I merge sheets from different Excel files?

+
Yes, you can copy and paste sheets from different files into one workbook before merging or use more advanced methods like Power Query or VBA.
What happens if I have different data in each sheet?

+
If your data structure differs across sheets, you will need to manually align headers or create a template sheet with all possible headers. Use the ‘Consolidate’ feature or manual copying with caution to ensure data integrity.
Is there a way to automate the merging process?

+
Yes, Excel offers Power Query, which can automate data merging from multiple sources. Additionally, VBA scripts can be written to automate complex merging tasks.


