7 Ways to Print Long Excel Sheets Easily

Managing and printing long Excel sheets can often be a daunting task, especially when you want to present your data clearly and professionally. In this blog post, we'll dive into seven practical methods to make printing long Excel spreadsheets not only easy but also efficient.
Method 1: Using Print Preview


The Print Preview feature in Excel allows you to see how your data will appear on the printed page before you commit to printing.
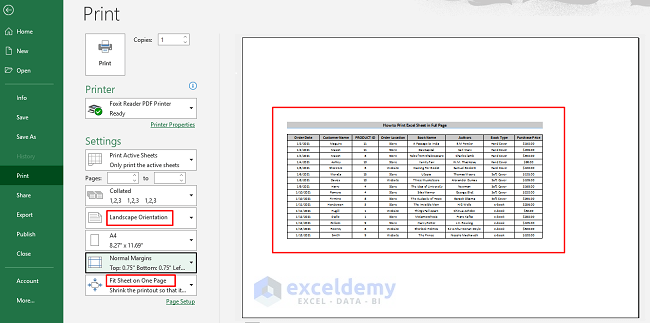
- Go to the File tab and select Print.
- Use the Print Preview section to adjust margins, scale, and orientation.
This tool helps you ensure that your document fits neatly on the page, avoiding unnecessary page breaks or cut-off data.
Method 2: Adjusting Page Layout

Proper page setup can significantly impact how your data is laid out when printed:
- Select Page Layout from the ribbon.
- Set up page margins, orientation, and scale using Page Setup options.
- Consider using Landscape for wide tables to prevent excessive page breaks.
📝 Note: Remember, setting margins too narrow might cut off critical data when printing.
Method 3: Page Break Preview


The Page Break Preview mode lets you manually set where pages should break:
- Go to the View tab and select Page Break Preview.
- Drag the blue lines to adjust where page breaks should occur.
This gives you fine control over which data appears on each page.
Method 4: Fit to One Page Option

If your data is crucial but not too complex, using the Fit to One Page option can be beneficial:
- In the Page Setup dialog, go to the Page tab.
- Under Scaling, choose Fit to and set 1 page(s) wide by 1 tall.
⚠️ Note: This might make text very small if you have a lot of data.
| Scaling Option | Effect on Print |
|---|---|
| No Scaling | Prints as-is, possible multi-page output |
| Adjust to % | Reduces or enlarges data to fit better |
| Fit to One Page | Compresses all data onto one page |

Method 5: Print Headers and Footers

Adding headers and footers can help maintain context across multiple pages:
- Navigate to Page Layout > Print Titles to insert headers and footers.
- Select from pre-made options or customize your own.
Method 6: Printing Specific Ranges

When you only need to print a portion of your data:
- Highlight the range of cells you wish to print.
- Go to File > Print and choose Print Active Sheets or Print Selection.
Method 7: Using VBA Macro for Custom Print Settings

For a truly tailored printing experience, consider a VBA macro:
Sub CustomPrint()
    With ActiveSheet.PageSetup
        .PrintArea = “A1:M200”
        .PrintTitleRows = “1:2”
        .PrintTitleColumns = “A:A”
        .Zoom = False
        .FitToPagesWide = 1
        .FitToPagesTall = False
        .Orientation = xlLandscape
        .PrintGridlines = True
    End With
    ActiveSheet.PrintOut
End Sub
This script can be executed with a single click, setting up all the necessary parameters for a perfect printout.
In summary, by leveraging these seven methods, you can streamline the process of printing long Excel sheets. Whether you’re looking for a quick print or need detailed control over every aspect of your output, there’s a solution that fits. Remember to keep tweaking and experimenting with these methods to find what works best for your unique needs.
What if my Excel sheet is too wide to fit on one page?

+
Try using the Landscape orientation or the Fit to One Page option. If your data is still too wide, consider printing in sections or using a larger paper size if available.
How can I ensure that my headers repeat on every printed page?

+
Go to Page Layout > Print Titles and specify the rows to repeat on each page. This can be set for both headers and footers.
Can I print Excel sheets directly without opening them?

+
Yes, you can create a VBA script or use the PrintOut method to print Excel files without opening them in the Excel application.


