Excel Data Splitting Made Easy: Quick Tips and Tricks

Working with Excel can sometimes feel like navigating through a maze, especially when it comes to managing and organizing large datasets. A common challenge many users face is splitting data within cells. Whether it's separating names, dates, or any information spread across a cell, mastering this skill can dramatically boost your productivity and accuracy when working with spreadsheets. In this extensive guide, we'll explore various techniques for Excel data splitting, offering you quick tips and tricks to streamline your work.
Why Split Data in Excel?

Data splitting in Excel is essential for several reasons:
- Improved Data Organization: Splitting data helps in organizing it in a structured manner, making it easier to manage and analyze.
- Enhanced Data Analysis: Split data allows for better sorting, filtering, and application of functions like VLOOKUP or INDEX MATCH.
- Efficient Data Entry: When data is split into separate cells, it simplifies inputting, editing, and updating information.
- Facilitates Data Import: Many systems require data in a specific format; splitting data correctly ensures smooth data import.
💡 Note: Always back up your data before attempting any large-scale operations like splitting cells.
Basic Splitting with Text to Columns

Excel provides a straightforward tool for splitting data called Text to Columns:
- Select the column containing the data you wish to split.
- Go to the Data tab in the ribbon.
- Click on Text to Columns.
- Choose either Delimited or Fixed Width based on your data structure.
- If Delimited, choose the delimiter character (like comma, space, or tab).
- Specify the destination cells where you want the split data to go.
- Click Finish.
Here’s how the Text to Columns Wizard works:

👉 Note: For dynamic data sets, you might need to re-run this process each time data changes or use an Excel macro for automation.
Splitting with Excel Formulas

Formulas offer more control and are useful for dynamic data manipulation. Here are some examples:
LEFT, MID, and RIGHT Functions

These functions help you extract specific parts of text:
- LEFT(text, num_char) - Extracts characters from the start of a text string.
- MID(text, start_num, num_chars) - Takes characters from a specified starting point.
- RIGHT(text, num_char) - Grabs characters from the end of the text.
| Function | Example | Result |
|---|---|---|
| =LEFT("John Doe", 4) | John | |
| =MID("John Doe", 6, 3) | Doe | |
| =RIGHT("John Doe", 3) | Doe |

FIND and SEARCH Functions

To determine where to start splitting:
- FIND(find_text, within_text) - Case-sensitive search for a substring.
- SEARCH(find_text, within_text) - Case-insensitive search for a substring.
Example: To split a full name into first and last name:
=LEFT(A1, FIND(" ", A1) - 1) - For the first name

=MID(A1, FIND(" ", A1) + 1, LEN(A1)) - For the last name
Text Functions for More Complex Splitting

For splitting based on multiple delimiters or complex structures, use:
- REPLACE to remove unwanted characters.
- LEN to count characters.
- CONCATENATE or CONCAT to join strings back together if needed.
💡 Note: Combining these functions can create complex formulas for unique splitting needs.
Advanced Techniques

Power Query for Data Splitting

Power Query, introduced in Excel 2016 and later, offers advanced data transformation capabilities:
- Load your data into Power Query.
- Select the column you want to split.
- Go to the Home tab, click Split Column, and choose from various options like By Delimiter, By Number of Characters, or By Positions.
- Set up the splitting options and apply them.
- Load the transformed data back into Excel.
👉 Note: Power Query provides a repeatable process, making it ideal for dynamic data sets or when sharing workbooks.
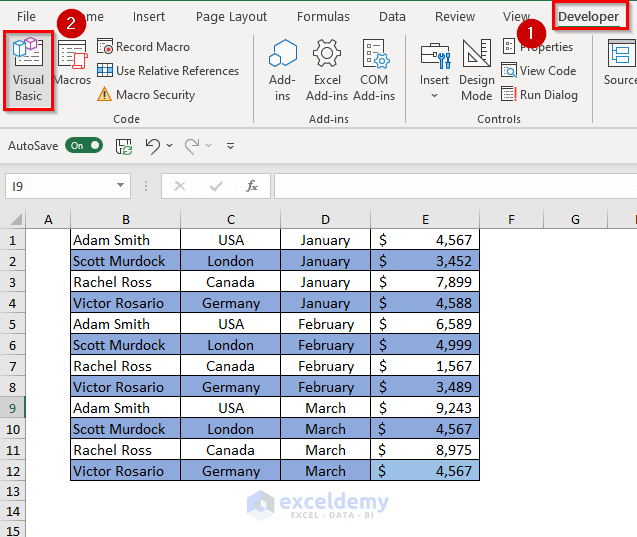
VBA Macros for Automated Splitting

For automating repetitive tasks:
Sub SplitData()
    'Your VBA code here
End Sub
Create a VBA function that can handle the split, automate the process, and you can run it with a single click or assign it to a button.
Common Issues and Solutions

Here are some common issues you might encounter and how to resolve them:
- Data with Irregular Delimiters: Use Power Query's Split Column with a custom delimiter or regex if supported.
- Variable Number of Spaces: Use TRIM function to remove excess spaces before splitting.
- Data with Commas in Values: Use a different delimiter or escape the commas within the data.
- Dynamic Data: Automate with Power Query or a VBA macro to handle data changes seamlessly.
By understanding these basic and advanced techniques, you're now equipped to tackle any data splitting task in Excel with confidence. Remember, the key to mastery lies in practice, so experiment with different datasets to hone your skills. As data becomes more complex, you'll find Excel's versatile tools like Text to Columns, formulas, Power Query, and VBA increasingly useful.
Frequently Asked Questions (FAQs)

How can I split data if there’s no delimiter?

+
Use functions like LEFT, MID, and RIGHT based on character positions or use Power Query’s Split Column by Positions or Number of Characters.
Is there a way to automatically update split data when the source changes?

+
Yes, with Power Query or VBA macros, you can automate the data splitting process to update dynamically with changes in your source data.
What if my data includes the delimiter as part of the value?

+
Use a custom delimiter in Power Query or escape the delimiter character within your data. Alternatively, manually clean the data or use complex formulas to handle these cases.


