Shrink Excel Sheet for Easy Printing: Quick Guide

Understanding the Need for Shrinking Excel Sheets

Excel sheets are fantastic tools for organizing and analyzing data, but there comes a time when you need to present this data in a more compact and print-friendly manner. Whether you're preparing a report, organizing a financial statement, or sharing data at a meeting, shrinking an Excel sheet can help make your documents more readable and manageable. Here's a quick guide on how to reduce the size of your Excel sheets for easy printing:
How to Shrink Excel Sheets for Printing

1. Adjust Page Layout Settings

- Margins: Go to Page Layout > Margins > Custom Margins. Reduce the margins to minimize the unused space around your data.
- Orientation: Switch from Portrait to Landscape if your data fits better horizontally.
- Scale to Fit: Use the Scale to Fit group to shrink your document to fit a specific number of pages wide or tall.
2. Reduce Font Size and Cell Padding

- Highlight your data range or entire sheet.
- Decrease the font size from the Home tab to make text smaller.
- Right-click on the selected cells, go to Format Cells, and reduce the cell padding in the Alignment tab to minimize space between cells.
3. Auto-Fit Columns and Rows

- Select the columns or rows you wish to fit.
- Double-click the right border of the column header or bottom border of the row header. This will automatically adjust the size to the content, making your sheet more compact.
4. Use Print Area

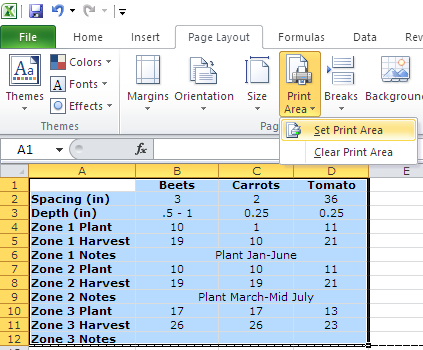
- Go to Page Layout > Print Area > Set Print Area to define only the necessary range for printing, excluding any extraneous data or empty cells.
5. Hide Unnecessary Data

- Right-click on the rows or columns you don’t want to print and select Hide.
- This action doesn't delete data; it just prevents it from being visible or printed.
6. Group and Outline

- If your data has logical breaks, use Data > Group to group rows or columns. When printing, collapse these groups to show summary data only.
7. Print Preview and Adjust

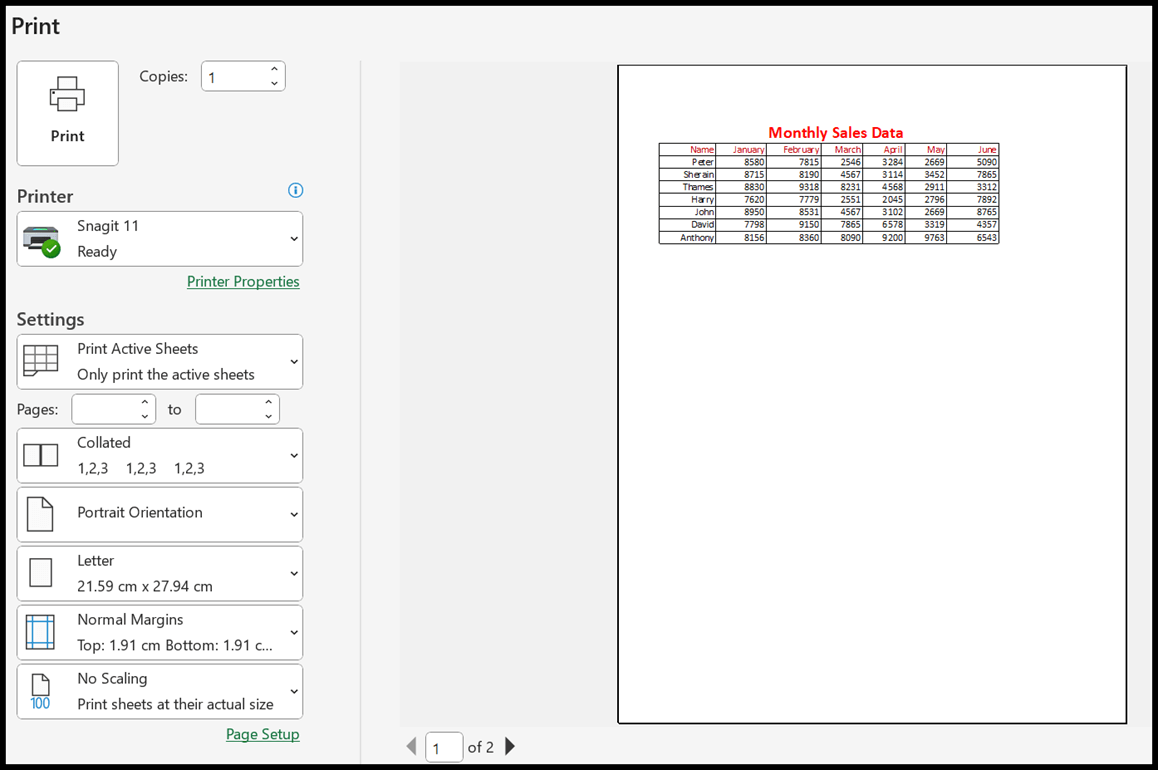
- Use the File > Print option to see a preview of your document.
- Adjust settings like scaling or repeat the steps above if the document doesn't fit on one page or needs further compaction.
📝 Note: When you use Set Print Area, remember to clear it after you're done printing to avoid unintentionally hiding data on the sheet.
The process of shrinking an Excel sheet for printing might seem tedious, but with these steps, you can ensure that your data looks neat, organized, and fits on fewer pages. This not only saves paper but also makes your printed materials more professional and user-friendly.
Frequently Asked Questions

Will shrinking my Excel sheet affect the data in any way?

+
No, the data itself remains unchanged. You are merely adjusting how it appears on the printed page or within the Excel sheet itself for presentation purposes.
Can I revert the changes made for printing?

+
Absolutely. You can undo all print-specific adjustments by resetting the margins, font sizes, and clearing the print area. Additionally, unhiding rows or columns will restore the full view of your data.
How can I ensure that all data is legible after shrinking?

+
Use print preview to check the document’s legibility. If text or data becomes too small to read, consider increasing font size slightly, or break the document into more pages while still keeping it compact.


