Remove Excel Gridlines Effortlessly: Simple Guide

Have you ever found yourself staring at a messy Excel spreadsheet cluttered with gridlines that make it hard to concentrate on the actual data? It's a common annoyance, but fear not, as there are straightforward solutions to streamline your view and remove those unwanted gridlines from your Excel sheets. In this detailed guide, we'll explore various methods to help you manage gridlines in Excel, thereby enhancing your document's readability and professionalism. Whether you're working on financial reports, data analysis, or any spreadsheet task, this tutorial will empower you to take control of your workspace effortlessly.
Why Remove Gridlines?

- Improved Clarity: With gridlines gone, the data stands out more clearly.
- Professional Appearance: Gridlines can look informal; removing them adds to the document’s polished look.
- Focus on Content: No distractions means better focus on what’s truly important: your data.
- Ease of Use: Navigation through large datasets becomes smoother without gridlines.
Steps to Remove Excel Gridlines

Here’s how you can remove gridlines from your Excel document:
Using the Ribbon

- Open your Excel workbook.
- Go to the “View” tab on the ribbon.
- Uncheck the “Gridlines” box. This action will instantly hide the gridlines.
This method is the quickest way to hide gridlines, making it suitable for quick presentations or when you need a clean look without modifying the workbook settings permanently.
⚠️ Note: Gridlines will reappear if you print your sheet with this method; to prevent this, consider adjusting page setup options.
Page Layout View

Alternatively, you can:
- Select the “Page Layout” tab from the ribbon.
- Click the small arrow in the bottom right of the “Sheet Options” group.
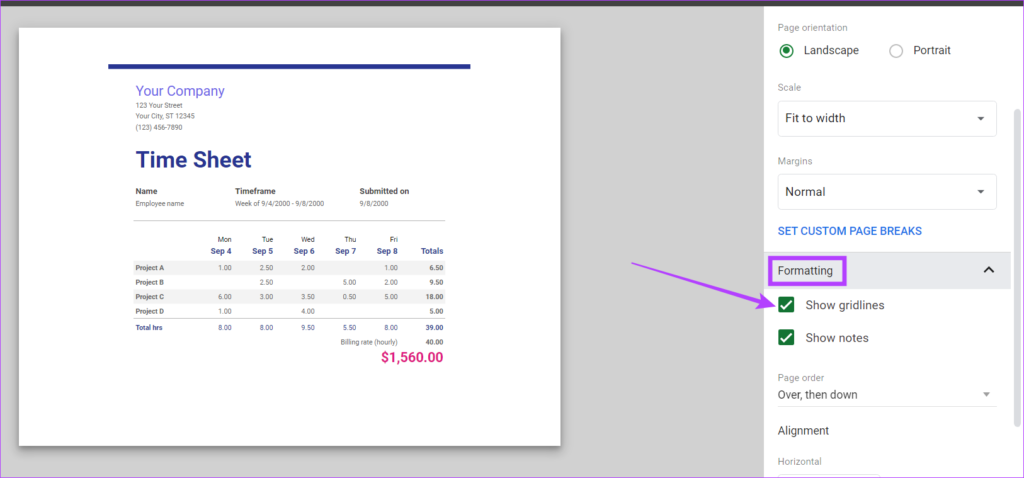
- In the dialog that appears, uncheck the “Gridlines” option under “Print” to prevent printing with gridlines.
This approach ensures that when you print your document, the gridlines will not appear, providing consistency between the screen view and the printed output.
Using VBA for Gridline Control

For advanced users or those needing to automate the process:
- Open the VBA Editor by pressing Alt + F11 or selecting “Visual Basic” from the “Developer” tab.
- In the VBA editor, insert a new module from “Insert” > “Module”.
- Enter the following VBA code:
| Action | VBA Code |
|---|---|
| Hide Gridlines | ActiveSheet.DisplayGridlines = False |
| Show Gridlines | ActiveSheet.DisplayGridlines = True |

Running this code will toggle gridlines on or off. Remember to save your Excel file as a macro-enabled workbook (XLSM) to preserve these macros.
💡 Note: If you’re not familiar with VBA, enabling and using macros requires careful attention to security settings.
Additional Tips for Managing Gridlines

- Use Borders: Instead of gridlines, consider adding borders to specific cells to organize data.
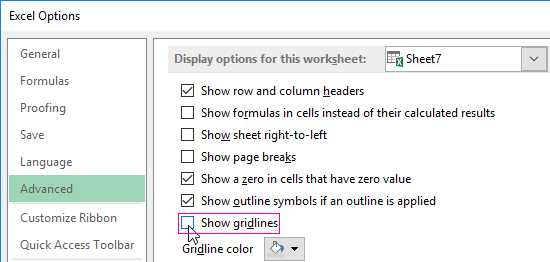
- Custom Color: Change gridline color to a lighter shade to reduce visual clutter without removing them entirely.
- Per-Sheet Settings: Remember, gridline visibility can be adjusted for each worksheet individually.
To conclude, removing gridlines from your Excel worksheets can significantly improve the clarity and professionalism of your data presentation. Whether you opt for a quick change via the ribbon, adjust page layout settings, or dive into VBA, the control is entirely in your hands. Now, go ahead and customize your Excel sheets to reflect your data's best side.
Will removing gridlines affect how my Excel document prints?

+
Not directly if you’ve used the Page Layout view to turn off gridlines for printing. However, if gridlines are on when you print, they will appear.
Can I remove gridlines for specific sheets only?

+
Yes, gridline visibility can be adjusted per worksheet. Each sheet can have its own gridline settings.
Is it possible to restore gridlines easily if I need them back?

+
Absolutely, you can restore gridlines by checking the “Gridlines” box in the View tab or using VBA to set ActiveSheet.DisplayGridlines = True.


