Print Excel Sheets on A4 Paper Easily

Understanding Your Printer Settings

Before diving into the specifics of printing your Excel sheets, it’s crucial to understand the basic settings on your printer. When you print from Excel, the application sends data to your printer, which then uses its settings to interpret how the print job should be executed. Here are some key aspects you need to familiarize yourself with:
- Paper Size and Orientation: Ensure your printer is set to use A4 size paper. The orientation (portrait or landscape) affects how your data is laid out on the page.
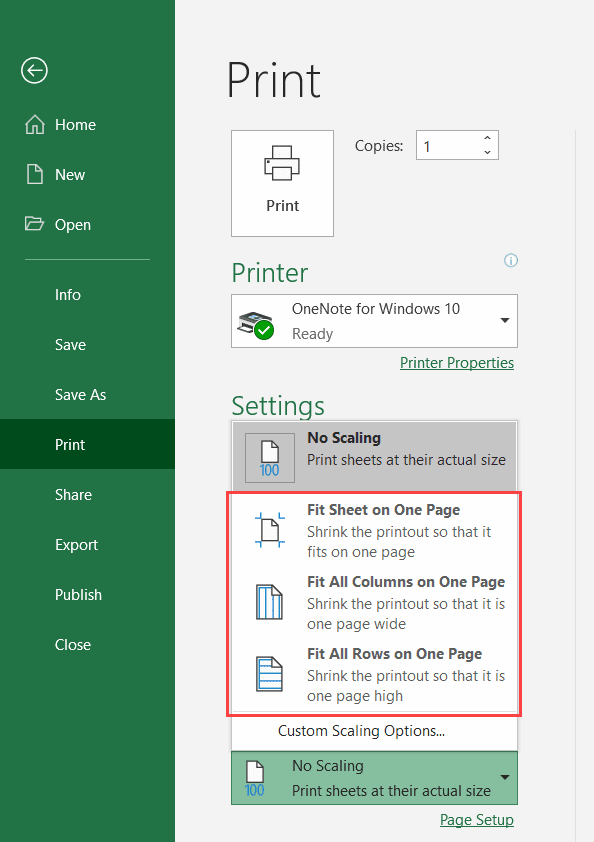
- Scaling Options: This setting adjusts how your Excel data fits onto the paper. Options like “Fit Sheet on One Page” can be invaluable when you have extensive spreadsheets.
- Margins: Adjusting margins can help you control how much space is used on the paper, ensuring no data is cut off at the edges.
Configuring Excel for Printing

To print your Excel sheets effectively on A4 paper, you’ll need to make specific adjustments within Excel:
Setting the Print Area

Often, you might not need to print the entire worksheet, but only a selected area:
- Select the area you wish to print.
- Go to Page Layout tab > Print Area > Set Print Area.
Page Layout Settings

Adjust these settings under the Page Layout tab:
- Size: Set to A4.
- Orientation: Choose between Portrait or Landscape based on your data layout.
- Scaling: Use options like ‘Fit Sheet on One Page’ or adjust the scale percentage manually.
Adjusting Margins

Navigate to Page Setup from the Page Layout tab:
- Set custom margins or choose preset options like ‘Normal’ or ‘Wide’.
- Keep an eye on ‘Print Preview’ to see how your changes affect the layout.
Using Print Preview for Optimal Results

Print Preview in Excel is your best ally to check and adjust how your document will appear when printed:
- Access Print Preview by clicking on the File tab and then Print.
- Check for any cut-off data, misaligned grids, or scaling issues.
- Use the zoom feature to closely examine the layout. If adjustments are needed, you can jump back to Excel to refine settings.
Common Issues and Solutions

Printing from Excel isn’t always straightforward. Here are some typical problems you might encounter and how to solve them:
Headers and Footers Overlapping

Headers and footers might merge into your data, making it hard to read:
- Increase margins to give headers and footers more space.
- Alternatively, scale down your data to fit within the reduced print area.
Content Overlapping or Truncated Data

If your content spills over or gets cut off:
- Check if you’ve used a consistent print area.
- Reduce font size or adjust column widths if the content seems cramped.
Scaling Issues

If your data doesn’t fit onto a single page:
- Adjust the scaling percentage or use the ‘Fit Sheet on One Page’ option.
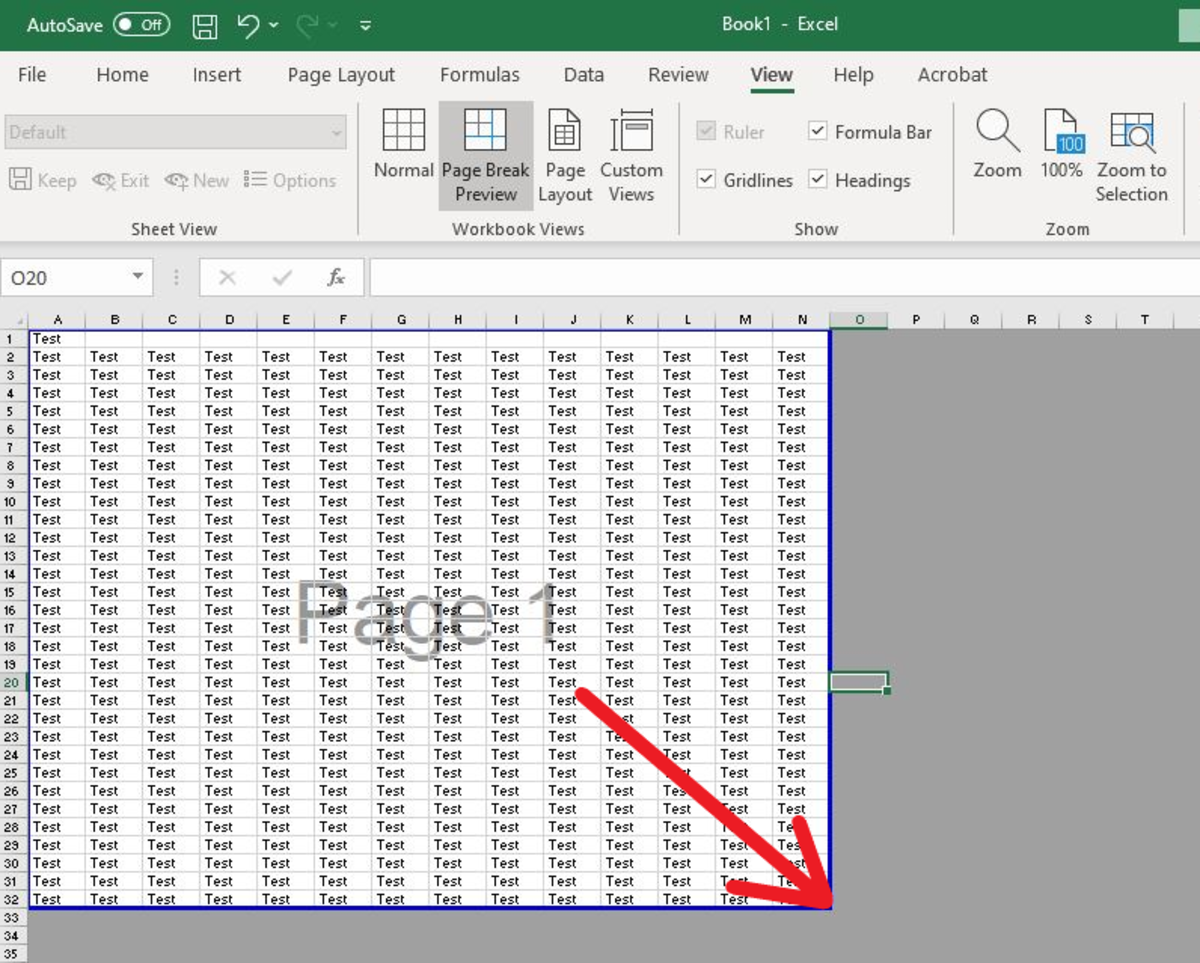
- Review page breaks to ensure logical distribution of data across multiple pages.
Complex Spreadsheets and Formulas

For spreadsheets with extensive formulas:
- Ensure all cells are calculated correctly before printing to avoid unexpected results.
- Print with formulas visible to double-check, or hide them for presentation.
Advanced Printing Features

Excel offers several advanced options for those needing more than basic printing:
Print Titles

This feature repeats rows or columns on every printed page:
- Go to Page Setup, under the Sheet tab, specify rows or columns to repeat.
Print Preview with Gridlines

Previewing your document with gridlines helps in maintaining data alignment:
- Enable gridlines by checking ‘Print’ under Gridlines in Page Layout settings.
Custom Headers and Footers

Add dynamic information to headers or footers:
- In Page Setup, customize headers and footers to include page numbers, dates, or file paths.
📝 Note: Regularly check the print preview to ensure your adjustments are accurately reflected in the final output.
By understanding and mastering these settings and techniques, you can transform the way you print Excel documents, ensuring clarity, precision, and professionalism in every printout. Whether it’s for personal use, work presentations, or sharing data with others, these tips will streamline your printing process, making it not only efficient but also effective.
Recap: Remember to set the correct paper size, adjust scaling, and use print preview to ensure your Excel sheets look just right when printed. Familiarize yourself with page layout settings, use advanced features like print titles, and solve common printing issues with confidence. Your next Excel print job will be a breeze, reflecting the high quality of your work.
Can I print multiple Excel sheets on A4 paper?
+
Yes, you can print multiple sheets by selecting them while holding the Ctrl key, then setting your print area or choosing ‘Entire Workbook’ in the print settings.
How do I ensure formulas are included in the printout?
+
Go to Page Setup, under the ‘Sheet’ tab, check ‘Show Formulas’. This will print the formulas instead of the calculated results.
Why does my Excel data look different when printed?
+
Your data might appear different due to printer settings, paper size, scaling options, or margins. Always use print preview to check the layout before printing.


