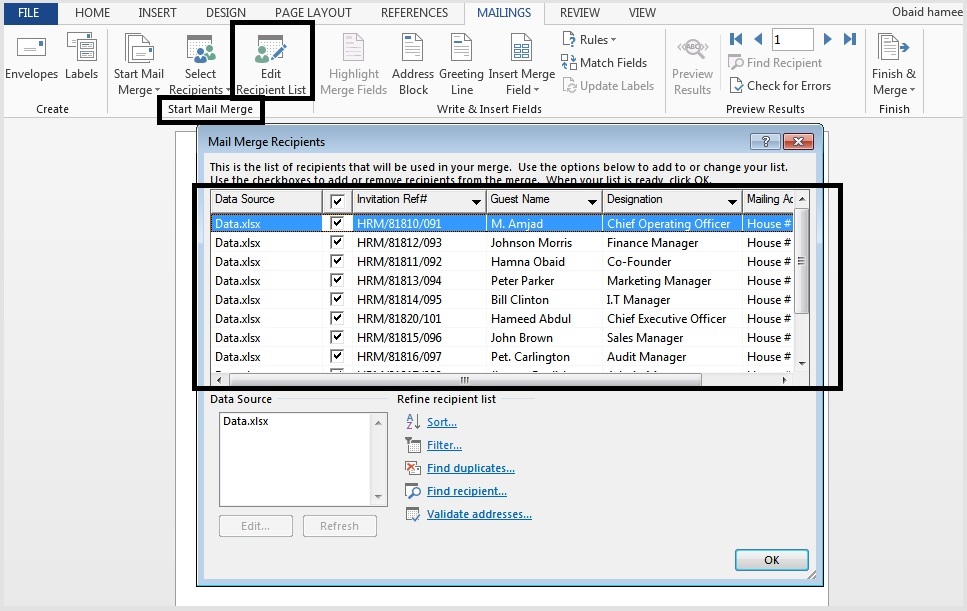
Mastering Mail Merge: Excel Preparation Guide

Mail Merge can be a powerful tool for streamlining communication and administrative tasks, offering an efficient way to personalize communications, generate documents, or manage large sets of data. However, to fully harness the potential of Mail Merge, preparing your data in Excel is crucial. Here's a comprehensive guide to ensure your Excel sheets are primed for an effective Mail Merge:
Understand Your Mail Merge Data Requirements

Before diving into the technicalities, understand what you need:
- Data Consistency: Names, addresses, or any critical data must be consistent in formatting.
- Field Structure: Each piece of information you intend to merge should have its column.
- Data Accuracy: Since automated processes like Mail Merge rely on input data, accuracy is paramount.
💡 Note: It’s a good practice to double-check your data for inconsistencies before starting the merge process.
Step-by-Step Preparation in Excel

1. Organize Your Data

Start by creating a new workbook or using an existing one where:
- Each column represents a field for merging (First Name, Last Name, Email, Address, etc.).
- Each row represents a record (one person or contact).
💡 Note: Keep your header row simple and descriptive to facilitate easy mapping during Mail Merge.
2. Format Your Data Correctly

To ensure compatibility with your document:
- Data Type: Use text for names, addresses, and emails. Numbers and dates should be formatted appropriately.
- Normalization: Ensure that names are capitalized properly, and phone numbers or ZIP codes are formatted consistently.
- Sorting and Filtering: Utilize Excel’s sorting and filtering features to correct any data issues.
3. Handling Special Cases

Excel often holds data that can be problematic in Mail Merge:
- Remove Leading/Trailing Spaces: Use the TRIM function to clean spaces.
- Handle NULL Values: Replace blank cells with appropriate text or placeholders.
- Replace Special Characters: Characters like commas in address fields might disrupt the merge, so consider replacing them.
4. Check for Duplicates

Duplicate entries can mess up your merge process:
- Use the Conditional Formatting or Data > Remove Duplicates to find and handle duplicates.
5. Use Named Ranges or Tables

Named ranges or Excel tables can simplify:
- Referencing your data during Mail Merge.
- Expanding your data set automatically if new rows are added.
6. Final Validation

Once your data is prepped:
- Use Excel’s validation tools like Data Validation to ensure each field’s data integrity.
- Review your dataset for any obvious errors or missing information.
Summary of Preparation

In preparing your Excel data for Mail Merge, you’ve:
- Organized and formatted your data for seamless integration with your document.
- Removed potential issues that could disrupt the process.
- Ensured that your data will result in accurate and personalized documents.
By taking these steps, you're setting yourself up for a smooth Mail Merge process, saving time and ensuring that the final documents are both professional and personalized. Now, your Excel sheet is not just a collection of data; it's a well-structured, meticulously cleaned dataset ready to facilitate efficient communication or administrative tasks through Mail Merge.
What are common mistakes to avoid when preparing data for Mail Merge?

+
Common errors include inconsistent data formatting, misplaced commas in addresses, and not handling duplicate records.
Can I use Excel Formulas in Mail Merge?

+
Yes, Mail Merge supports the use of Excel formulas. However, the result of the formula will be used, not the formula itself.
What should I do if my Mail Merge results are inconsistent or incorrect?

+
Check your Excel data for formatting issues, data validation, and make sure all fields are correctly referenced during the Mail Merge setup.


