Password Protect Excel Sheet: Secure Viewing Easily

Excel, a powerhouse in data management and analysis, often contains sensitive information ranging from financial figures to personal details. It's crucial to ensure that such data remains secure, especially when shared. One of the most effective methods to safeguard your work is by password protecting your Excel sheet. This guide will take you through the steps of securing your Excel document with ease.
Why Password Protect Your Excel Sheet?

Before diving into the how-to, let's discuss the importance of securing an Excel sheet:
- Data Privacy: Prevent unauthorized users from viewing or editing your sensitive data.
- Version Control: Keep the document unaltered to preserve the integrity of your work.
- Compliance: Meet regulatory requirements by ensuring that data can only be accessed by authorized personnel.
Steps to Password Protect Your Excel Sheet

Step 1: Opening the Excel Workbook

Open the workbook you wish to protect. If you haven’t created one yet, start by making a new workbook and entering your data.
Step 2: Saving with a Password

Go to:
- File
- Save As
- Choose a location for your file
- Click on ‘Tools’ at the bottom of the Save As window
- Select ‘General Options’
Here you will find two boxes:
- Password to Open: Use this to set a password for opening the workbook.
- Password to Modify: Set this to allow users to open the workbook but not to make changes.
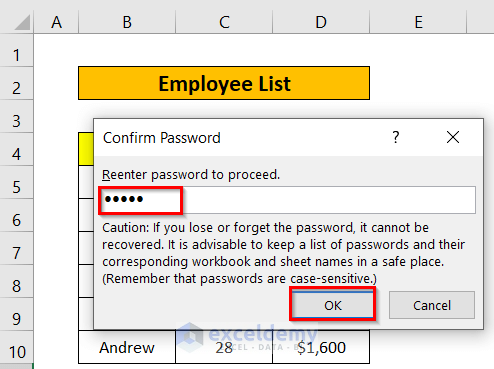
Enter your desired password in one or both boxes, then confirm and save. The file will now require the password(s) to be accessed or modified.
Step 3: Protecting Specific Sheets

If you only want to protect certain sheets within your workbook:
- Select the sheet you wish to protect by clicking its tab
- Go to ‘Review’
- Click ‘Protect Sheet’
- Set a password and decide on what users can or can’t do
🔍 Note: Remember that password protection isn't foolproof. A dedicated hacker with sufficient tools can potentially access your data. Always use strong, unique passwords and consider additional layers of security if dealing with highly sensitive information.
Step 4: Protecting the Entire Workbook

To secure the structure of your workbook, preventing users from:
- Adding or deleting sheets
- Changing sheet order
Follow these steps:
- Go to ‘Review’
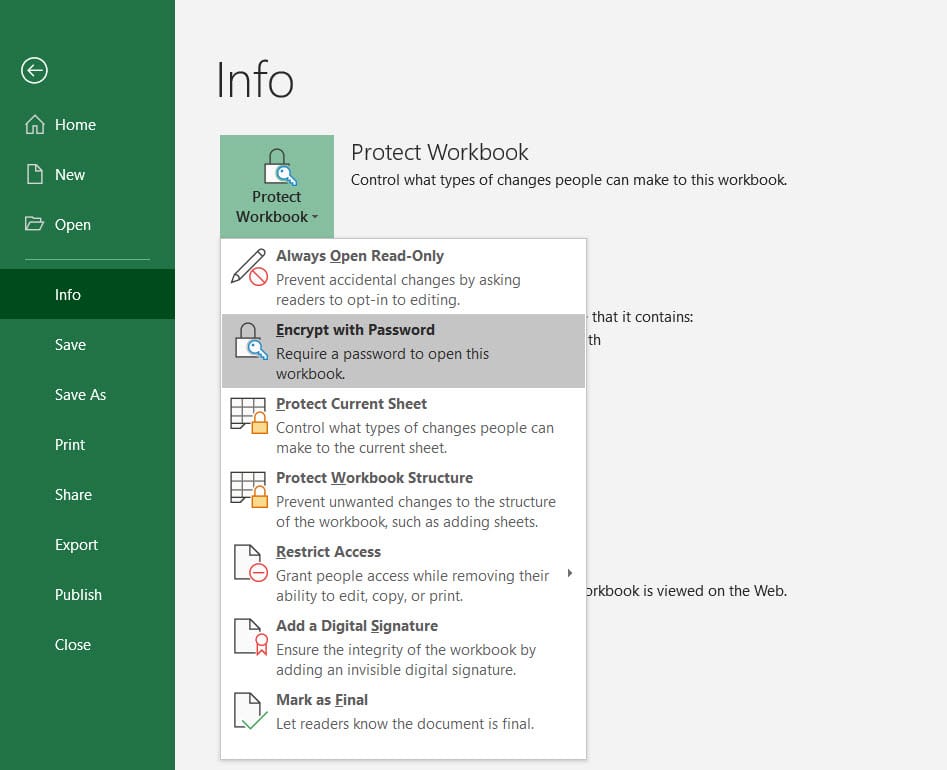
- Choose ‘Protect Workbook’
- Enable ‘Structure’ protection
- Set a password if desired
How to Unlock a Password-Protected Excel Sheet

If you’ve forgotten or need to remove a password:
- Open the workbook as usual
- If it’s sheet-specific protection, go to ‘Review’ > ‘Unprotect Sheet’ or ‘Unprotect Workbook’ if it’s the workbook structure
- Enter the password you previously set
FAQs About Password Protecting Excel Sheets

Can I password protect only certain sheets in my workbook?

+
Yes, Excel allows you to protect individual sheets within a workbook. Go to ‘Review’ > ‘Protect Sheet’ and set a password for each sheet you wish to protect.
What happens if I forget the password to an Excel sheet?

+
Excel does not provide a built-in way to recover forgotten passwords. You would need to reset or remove the password by accessing the file through third-party software or by starting anew with a backup. It’s advisable to keep passwords in a secure password manager.
Is there a limit to how many Excel sheets I can password protect?

+
Technically, there’s no limit to how many sheets you can protect, but managing multiple protected sheets can become cumbersome. It’s better to assess the necessity of protection for each sheet and organize your workbook accordingly.
Can I still see the data if the sheet is protected?

+
If the sheet is password-protected for viewing, you’ll need to enter the password to see the data. However, if only modifications are restricted, you can view the data without a password but won’t be able to alter it.
Will password protection affect the performance of Excel?

+
Password protection itself doesn’t significantly impact Excel’s performance. However, locking and unlocking files can add a minor delay during save or open operations.
Securing your Excel sheets is not just about keeping prying eyes at bay; it’s about maintaining control over who can view or manipulate your data. The steps provided above guide you through the essential process of password protecting your Excel sheet, whether it’s for a single sheet or the entire workbook. Remember that while passwords add a layer of security, they are not impervious to sophisticated breaches. Always use strong, complex passwords, and consider additional security measures like encryption for truly sensitive data.
By following this guide, you’re now well-equipped to handle your Excel files securely. Protect your spreadsheets, keep your data safe, and ensure that only those with permission can access or modify your hard work.


