Create an Excel Inventory Sheet: Easy Guide

Introduction to Excel Inventory Sheets

Keeping track of inventory can be a daunting task, especially as your business scales. Whether you're managing a small boutique, a large warehouse, or an online store, having an effective inventory system in place is crucial for operational efficiency, cost management, and customer satisfaction. Microsoft Excel, with its robust features, offers a practical solution for creating an inventory sheet. This guide will walk you through the steps to set up and optimize your inventory management in Excel, making it easier to track stock levels, manage orders, and analyze sales data.
Benefits of Using Excel for Inventory Management

Before diving into how to create an inventory sheet, let's quickly outline the advantages of using Excel:
- Flexibility: Excel allows for customization tailored to your business's unique needs.
- Accessibility: It's widely used, ensuring almost anyone can handle the basics of Excel inventory management.
- Cost-Effectiveness: Compared to specialized software, Excel is often included in Microsoft Office, making it an affordable option.
- Advanced Data Analysis: Excel offers functions for deep data analysis, from basic formulas to complex pivot tables and charts.
Step-by-Step Guide to Creating an Excel Inventory Sheet

1. Open Excel and Set Up Your Workbook
Open Microsoft Excel and create a new workbook. You can start with a blank workbook or use a template if available.
2. Define Your Columns

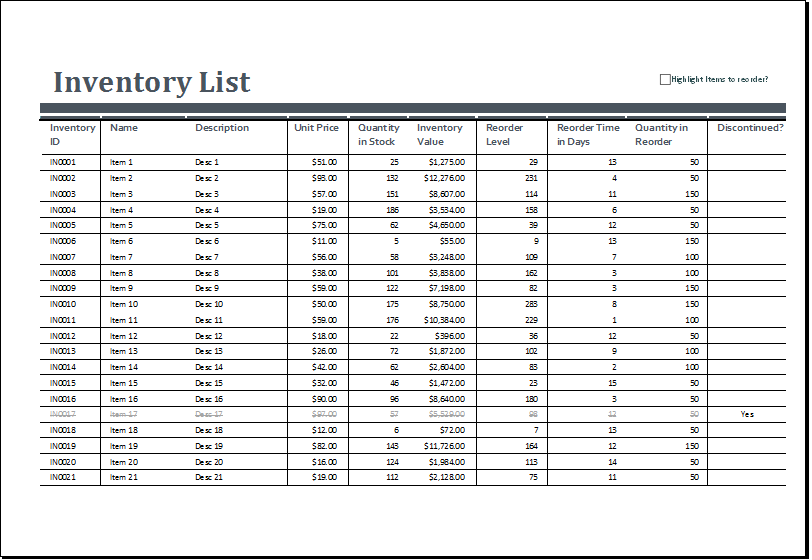
Your Excel inventory sheet should contain several key pieces of information:
- Product ID: Unique identifier for each product.
- Product Name: The name of the item.
- Description: A brief description or notes about the product.
- Category: To classify items by type, such as electronics or clothing.
- Quantity on Hand: Current stock levels.
- Minimum Stock Level: The point at which you need to reorder.
- Cost Price: How much it costs you to buy or produce the item.
- Retail Price: The selling price to your customers.
- Supplier: Who supplies the product.
- Location: Where the product is stored in your inventory.
3. Formatting Your Inventory Sheet

Select all the cells in your sheet and apply some basic formatting:
- Use bold text for column headings to distinguish them.
- Freeze the top row to keep headings visible as you scroll.
- Consider using filters to sort and view data easily.
- Apply cell borders for clarity, and use alternating row colors for readability.
4. Inputting Data

Start entering data into your sheet. Use the columns defined in step 2, and make sure to:
- Ensure Product IDs are unique.
- Use drop-down lists for Category and Supplier to standardize entries and reduce errors.
- Enter quantities accurately, and consider setting up a system for automatic updates or alerts when inventory falls below the minimum stock level.
5. Calculations and Formulas

Excel can do much more than just store data:
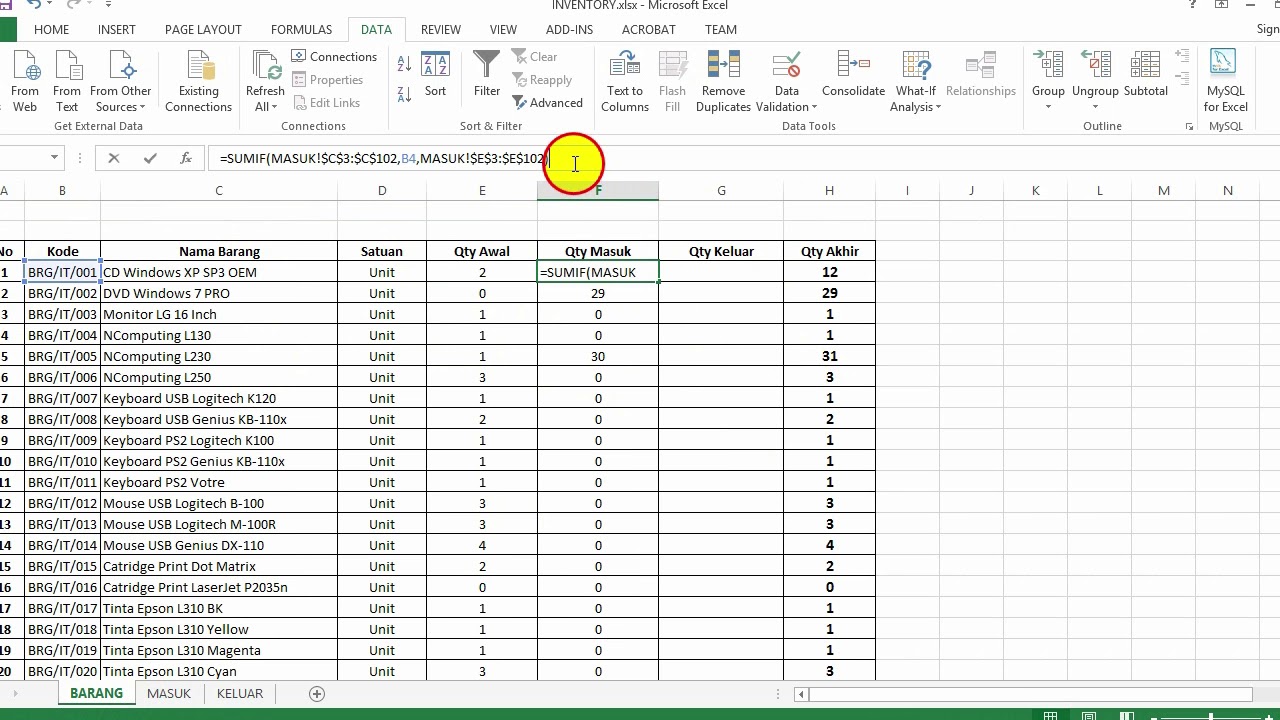
- Use formulas like
=A2*B2to calculate total stock value or profit margins. - Apply conditional formatting to highlight when inventory needs attention, like when stock levels are low.
- Create pivot tables or charts for visual analysis of inventory trends, sales, and profitability.
6. Setting Up Alerts

Set up alerts to know when inventory is low:
- Create a conditional formatting rule that changes the color of the cell when the quantity on hand is below the minimum stock level.
- Use Excel’s data validation to send a warning or make a decision on reordering.
7. Backup and Version Control

Regularly backup your Excel files to prevent data loss:
- Use the ‘Save As’ feature to create backup versions.
- Consider setting up automatic backups or using cloud storage solutions for automatic syncing.
- Use version control to track changes over time.
💡 Note: Remember to save your work frequently and consider using cloud services for both accessibility and backup purposes.
Wrapping Up

To sum it up, creating an inventory sheet in Excel might initially seem complex, but it provides a flexible, powerful tool for managing your stock effectively. By following these steps, you can customize your sheet to fit your business’s needs, ensuring inventory accuracy, timely reordering, and enhanced analysis. Remember, the key to a successful inventory system is not just in the creation but also in its maintenance and continuous improvement based on your evolving business requirements.
How often should I update my Excel inventory sheet?

+
It’s best to update your inventory sheet daily or after each transaction to maintain accuracy. However, depending on your business size, you might choose to update weekly or at least before any major reordering.
Can Excel be integrated with other systems for real-time inventory updates?

+
Yes, Excel can be integrated with other systems through various methods like VBA scripting, APIs, or third-party add-ins, allowing for real-time updates and more automated inventory management.
What should I do if I make a mistake in my inventory sheet?

+
If you make a mistake, you can undo your last action using Ctrl + Z or restore from a backup if it’s significant. Always ensure your data is backed up to prevent major issues from data entry errors.


