5 Ways to Create a Flowchart in Excel Easily

Using Excel’s Shapes and Lines


If you’re looking for an intuitive way to start designing a flowchart in Excel, the built-in Shapes and Lines tools can be your best friend. Here’s how you can use them:
- Start with a Blank Workbook: Open Excel and create a new workbook or use an existing one with enough space for your flowchart.
- Access Shapes: Navigate to the ‘Insert’ tab on the Ribbon, click on ‘Shapes’, and you’ll find a variety of shapes like rectangles, ovals, arrows, and more which can represent different elements of your flowchart.
- Draw Flowchart Elements: Select the shape, click on the worksheet, and drag to create the size you need. For uniformity, consider using the ‘Format Painter’ tool to apply the same style to all shapes.
- Connect Shapes: Use the connector lines or freeform lines from the ‘Shapes’ dropdown to connect your shapes, ensuring that the flow of your process is clear and logical.
- Label Your Flowchart: Add text boxes or directly edit the shape text to label each element of your flowchart, making sure every step or decision is clearly identified.
- Align and Distribute: Excel allows you to align and distribute shapes evenly, which helps in maintaining a neat and professional flowchart layout.
💡 Note: To keep your flowchart organized, group related shapes or use layers for a more complex chart.
SmartArt Graphics for Flowcharts


SmartArt Graphics provide predefined layouts that make it easy to create flowcharts in Excel:
- Insert SmartArt: Go to the ‘Insert’ tab and click on ‘SmartArt’. Scroll to find options under ‘Process’ or ‘Hierarchy’ that suit your flowchart design needs.
- Choose a Layout: There are layouts like ‘Basic Process’, ‘Cycle’, or ‘Hierarchy’ which can be adapted for flowchart creation. Select one that closely matches your intended chart structure.
- Customize: Once you insert a SmartArt graphic, you can customize each shape with your text or change the color and style to match your branding or preferences.
- Add Steps: Add or remove shapes to match the number of steps or decisions in your process. Use the provided tools to manage the flowchart’s structure.
💡 Note: SmartArt can sometimes be less flexible than free-form shapes, but it’s a quick start for basic flowcharts.
Use Add-ins for Enhanced Functionality


To go beyond Excel’s built-in capabilities, consider using add-ins for a richer flowchart experience:
- Microsoft Visio: If available, integrate Microsoft Visio, which is specifically designed for diagramming and offers detailed flowchart options directly from Excel.
- Lucidchart Add-In: Lucidchart provides a free add-in for Excel, allowing you to create flowcharts with more flexibility in terms of design and collaboration.
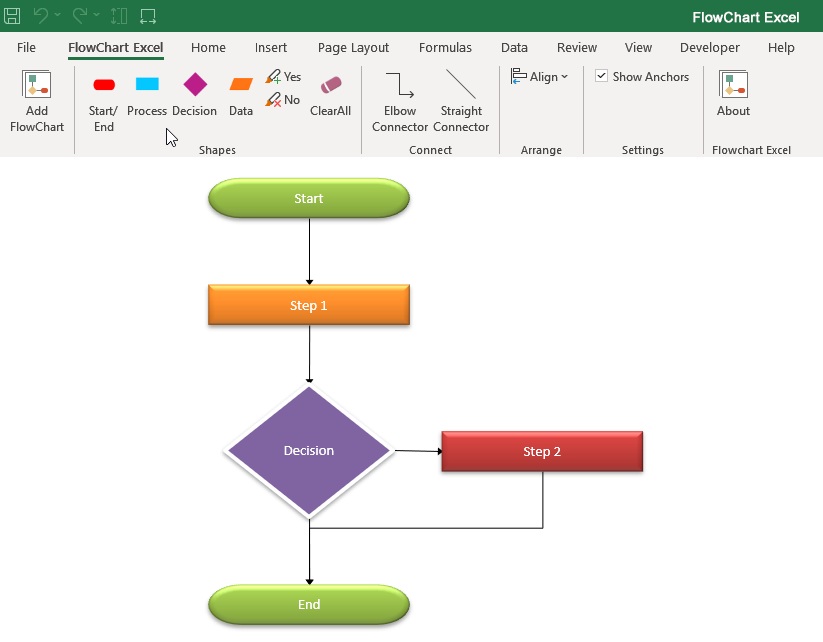
- FlowBreeze: This add-in lets you draw flowcharts in Excel with additional features like automatic formatting and exporting to other diagram formats.
- Other Add-Ins: Explore third-party add-ins on the Office Store for specific functionalities that suit your workflow requirements.
💡 Note: Add-ins can significantly improve your flowchart capabilities, but they might require a subscription or one-time payment.
Leveraging Excel’s Drawing Tools


Excel’s drawing tools offer additional control over flowchart creation:
- Draw Tab: The ‘Draw’ tab on the Ribbon provides tools to freely draw shapes and lines, which can be useful for bespoke flowcharts where standard shapes don’t fit.
- Ink to Shape: Convert your freehand drawings into standard shapes, making your flowchart look professional and neat.
- Grouping: Group related elements to move or edit them as a single unit, enhancing organization.
- Edit Points: Use the ‘Edit Points’ feature to modify shapes to better fit your flowchart’s design requirements.
💡 Note: While powerful, drawing tools might require a bit more finesse to create a polished look.
Using Templates and Online Tools


If you prefer a quicker or more collaborative approach, templates and online tools can be advantageous:
- Excel Templates: Search for pre-made flowchart templates in Excel or online marketplaces, which can be customized to your needs.
- Online Tools: Websites like Canva, Miro, or draw.io offer flowchart creation tools that can export to Excel or provide templates for direct use.
- Collaboration: Many online tools allow real-time collaboration, which can be beneficial for team projects.
- Integration: Some tools integrate with Excel, allowing for seamless data transfer between your flowchart and your data analysis work.
💡 Note: While convenient, online tools might require exporting or importing to achieve the best compatibility with Excel.
In summary, creating a flowchart in Excel can be achieved through multiple methods, each with its own strengths. Whether you choose the simplicity of shapes, the convenience of SmartArt, the power of add-ins, the control of drawing tools, or the collaborative nature of online resources, Excel provides versatile options for flowchart creation. With these techniques in mind, you're now equipped to design informative and visually engaging flowcharts to map out your processes, decision trees, or workflows effectively.
Can I use Excel for complex flowcharts?

+
Excel is great for basic and intermediate flowcharts. For very complex flowcharts, specialized tools like Visio or dedicated online platforms might offer more advanced features.
How do I collaborate on flowcharts in Excel?

+
You can share your Excel file on OneDrive or through Excel Online for real-time collaboration. Online tools can also provide better collaboration features specifically for flowcharts.
Are add-ins free to use?

+
Some add-ins have free versions with limited features, while premium functionalities might require a subscription or a one-time payment.


