5 Steps to Creating a Balance Sheet in Excel

Welcome to your guide on how to create a balance sheet in Microsoft Excel, a fundamental tool for financial analysis in businesses of all sizes. Whether you're tracking personal finances or managing a corporation's books, Excel offers the functionality to construct detailed and accurate balance sheets with ease. This comprehensive tutorial will walk you through the steps, providing you with the knowledge to improve your financial management skills.
Step 1: Understand the Components of a Balance Sheet

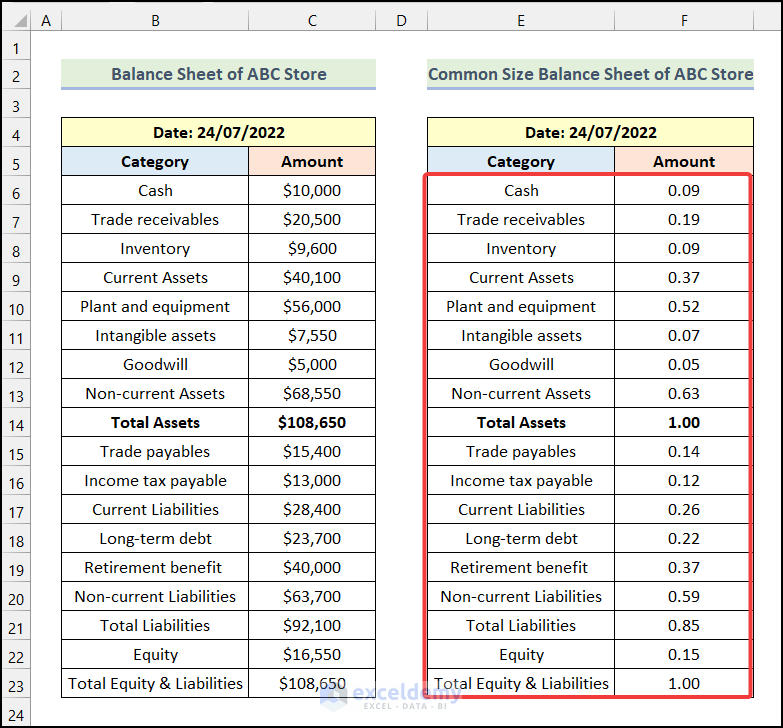
Before diving into Excel, it’s crucial to understand what elements constitute a balance sheet:
- Assets: Anything of value owned by the company. These can be split into:
- Current Assets: Cash, accounts receivable, inventory, etc.
- Long-Term Assets: Property, plant, equipment, intangible assets, etc.
- Liabilities: What the company owes:
- Current Liabilities: Accounts payable, short-term loans, etc.
- Long-Term Liabilities: Bonds, long-term debts, etc.
- Equity: The residual interest in the assets of the company after deducting liabilities (often called owner’s or stockholder’s equity).
Step 2: Open a New Excel Workbook

Start by opening Microsoft Excel and creating a new workbook. Here’s how you can set up your sheet:
- Rename ‘Sheet1’ to ‘Balance Sheet’ for clarity.
- Set up your worksheet to look clean and professional:
- Adjust column widths for better readability.
- Apply a header for the date or period.
- Use borders to separate sections visually.
- Use Excel’s formatting tools:
- Apply bold text for headings.
- Use color coding for different sections.
- Employ number formatting to align financial figures.
- Create subtotals for each category and a total for each section (Assets, Liabilities, Equity).
- Sum up the Assets section:
Step 3: Input Your Data

Now, input the financial data into your balance sheet:
| Section | Examples |
|---|---|
| Assets | Current Assets: Cash, Accounts Receivable |
| Long-Term Assets: Land, Machinery | |
| Liabilities | Current Liabilities: Accounts Payable, Short-Term Loans |
| Long-Term Liabilities: Bonds, Long-Term Debts | |
| Equity | Owner’s Equity, Retained Earnings, etc. |

Step 4: Organize and Format Your Data

To make your balance sheet more readable and functional:
Step 5: Verify Accuracy and Balance

The fundamental principle of a balance sheet is that total Assets must equal total Liabilities plus Equity:
=SUM([Range of Assets])
=SUM([Range of Liabilities])
=SUM([Range of Equity])
=Assets=Liabilities+Equity
Excel functions like SUM() can help automate these calculations, ensuring your balance sheet is accurate.
📌 Note: Always double-check your figures as even minor discrepancies can lead to significant errors.
By following these steps, you’ll have created a robust balance sheet in Excel, a critical tool for anyone involved in financial analysis or business management. Now, you’re equipped with a tool that can help you understand your financial position at a glance, enabling better decision-making for your business or personal finances.
As you continue to work with Excel for financial reporting, remember that your balance sheet is not just a document but a dynamic tool. Regular updates will provide you with ongoing insights into your financial health, allowing you to track changes over time and make informed decisions about investments, debts, and financial strategies.
How often should I update my balance sheet?

+
Your balance sheet should be updated at least monthly for business purposes, or whenever significant financial changes occur.
What do I do if my balance sheet does not balance?

+
Check for errors in data entry or misclassification of assets, liabilities, or equity. Also, ensure all calculations are correct.
Can I automate my balance sheet in Excel?

+
Yes, using Excel’s built-in functions like SUM() can automate calculations, and you can use data validation, named ranges, and macros to streamline updates and verifications.


