Lock Excel Sheet: Simple Steps to Secure Your Data

Securing sensitive data within an Excel sheet is crucial for businesses, researchers, or anyone handling important information. Microsoft Excel offers a variety of tools to protect your spreadsheets from unauthorized access or unintended modifications. Whether you're looking to lock an entire workbook, specific worksheets, or even just certain cells, Excel provides options to keep your data safe. In this article, we'll explore the steps to lock an Excel sheet, ensuring that your data remains secure and unaltered.
Why Lock an Excel Sheet?

Before diving into the how-to’s, let’s consider the reasons for securing an Excel sheet:
- Data Integrity: Prevent accidental or deliberate changes to your data.
- Privacy: Keep sensitive information hidden from prying eyes.
- Audit Trail: Maintain a record of who made changes by tracking modifications.
Protecting an Entire Workbook

To secure your entire Excel workbook, follow these steps:
- Open your workbook in Excel.
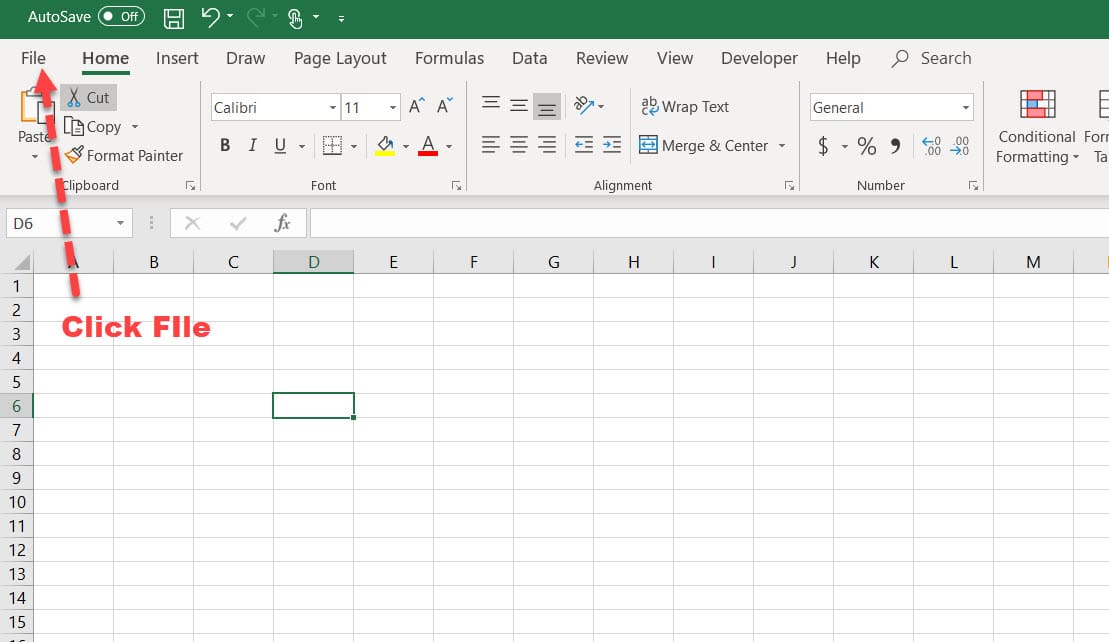
- Select File > Info.
- Click on Protect Workbook, and then choose Encrypt with Password.
- Enter a strong password in the dialog box. Remember this password; if you forget it, you’ll lose access to your workbook!
- Confirm the password by re-entering it, then click OK.
Protecting a Single Worksheet

Sometimes, you might not need to lock the entire workbook but just a particular worksheet:
- Right-click the sheet tab you want to protect and select Protect Sheet.
- In the Protect Sheet dialog, choose what users can do when the sheet is locked. Options include allowing users to select cells, format cells, insert rows, etc.
- Set a password if required, then click OK.
Locking Specific Cells

If you need to lock only certain cells within a worksheet, here’s how:
- Select the cells you wish to lock.
- Right-click, then choose Format Cells > Protection.
- Check the box labeled Locked. By default, all cells are locked, so you must unlock the cells you don’t want to lock.
- Once you’ve set the lock status for the cells, protect the sheet as described above. Remember, only when the sheet is protected do the locked cells actually restrict editing.
Using Password Protection

Password protection is a powerful tool for added security:
- Password-encrypt the entire workbook or worksheet.
- Use different passwords for different sheets if necessary.
- Remember that Excel’s password protection is not bulletproof; experienced users might find ways to bypass it.
🔒 Note: While Excel’s password protection is useful, it is not foolproof. For high-security needs, consider more robust encryption methods or separate data storage solutions.
Collaborative Editing with Permissions

In scenarios where multiple people need to edit a workbook, you can set permissions:
- Allow editing by specific users: Share the workbook and set permissions for who can edit what.
- Track changes: Use the Review > Track Changes feature to log who made what changes.
These measures help maintain both security and accountability, ensuring your data remains protected while still facilitating teamwork.
Additional Tips for Securing Your Excel Sheet

- Regular Backups: Always back up your Excel files to avoid data loss from corruption or unauthorized access.
- Minimize Exposure: Only share the parts of your workbook that are necessary.
- Use Cloud Services: Online storage solutions like OneDrive or Google Drive can provide additional layers of security and access control.
- Regularly Update: Keep Excel updated to benefit from the latest security features and patches.
In the final part of this guide, we’ll summarize the key steps to secure your Excel sheets and ensure your data remains confidential and intact.
🔍 Note: Remember to check with your IT department or security policies for guidelines on securing sensitive data in Excel, as enterprise settings might have specific protocols.
By understanding these security features and implementing them, you not only protect your data but also maintain control over who can access or modify it. Excel’s protection features are robust enough for most needs, yet they’re also flexible for collaborative environments.
Here’s a quick recap of what we’ve learned:
- Workbook Encryption: Protecting the entire workbook with a password.
- Worksheet Protection: Securing individual sheets to limit editing capabilities.
- Cell Locking: Restricting changes to specific cells within a sheet.
- Collaborative Features: Setting permissions for shared editing and tracking changes.
- General Tips: Regular backups, minimal exposure, cloud services, and software updates.
Implementing these security measures will help safeguard your information, allowing you to share data confidently when necessary or keep it entirely confidential. Excel’s versatility in providing data protection means that, with the right configurations, you can effectively control access to your valuable information.
Now, let’s address some common questions users often have about locking Excel sheets:
What is the difference between worksheet protection and workbook protection in Excel?

+
Worksheet protection limits what can be changed within a single sheet, while workbook protection secures the entire workbook from unauthorized structural changes, like adding or deleting sheets.
Can I lock formulas in Excel?

+
Yes, you can lock cells containing formulas by selecting those cells, setting the Locked option to True, and then protecting the worksheet. This prevents users from modifying or deleting formulas when the sheet is protected.
How secure is Excel’s password protection?

+
Excel’s password protection provides a layer of security for casual users but isn’t considered highly secure against professional hacking attempts. For critical data, consider more robust security measures.


