5 Ways to Insert Filters in Excel Sheets

Microsoft Excel, as a powerhouse for data analysis, provides numerous tools to manage and analyze data effectively. One of the most essential features for sorting and viewing data in Excel is the ability to insert filters. Filters help you to refine datasets quickly, allowing you to focus on specific data points or segments. Here are five different methods to insert filters in Excel sheets:
1. Basic Filter


The simplest way to filter data in Excel is by using the Basic Filter:
- Select your dataset by clicking and dragging to highlight the cells, including the header row.
- Go to the Data tab.
- Click on Filter under the Sort & Filter group.
- Dropdown arrows will appear on each column header. Click these arrows to filter your data by various criteria like text, number, or date.
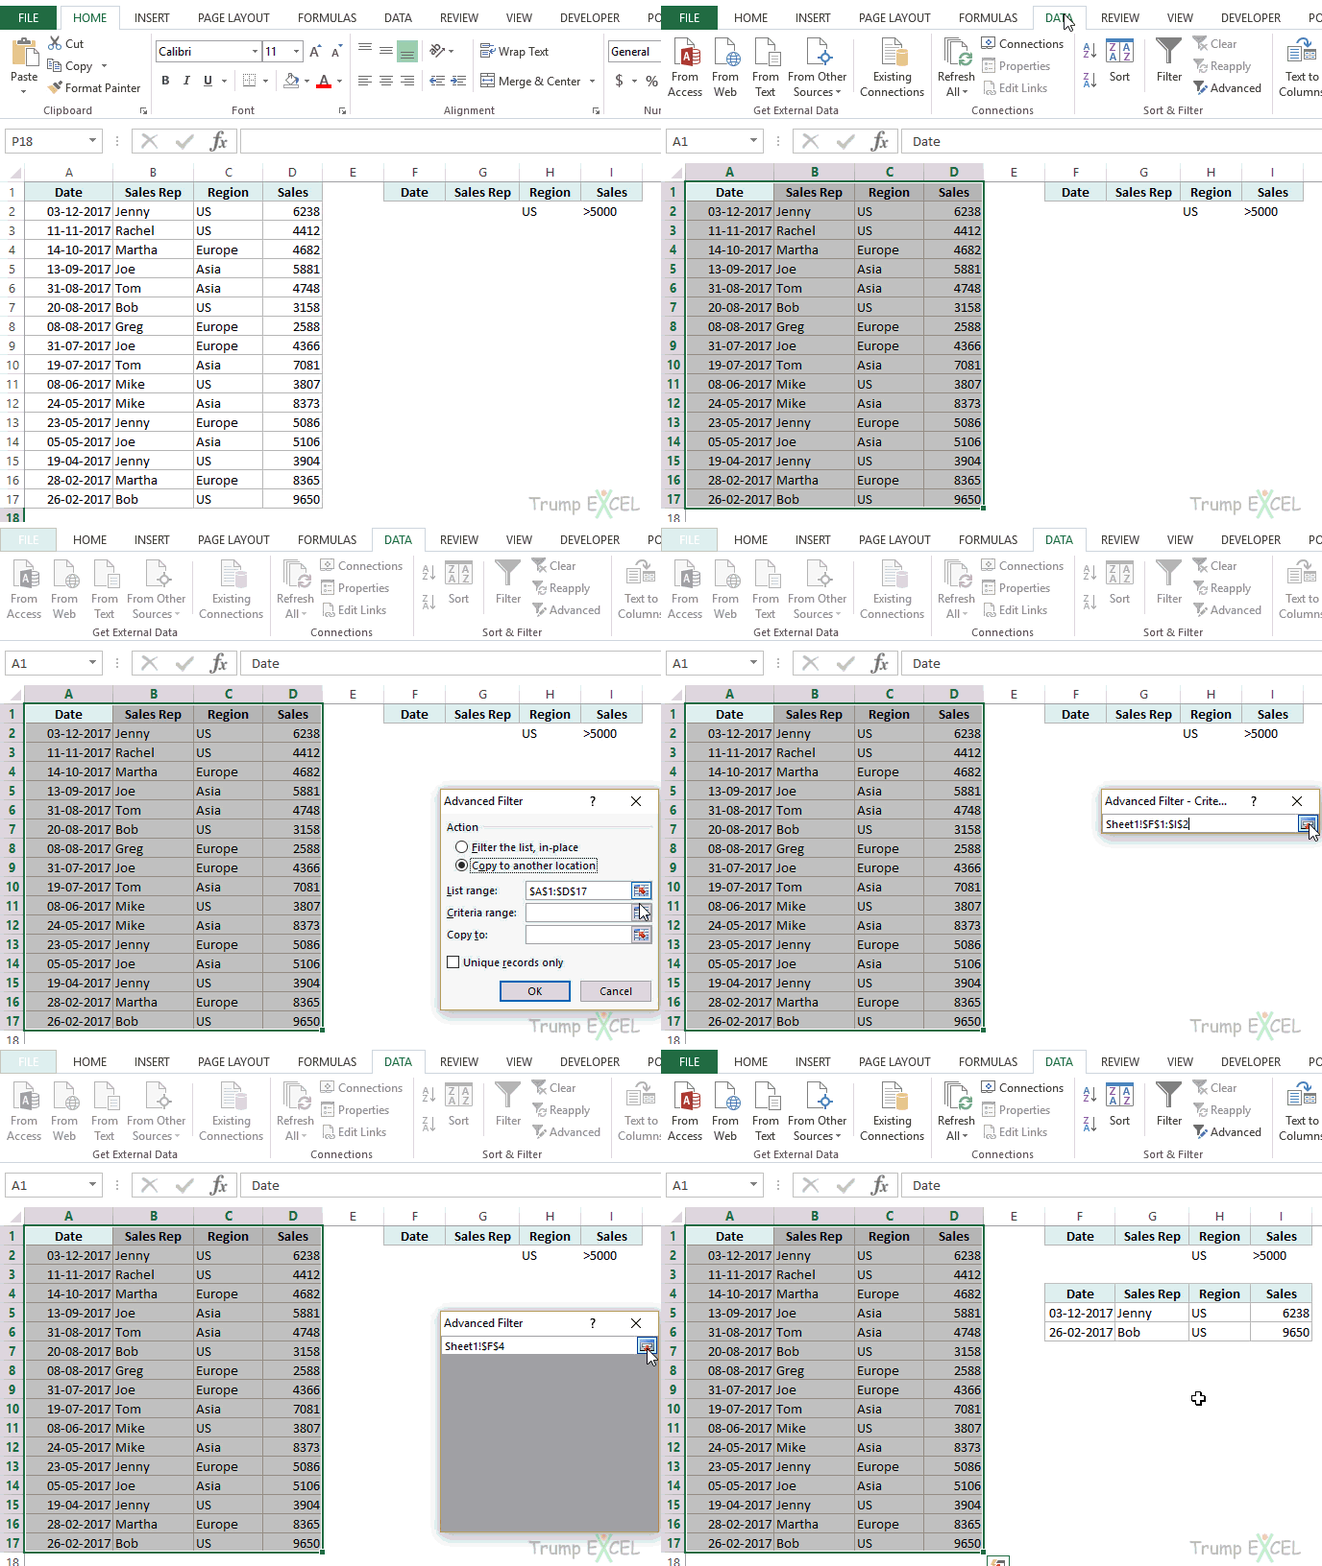
2. Advanced Filter

When you need to filter data based on complex criteria, the Advanced Filter comes in handy:
- Click on any cell within your dataset.
- Navigate to the Data tab, then select Advanced in the Sort & Filter group.
- Choose between Filter the list, in-place or Copy to another location for the action.
- Set your criteria in a separate range, defining complex conditions like "AND" and "OR" operations.
- Confirm your settings and Excel will apply the filter based on your defined criteria.
3. AutoFilter

AutoFilter allows for a quick filter application:
- Select the range of cells or entire column for filtering.
- In the Data tab, click Filter in the Sort & Filter group.
- Use the dropdowns to choose from pre-defined options like sorting, text filters, or date filters.
4. Table Filters

If your data is organized in an Excel Table:
- Convert your range of data into a table by selecting it, going to the Home tab, and clicking Format as Table.
- Excel automatically provides filter functionality by adding dropdown arrows to table headers.
- Click any arrow to filter the table.
5. Custom Filters with VBA

For advanced users, creating custom filters using VBA can automate and tailor data manipulation:
- Open the Visual Basic for Applications editor by pressing Alt+F11.
- In the VBA Project window, double-click the worksheet where you want to apply the filter.
- Insert the following code to filter a specific range based on a condition:
Sub ApplyCustomFilter()
    With Worksheets("Sheet1").Range("A1:D100")
        .AutoFilter Field:=2, Criteria1:=">1000"
    End With
End Sub
⚠️ Note: VBA scripting requires basic programming knowledge. Always test VBA scripts in a backup of your data to prevent unintended changes or loss.
Each of these methods provides a different approach to filtering data, tailored to various levels of complexity in Excel usage. Whether you're organizing large datasets for corporate analysis or simply sorting through a list, Excel's filtering capabilities streamline the process, making it quicker and more efficient.
What is the difference between AutoFilter and Advanced Filter?

+
AutoFilter offers quick sorting and filtering with predefined options, whereas Advanced Filter allows for more complex criteria, including multiple conditions and copying the filtered data to another location.
Can I use VBA to automate filtering in Excel?

+
Yes, you can write VBA scripts to automate complex filtering tasks, allowing for custom, reusable, and efficient data manipulation.
How do I remove filters in Excel?

+
To remove filters, go to the Data tab and click on ‘Filter’ again, or you can select ‘Clear’ from the filter dropdown arrow in the header row.
What are the benefits of using filters in Excel?

+
Filters help in isolating and analyzing subsets of your data, making it easier to find, summarize, or delete specific information without altering the original dataset.
Can I apply multiple filters at once?

+
Yes, with Advanced Filter or by using custom filters, you can apply multiple conditions simultaneously to refine your data further.


