Automatically Insert Dates in Excel: Quick Guide

Learning how to automatically insert dates in Excel can significantly enhance your productivity, especially if you deal with large datasets that require frequent date updates. Whether you're tracking sales, managing inventory, or scheduling events, Excel's automation features for date entry can save you from manual input errors and time-consuming tasks. Let's dive into the various methods you can use to make your life easier with Excel's date functions.
Why Automate Date Insertion?

- Efficiency: Automating date insertion speeds up data entry, allowing you to focus on more critical tasks.
- Accuracy: Manual entry is prone to mistakes; automation reduces the risk of incorrect date formatting or typos.
- Consistency: Automated dates ensure that all data follows the same format, improving readability and data integrity.
Using Built-In Excel Functions

Excel offers several functions for date manipulation:
- TODAY(): This function inserts the current date into a cell. Simply type
=TODAY()into a cell, and the current date will be displayed automatically. - NOW(): Similar to TODAY(), but this function includes both the date and time. Type
=NOW()to see the current date and time.
These functions are dynamic, meaning they will update every time the worksheet is opened or recalculated.
⚠️ Note: Use these functions for immediate updating of dates. If you need the date to remain static, copy and paste the value of the cell as a value, not as a formula.
Creating a Dynamic Date Range

If you need to insert a range of dates, say for a week or month:
- Type
=TODAY()in the first cell. - Fill Handle: Select the cell with your date, and drag the fill handle (the small square in the bottom right corner of the cell) down or across. Excel will automatically continue the date sequence based on the initial input.
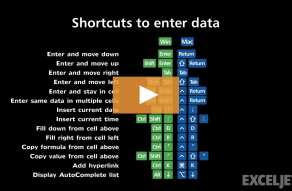
Utilizing Keyboard Shortcuts

Excel provides shortcuts for quick date insertion:
- Ctrl + ; enters the current date.
- Ctrl + Shift + ; enters the current time.
These shortcuts are useful for entering a static date or time without the need for formulas that update.
Inserting Dates with VBA

For advanced users, Visual Basic for Applications (VBA) can automate date insertion even further:
Sub InsertDate()
    Range(“A1”).Value = Date
End Sub
This simple macro will insert today's date into cell A1 when executed. You can customize this code for different date formats or to fill multiple cells.
Handling Date Formats

Excel recognizes dates in several formats, but to ensure correct date interpretation:
| Input | Excel Interpretation |
|---|---|
| 01/01/2023 | January 1, 2023 |
| Jan 1, 2023 | January 1, 2023 |
| 2023-01-01 | January 1, 2023 |

✅ Note: Excel's default date format might vary by your system's regional settings. To change the date format, right-click on the date cell, select "Format Cells," and then choose from the list of date formats.
Summing Up

Excel’s date insertion automation tools are both robust and versatile, catering to a variety of needs from basic to complex data management. By leveraging functions like TODAY(), NOW(), and VBA scripts, you can streamline your workflow, minimize errors, and ensure that your dates are consistently formatted. Remember to adjust settings for your regional date formats, and use keyboard shortcuts for quick insertions. With these techniques, Excel’s date handling capabilities will become an indispensable part of your data management toolkit.
Can I insert the current date in a specific cell format?

+
Yes, you can format the cell with the date function to display in your preferred format. Right-click the cell with the date function, select “Format Cells,” and choose from the date formats available.
Will dates entered with keyboard shortcuts automatically update like TODAY() or NOW()?

+
No, dates entered with keyboard shortcuts like Ctrl + ; are static and do not update automatically as formulas do.
How can I make the date stop updating when I close and reopen the workbook?

+
To prevent dynamic dates from updating, copy the cell containing the formula and paste it as values by using “Paste Special” and selecting “Values” only.


