5 Ways to Insert Date & Time in Excel

In Microsoft Excel, inserting date and time into your spreadsheets can significantly enhance the functionality and efficiency of your data management tasks. Whether you're scheduling, tracking deadlines, or simply wanting to have a record of when certain entries were made, knowing how to properly insert dates and times is key. This comprehensive guide will walk you through five different methods for inserting date and time into your Excel sheets, along with additional tips for customization and automation.
1. Manually Typing Dates and Times

Perhaps the most straightforward method is to manually enter dates and times into cells:
- To insert today’s date, type =TODAY() or simply the date format like 05/03/2023. For the current time, use =NOW() or type in the time like 3:45 PM.
- Excel will often auto-correct date and time entries if you follow a common format (MM/DD/YYYY or HH:MM:SS). Ensure your locale settings match the date and time format you’re entering.
💡 Note: Ensure your cell format is set to ‘Date’, ‘Time’, or ‘DateTime’ so Excel understands and displays the entry correctly.
2. Using Excel’s Built-in Functions

Excel offers several functions to facilitate the insertion of date and time:
- =TODAY() - Inserts the current date into the cell.
- =NOW() - Inserts the current date and time, which updates dynamically.
- For specific dates or times:
- =DATE(year, month, day) to insert a custom date.
- =TIME(hour, minute, second) for setting a particular time.
3. Shortcut Keys

Excel provides keyboard shortcuts to quickly insert the current date or time:
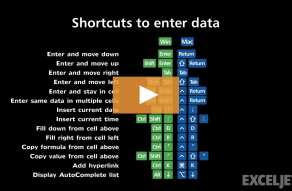
- To insert the current date, press Ctrl + ;
- To insert the current time, press Ctrl + Shift + ;
These shortcuts provide an efficient way to timestamp your spreadsheets without navigating through menus or remembering formulas.
4. Using Excel’s AutoFill Feature

AutoFill can be a powerful tool for dates and times:
- Enter a date or time in a cell, then drag the fill handle (the small square at the bottom-right of the cell) across the cells you want to fill.
- For sequential dates or times:
- After entering the first date, dragging the fill handle will automatically increment by one day.
- Hold down the Ctrl key while dragging to fill with the same date or time.
Customize the series by adjusting the default AutoFill settings:
- Right-click the fill handle and choose Fill Series for more options like days, months, or years.
🔍 Note: Be aware that AutoFill can be unpredictable if your initial entries aren’t consistently formatted.
5. Advanced Methods: VBA and Custom Functions

For advanced users, Visual Basic for Applications (VBA) or custom functions can automate date and time insertion:
- Create a VBA macro to insert dates or times with specific formatting or conditions.
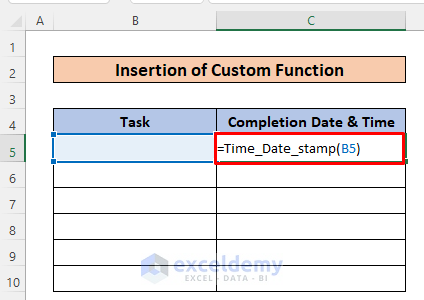
- Develop custom Excel functions for more sophisticated date and time handling.
This method requires some programming knowledge but offers unparalleled customization and automation.
In summary, Excel provides multiple avenues for inserting dates and times into your spreadsheets, catering to both simple and complex needs. Whether you choose to type manually, use functions, leverage shortcuts, take advantage of AutoFill, or delve into VBA scripting, Excel's versatility ensures there's a method that will fit your workflow perfectly. Remember to customize your cell formats and use these tools in combination for the best results in your data management tasks.
How do I change the date format in Excel?

+
Change the date format by selecting the cells, right-clicking, choosing ‘Format Cells’, and selecting from the ‘Number’ tab under the ‘Date’ category.
Can Excel automatically update dates?

+
Yes, by using the =TODAY() or =NOW() function, Excel will automatically update to the current date or date-time when the worksheet recalculates.
What’s the difference between absolute and relative time references in Excel?

+
Absolute time references are fixed, like a specific date or time. Relative references change with formula copying, like AutoFill. Use $ in formulas for absolute references.


