3 Ways to Password Protect Your Excel Sheets

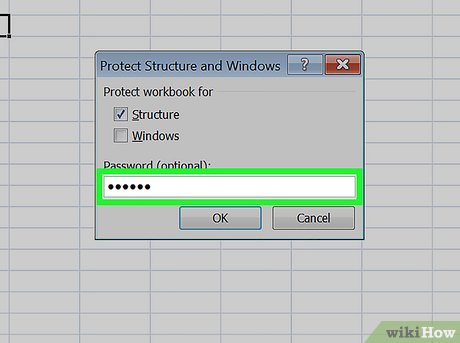
There are times when sharing data becomes a necessary part of your work. However, not all information is meant for everyone's eyes. Excel, a powerhouse of Microsoft Office, offers robust tools to safeguard your spreadsheets from unauthorized access. Here are three effective methods to password protect your Excel sheets:
Method 1: Protecting the Entire Workbook

If your goal is to keep your entire Excel workbook secure, here's how you can do it:
- Open your Excel workbook.
- Go to the File tab and select Info.
- Click on Protect Workbook and then Encrypt with Password.
- In the "Encrypt Document" box, enter your password and confirm it by re-entering it.
- Save the workbook, and your file will now be password protected.

🔒 Note: This method encrypts the workbook, making it completely inaccessible without the password. Always ensure to remember the password, or store it in a secure place, as there's no recovery option if forgotten.
Method 2: Password Protecting Individual Worksheets

If you need to secure only specific sheets within a workbook, follow these steps:
- Right-click on the worksheet tab you want to protect.
- Choose Protect Sheet from the context menu.
- In the dialog box, set permissions for various actions like selecting cells or formatting columns.
- Enter a password for the sheet protection. Click OK.
- Re-enter the password to confirm.
- Your worksheet is now protected.

⚠️ Note: Be aware that this protection can be bypassed using VBA or by saving the file in an older format. It's less secure than workbook encryption but useful for internal use or when you need to permit certain actions.
Method 3: Password Protecting Your Excel File (For Saving and Opening)

Sometimes, you might want to ensure that changes to the file can only be made by authorized individuals. Here’s how to do that:
- Go to the File tab, then Save As.
- Choose where you want to save the file.
- Under "Tools", select General Options.
- Here, you can set passwords for opening and modifying the workbook:
- Password to Open: Users must enter this password to open the file.
- Password to Modify: Users can open the file but can only view it, not edit it.
- Enter the passwords and click OK.
- Save the workbook.
| Password Type | Functionality |
|---|---|
| Open | Prevents anyone without the password from opening the file. |
| Modify | Allows viewing but restricts editing to authorized users only. |


💡 Note: Excel files with an open password are entirely locked out without the password. For password protection, ensure you're using Excel 2010 or later for better security features.
Wrapping up our discussion on password-protecting your Excel sheets, let’s summarize:
- Workbook Encryption secures the entire file, ensuring no one can access it without the password.
- Sheet Protection allows individual sheet control, which can be useful for collaboration.
- Setting passwords for opening and modifying restricts access to and changes in the file.
In each method, the balance between security and accessibility can be tailored to your specific needs. Whether you're sharing sensitive data internally or with external parties, understanding these methods helps you maintain control over your information. Remember, though, passwords are only as secure as you make them; use strong, unique passwords and secure storage to keep your Excel sheets safeguarded.
Can I protect multiple sheets at once in Excel?

+
No, Excel does not have a built-in feature to protect multiple sheets simultaneously. You’ll need to protect each sheet individually.
What happens if I forget the password I set?

+
There’s no recovery method for forgotten passwords in Excel. You’ll lose access to the content if you forget the password. Always use a password manager or secure storage for your passwords.
Can I share password-protected Excel files securely?

+
Yes, but ensure you use a secure method to share the password separately from the file. Using encryption tools or secure file transfer protocols can enhance security.


