Fit Your Excel Sheet on One Page Easily

Are you tired of printing your Excel sheets and realizing that they span across multiple pages? It's a common frustration, especially when presenting data clearly and concisely is key. In this comprehensive guide, we will delve into how you can easily fit your Excel sheet on one page, enhancing both your presentation and your print efficiency. Let's get started with some basic tips and advanced techniques.
Understanding Your Excel Page Layout

Before you start adjusting settings to fit your data on one page, understanding the basic Excel page layout is crucial. Here’s how you can view and modify these settings:
- Page Layout Tab: Navigate to the Page Layout tab to access your printing options.
- Page Setup Dialog: Click on the small square icon in the bottom-right corner of the Page Setup group to open the Page Setup dialog box.
Basic Page Setup Adjustments

Here are the first steps you should take:
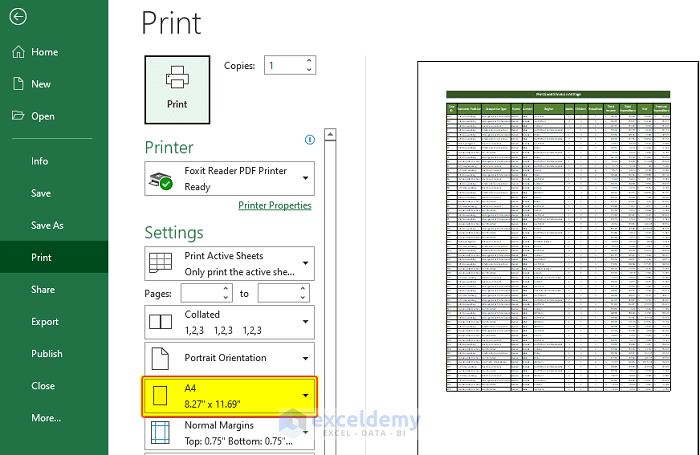
- Adjust Margins: By default, Excel uses 0.75 inch margins on all sides. You can decrease these to create more space for your data.
- Scale to Fit: Under the ‘Scale to fit’ section in the Page Setup dialog, you can choose ‘Fit to’ and enter ‘1’ for both width and height to ensure your data fits on one page.
Advanced Techniques for Reducing Print Size

If scaling and adjusting margins isn’t enough, here are some advanced techniques:
1. Decrease Font Size

A smaller font size can significantly reduce the amount of space your data takes up:
- Select your data range or the entire sheet.
- Right-click to open the context menu, then select ‘Format Cells.’
- Go to the ‘Font’ tab and decrease the font size. For example, reducing from 12 to 10 can save a lot of space.
2. Compress or Remove Unnecessary Information

If you have unnecessary rows or columns, consider:
- Hiding rows or columns that contain no critical data by right-clicking on the row/column header and selecting ‘Hide.’
- Removing unused data entirely if it doesn’t contribute to your analysis or presentation.
3. Use of Columns and Rows Wisely

Reduce the width of columns:
- Double-click the right boundary of the column header to auto-fit, which can often make columns narrower without losing readability.
Or:
- Merge cells for headers or titles to consolidate space where possible.
4. Formatting and Style Adjustments

Consider these formatting changes:
- Turn off gridlines or borders if not essential for your data presentation.
- Use conditional formatting to highlight key data without additional headers or labels.
✍️ Note: When reducing font sizes or adjusting column widths, ensure that the readability of your data is not compromised. Data that's too dense to read defeats the purpose of fitting it on one page.
Utilizing the Print Preview

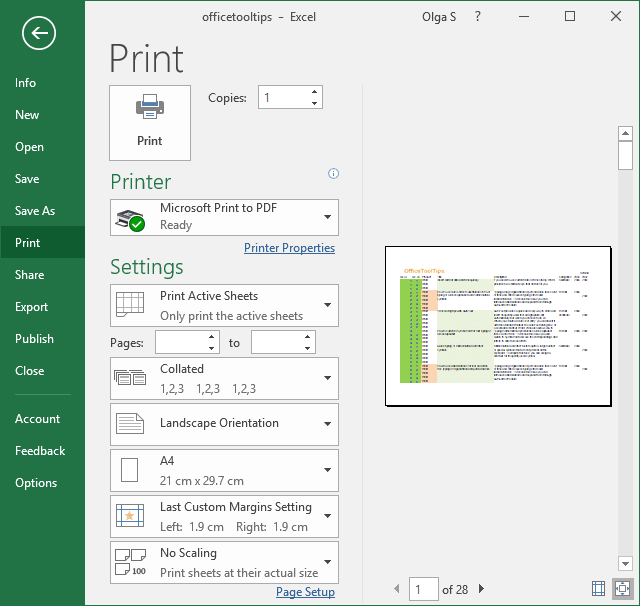
Always use Print Preview to check how your changes affect the print layout:
- In Excel, go to ‘File’ > ‘Print’ to see the preview.
- If the layout looks cramped, revisit the previous steps to find a better balance.
| Page Layout Setting | Description |
|---|---|
| Scale to Fit | Adjusts the entire content to fit on a specified number of pages. |
| Margins | Reduces the white space around the edges of your sheet to create more usable area. |
| Font Size | Decrease to make text smaller, freeing up space. |
| Hide Rows/Columns | Removes unnecessary information from the print view. |

The key to fitting an Excel sheet on one page is finding the right balance between readability, functionality, and presentation. Always ensure that your data remains legible and that the information you're conveying is clear even when compressed. Remember, the goal is to enhance efficiency without sacrificing clarity.
With these steps, your Excel printing experience should be far more straightforward. Whether you're preparing for a meeting, a presentation, or just need a clean printout, knowing how to optimize your sheet will save you time and paper, reducing the clutter of having your data spread across multiple pages.
What if I need to fit data across multiple sheets?

+
Use the ‘Fit to’ option in the Page Setup dialog, setting the number of pages for both width and height to fit the data optimally across multiple pages without overflow.
Can I still keep column headings on each page if I fit everything on one page?

+
Yes, if your data spans multiple pages, set print titles to repeat the column headings on each page by selecting ‘Print Titles’ under the Page Layout tab.
Does reducing font size always save space?

+
Yes, but ensure that readability isn’t compromised. Small font sizes might reduce space but can make text difficult to read if taken too far.
What’s the best practice for managing data that won’t fit?

+
Consider summarizing data, removing unnecessary information, or using smaller font sizes and narrower columns. Also, review if all the data needs to be printed or if a digital handout would suffice.


