Easily Delete Blank Rows in Excel: Step-by-Step Guide

Excel spreadsheets are powerful tools for organizing and analyzing data, but sometimes you may encounter unnecessary blank rows that clutter your view and complicate data processing. Removing these can streamline your work and enhance your data analysis efficiency. Here’s a detailed step-by-step guide on how to easily delete blank rows in Excel.
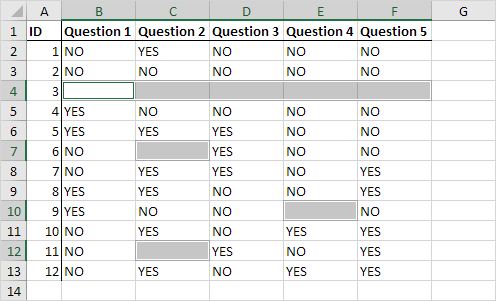
Understanding Blank Rows

Before diving into the deletion process, it’s important to understand what constitutes a blank row in Excel:
- Completely Blank Rows: These are rows where every cell from column A to the last column contains no data or formatting.
- Rows with Only Formatted Cells: Sometimes, a row might look empty but contains cell formatting, making it not truly blank.
Manual Deletion

Here’s how you can manually delete blank rows:
- Identify Blank Rows:
Scan your spreadsheet visually or use the “Find & Replace” feature to locate blank rows.
- Select Rows:
Click on the row number on the left-hand side to select the entire row. For multiple non-adjacent rows, hold Ctrl (Windows) or Command (Mac) while clicking.
- Right-Click and Delete:
Right-click on the selected rows and choose ‘Delete’ from the menu, or press Ctrl+Minus sign (-) on Windows or Command+Minus sign (-) on Mac.
⚠️ Note: Always double-check your selection before deleting rows to avoid losing important data.
Using Filters to Delete Blank Rows

For sheets with a large number of rows:
- Select the Column with Data:
Click on the header of any column that contains data.
- Apply AutoFilter:
Go to ‘Data’ > ‘Filter’ or click the Filter icon in the toolbar.
- Filter Out Blanks:
Click on the filter dropdown and select ‘Blanks’ to display only the rows with empty cells.
- Select and Delete:
Select these visible rows and delete as described above.
Advanced Technique: Using VBA Macro

When dealing with very large datasets, automating the process with a VBA macro can save considerable time:
Sub DeleteBlankRows()
    Dim lastRow As Long, i As Long
    With ActiveSheet
        lastRow = .Cells(.Rows.Count, “A”).End(xlUp).Row
        For i = lastRow To 1 Step -1
            If WorksheetFunction.CountA(.Rows(i)) = 0 Then
                .Rows(i).Delete
            End If
        Next i
    End With
End Sub
Here’s how to use this macro:
- Open VBA Editor:
Press Alt+F11 to open the VBA editor.
- Insert New Module:
Insert a new module (Insert > Module).
- Paste Code:
Copy and paste the above code into the module.
- Run the Macro:
Close the VBA editor, go to Developer > Macros, select 'DeleteBlankRows', and click 'Run'.
📝 Note: Macros can change the structure of your worksheet, so always backup your data before running macros.
Tips for Efficient Data Management

- Regular Cleaning: Make it a habit to clean your spreadsheets regularly to prevent clutter.
- Use Conditional Formatting: Highlight rows with specific conditions to easily spot and manage data issues.
- Backup Your Data: Always maintain a backup before performing bulk operations on your data.
With these methods, you can now efficiently manage and clean your Excel spreadsheets, making your data work both productive and error-free. Each approach has its own use case, from manual deletion for smaller datasets to VBA macros for extensive, repetitive tasks.
What if I accidentally delete important data?

+
Excel’s undo function (Ctrl+Z or Command+Z) can retrieve accidentally deleted data, but for comprehensive changes, regular backups are crucial.
How can I ensure I only delete rows where all cells are blank?

+
Use filters or the VBA macro provided in the post, as these methods check for completely empty rows before deletion.
Can I delete rows based on specific conditions, not just blanks?

+
Yes, you can use advanced filtering or write a VBA script tailored to delete rows that meet specific criteria.


