5 Easy Steps to Create Daily Sheets in Excel

Whether you're managing a small business, tracking personal finances, or organizing household chores, using daily sheets in Excel can transform your productivity. Excel is a versatile tool that allows you to design, customize, and manage data with ease. Here, we'll guide you through 5 easy steps to create daily sheets in Excel that are both functional and visually appealing.
Step 1: Plan Your Daily Sheet

Before diving into Excel, it’s important to outline what you need from your daily sheets:
- Identify the purpose of the sheet (e.g., task tracking, expense monitoring, or project management).
- Decide on the columns you will need (like Date, Task, Start Time, End Time, Status, etc.).
- Think about the frequency of updates and how long you want to maintain the sheet.
Step 2: Set Up Your Excel Workbook

Now, let’s open Excel and set up your workbook:
- Create a new workbook.
- Name the first sheet as “Template” or “Daily Sheet Template.”
- Set up your columns by adding headers in row 1. For example:
| Column A | Column B | Column C | Column D | Column E |
|---|---|---|---|---|
| Date | Task | Start Time | End Time | Status |

Make sure to format these headers appropriately for clarity (e.g., center alignment, bold text).
Step 3: Customize Your Template

Personalize your daily sheet:
- Formatting: Use borders, font styles, and colors to enhance readability.
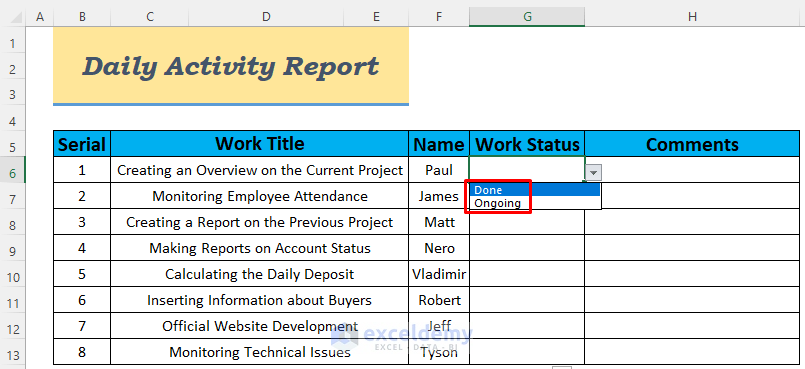
- Data Validation: Add drop-down lists for repetitive entries like task categories or statuses.
- Formulas: Insert formulas for automatic calculations, like duration or totals.
- Conditional Formatting: Highlight tasks based on status (e.g., overdue, completed).
Image of formatted daily sheet goes here.
Step 4: Automate Date Entry

Reduce manual entry errors by automating the date:
- In cell A2, enter the formula:
=TODAY()to automatically display the current date. - If you want each day’s sheet to start with a different date, link this cell to an external date source or manually update it each time you copy the template to a new sheet.
Step 5: Manage Multiple Sheets

Creating a daily sheet for each day can be repetitive, so:
- Use a macro or VBA script to automate sheet creation. This would duplicate the template sheet for each day or week you need.
- Alternatively, use the “Move or Copy” function to quickly replicate your template:
- Right-click on the sheet tab “Template” and select “Move or Copy.”
- Check the box for “Create a copy” and select where you want to place the new sheet.
- Rename the copied sheet with the date or day name (e.g., “Monday” or “2023-09-18”).
With these five steps, you now have a system in place to create, customize, and manage daily sheets in Excel. These sheets not only help keep you organized but also provide a quick visual reference of your daily or weekly activities.
📝 Note: Keep your template sheet simple for ease of replication. Overly complex designs might not translate well when copied multiple times.
💡 Note: Regularly review and update your template to reflect changes in your daily routine or project needs.
Now that you've mastered creating daily sheets, your next step would be to delve into more advanced Excel functionalities, like data analysis tools, to further enhance your sheets' capabilities. Your daily organization has just become more streamlined and efficient, saving you time and reducing the mental load of keeping track of tasks manually.
Can I use Excel daily sheets for team collaboration?

+
Yes, by using Excel Online or Google Sheets, you can share your daily sheet with team members. You can set permissions for editing, viewing, or commenting to ensure collaboration runs smoothly.
How do I link data from daily sheets into a monthly overview?

+
You can use Excel’s functions like VLOOKUP, HLOOKUP, or pivot tables to aggregate data from your daily sheets into a comprehensive monthly report. Name your sheets logically (e.g., 01-09-2023, 02-09-2023) to facilitate linking.
What if I want to keep a record of all my daily sheets but not have them open all the time?

+
Consider saving daily sheets as separate files with dates in their names or archiving them in a designated folder. Alternatively, keep them in the same workbook but use the “Hide” or “Very Hidden” sheet properties in VBA to keep them out of sight.


