5 Simple Steps to Consolidate Excel Sheets

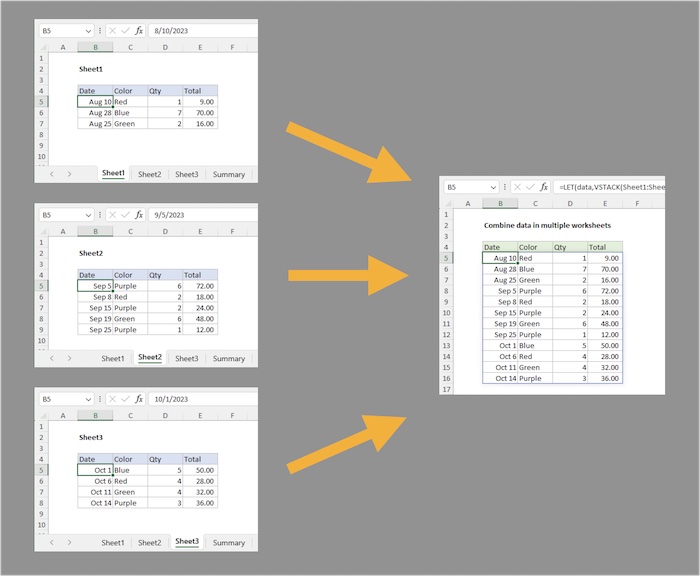
Welcome to our comprehensive guide on consolidating Excel sheets. Whether you're managing financial reports, tracking inventory, or dealing with multiple data sources, Excel's robust functionality can help you combine data efficiently. In this tutorial, we will explore five straightforward steps to merge Excel sheets into one cohesive workbook, enhancing your data analysis process.
Step 1: Preparing Your Excel Sheets

Before diving into consolidation, ensure that your Excel sheets are properly set up:
- Standardize Headers: Ensure all your data sheets have the same headers in the same order. If headers differ, decide how you’ll merge them.
- Data Consistency: Check for consistent data formats across sheets. For instance, dates should be in the same format, and text should be uniform.
- Remove Unnecessary Rows: Eliminate empty rows or columns that might complicate the consolidation process.
📌 Note: Spend time in this step to avoid data mismatches and errors during consolidation.
Step 2: Creating a New Workbook

Now that your data is prepared, let’s start the consolidation process:
- Open Microsoft Excel and create a new workbook.
- Save this new workbook under a descriptive name, e.g., “Consolidated_Data_Report.xlsx”.
Step 3: Importing Data from Source Sheets

With your new workbook ready, we’ll import data from each source sheet:
- Click on the “Data” tab, then select “Get External Data” and choose “From Other Sources” > “From Microsoft Query”.
- In the “Query Wizard”, select your data source, typically this would be “Microsoft Excel Files (*.xls, *.xlsx, *.xlsm, *.xlsb)”.
- Locate and select the first source file, choose your desired data range or sheet, and click “Next”.
- Repeat this process for each sheet you need to consolidate. Remember, the query can be filtered to ensure only relevant data is imported.
Here’s a simple table that outlines what you’ll be selecting:
| Action | Description |
|---|---|
| Choose File | Select the Excel file containing your data. |
| Select Range | Define which part of the sheet to import (e.g., Sheet1!A1:E50). |
| Apply Filters | Optionally apply filters to refine your data import. |

Step 4: Consolidating Data Using Excel Formulas or Power Query

Once all data is imported, we’ll use Excel tools to merge it:
- Excel Formulas: Use functions like VLOOKUP or INDEX/MATCH to combine data from multiple sheets into one master sheet. Here are some examples:
=VLOOKUP(A2, Sheet2!A:B, 2, FALSE)to pull data from Sheet2 to the master sheet.=INDEX(Sheet2!B:B, MATCH(A2, Sheet2!A:A, 0))for a more robust approach.
- Power Query:
- Navigate to “Data” > “Get Data” > “From Other Sources” > “Blank Query” in the Query Editor.
- Write a script to load and merge sheets. Here’s a basic M script:
= let Source = Folder.Files(“C:\YourDataFolder”), LoadedFiles = Source[Content] => Excel.Workbook(_, null, true), MergedFiles = Table.Combine(LoadedFiles), ExpandedColumns = Table.ExpandTableColumn(MergedFiles, “Content”, {“Column1”, “Column2”}, {“Content.Column1”, “Content.Column2”}) in ExpandedColumns - Power Query provides an interactive UI, which can be easier to manage if scripting isn’t your forte.
Step 5: Review and Finalize

After consolidating your data:
- Check for Errors: Use conditional formatting or other error-checking methods to ensure no data discrepancies.
- Format and Clean: Format cells as required, clean up any empty rows or columns that might have been introduced during the consolidation.
- Save Your Work: Remember to save frequently and consider using Excel’s autosave feature to prevent data loss.
In conclusion, consolidating Excel sheets can transform scattered data into a powerful tool for analysis. By following these steps, you not only streamline your workflow but also make your data management more efficient and error-free. Remember to keep backups of your source files and double-check your work to ensure accuracy in your final consolidated workbook.
What if my Excel sheets have different formats?

+
If your Excel sheets have different formats, you might need to standardize them manually before consolidation or use Power Query’s advanced transformations to normalize the data during the import process.
Can I consolidate sheets with different headers?

+
Yes, by using Power Query or Excel formulas, you can map different headers to a common structure. This might require some scripting or manual mapping, but it’s certainly possible.
How often should I consolidate my sheets?

+
The frequency depends on your data management needs. For daily operations, weekly or monthly consolidation might be appropriate. However, if your data changes frequently, consider automating the process with macros or Power Automate.


