5 Simple Ways to Format All Sheets in Excel Workbook

If you work with Microsoft Excel, you likely understand the struggle of ensuring that multiple sheets within a single workbook are formatted consistently. Imagine you're working on a financial report, where each sheet represents data from a different month or department, and you need each sheet to look the same for clarity and professionalism. In this blog post, we'll explore five simple ways to format all sheets in an Excel workbook. Whether you're aiming for uniformity in visual presentation or data structure, these methods will save you time and reduce errors.
1. Using Group Mode for Formatting

When you need to apply the same formatting across multiple sheets, Excel’s Group Mode is a lifesaver. Here’s how you can utilize it:
- Select the first sheet in your workbook.
- Hold down the Ctrl key and click on each sheet tab you want to format. If you want to select all sheets, click the first sheet, then press Shift and click on the last sheet tab.
- Once grouped, any changes you make to one sheet will be applied to all selected sheets.
This method is excellent for setting uniform fonts, column widths, and even applying conditional formatting or charts that you want to replicate across all sheets.
2. Formatting via VBA Macros

For more advanced users or for recurring tasks, VBA (Visual Basic for Applications) macros offer a powerful way to automate formatting. Here’s a simple VBA macro example to format all sheets:
Sub FormatAllSheets()
    Dim ws As Worksheet
    For Each ws In ThisWorkbook.Worksheets
        With ws
            .Range(“A1”).Font.Bold = True
            .Range(“A1”).Font.Color = RGB(0, 0, 255)
            .Columns(“A:Z”).AutoFit
        End With
    Next ws
End Sub
After writing or recording the macro:
- Press Alt + F11 to open the VBA editor.
- Insert a new module and paste your code.
- Save the workbook as a macro-enabled file (.xlsm).
- Run the macro from the ‘Macros’ option under the ‘View’ tab.
This script will make the first cell bold and blue and auto-fit all columns from A to Z in all worksheets.
3. Template Creation and Usage

If consistency is critical, creating a template can streamline your workflow:
- Format one sheet exactly how you want it.
- Save this as an Excel template by choosing ‘Excel Template (*.xltx)’ in the ‘Save As’ dialog box.
- Next time you need a workbook with that format, simply open the template and save your new data in it.
4. Use of Excel Styles

Excel Styles provide an efficient way to apply formatting consistently:
- Create a style with your desired formatting (like borders, font, etc.) through the ‘Home’ tab under ‘Cell Styles’.
- Once created, you can apply this style to multiple sheets by selecting them and then choosing your style from the ‘Cell Styles’ dropdown.
This approach is particularly useful when you have many sheets with similar formatting needs.
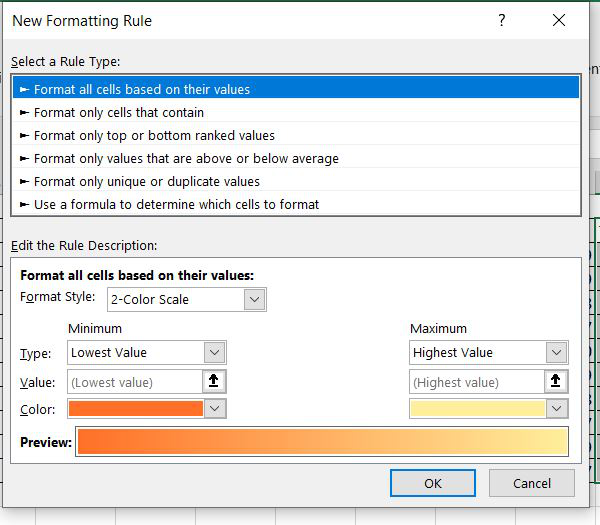
5. Conditional Formatting Across Sheets

If your goal is to highlight specific data across various sheets:
- Set up conditional formatting rules in one sheet.
- Using Group Mode (as described in step 1), you can copy these rules to multiple sheets at once, ensuring that any cell meeting your criteria will be formatted uniformly.
⚠️ Note: Remember that formatting changes made in Group Mode affect all sheets in the group. Make sure to ungroup sheets before making sheet-specific changes to avoid unintended modifications.
In summary, ensuring consistency in formatting across all sheets in an Excel workbook not only improves the professional appearance of your data but also enhances readability and minimizes confusion. Whether you choose to use Group Mode for quick changes, VBA Macros for custom formatting, Templates for recurrent projects, Excel Styles for uniform looks, or Conditional Formatting for dynamic data presentation, these techniques are invaluable for anyone working with Excel. By adopting these methods, you streamline your workflow, ensuring your data presentation is as effective as your analysis.
Can I use these methods to format only specific sheets in Excel?

+
Yes, you can. For instance, when using Group Mode, you can selectively choose the sheets you wish to format. With VBA macros, you can specify which sheets to format by altering the code to include conditions.
What happens if I make a mistake while formatting in Group Mode?

+
Any formatting changes made in Group Mode will apply to all selected sheets. If a mistake is made, you can undo the action by pressing Ctrl + Z. However, ensure you ungroup sheets before making unique changes to individual sheets.
Is it possible to automate the formatting process further?

+
Absolutely! With VBA macros, you can automate complex formatting tasks that go beyond basic styles or conditional formatting, making your workflow highly efficient.
Can I share a formatted Excel template with others?

+
Yes, templates are perfect for sharing. You can send the template file to others, allowing them to open it and save new data within the same formatted environment you created.


