Effortlessly Share Excel Spreadsheets with Multiple Users

Working with spreadsheets has become an integral part of modern business, from tracking sales figures and inventory to managing project timelines and customer data. Microsoft Excel, one of the most widely used tools for this purpose, offers robust features for data analysis and visualization. However, one of the challenges that teams often face is the effective and secure sharing of Excel spreadsheets among multiple users. This comprehensive guide will walk you through the process of how to effortlessly share Excel spreadsheets with multiple users, ensuring seamless collaboration without compromising on data integrity or security.
The Benefits of Sharing Excel Spreadsheets

Before diving into the “how-to,” let’s explore the advantages of sharing Excel spreadsheets:
- Real-time Collaboration: Multiple users can work on the same document simultaneously, seeing changes as they happen.
- Consistency and Accuracy: Reduces the risk of duplicating efforts or working with outdated data.
- Enhanced Productivity: Streamlines workflows, allowing team members to contribute in real-time, regardless of their location.
- Better Project Management: With shared access, managers can oversee progress without constant check-ins.
Setting Up Shared Access in Microsoft Excel

To begin sharing your Excel spreadsheets, follow these steps:
1. Use OneDrive

One of the easiest ways to share Excel files is through OneDrive, Microsoft’s cloud storage service:
- Open Excel, create your spreadsheet, or open an existing one.
- Save your document to OneDrive by selecting File > Save As > OneDrive.
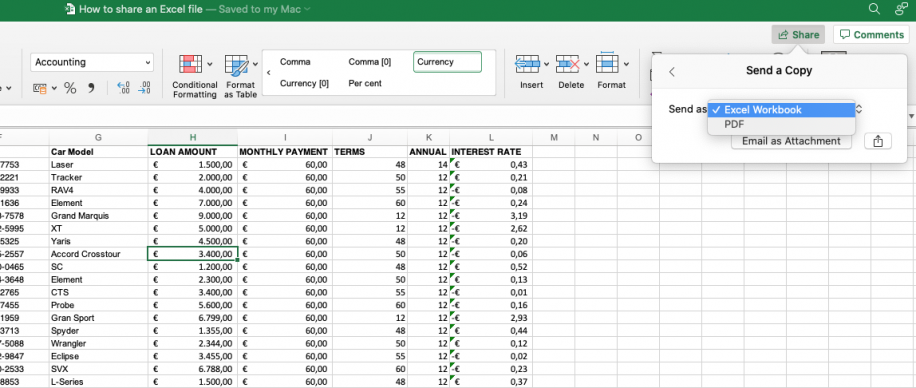
- Click on the Share button located in the upper-right corner of the Excel window.
2. Manage Permissions

When sharing your document, you can choose who can view, edit, or comment on the spreadsheet:
- Specify permissions by selecting Can view, Can edit, or Can comment.
- Set an expiration date for access or require recipients to log in with a Microsoft account.
- You can also allow editing but prevent people from making changes to the original structure of the spreadsheet by locking cells or protecting the workbook.
🔒 Note: Protecting your workbook is crucial when sharing sensitive data to prevent accidental or unauthorized alterations.
3. Send Sharing Links

Once permissions are set, you can generate a sharing link:
- Choose to copy the link or send invitations via email.
- When sending via email, Excel automatically includes the access permissions.
4. Manage Co-authoring

Excel supports real-time co-authoring, which means:
- Changes made by one user appear immediately to others working on the same document.
- Different colors highlight each user’s edits, helping to track who made which changes.
Key Features for Collaborative Work

Beyond basic sharing, here are some features that can enhance collaborative work:
- Version History: Access the Version History to revert to an earlier version or see what changes were made.
- Comments: Add inline comments for discussions or questions directly within the spreadsheet.
- AutoSave: With files saved on OneDrive, changes are automatically saved, reducing the risk of data loss.
- Collaborative Editing: Excel highlights cells that are being edited by others in real-time to prevent overwrites.
| Feature | Benefits |
|---|---|
| Version History | Track and revert changes if needed. |
| Comments | Streamline communication within the document. |
| AutoSave | Automatic backup of work in progress. |
| Collaborative Editing | Real-time editing with conflict resolution. |

Security and Privacy Considerations

While sharing documents makes collaboration easy, it’s vital to address security and privacy:
- Set Passwords: Excel allows you to encrypt files with a password to prevent unauthorized access.
- Manage Permissions: Regularly review who has access to your shared files and adjust permissions as needed.
- Audit Trails: Use the Version History to track changes and understand who did what.
- Secure Sharing: Opt for Microsoft’s recommended sharing options, such as requiring a Microsoft account for access.
In summary, sharing Excel spreadsheets with multiple users not only fosters collaboration but also enhances productivity by reducing the time spent on consolidating data. By leveraging cloud storage solutions like OneDrive, setting up appropriate permissions, and using collaborative features, businesses can create a dynamic environment where teams work in sync. Remember, while the benefits of sharing are numerous, safeguarding your data with robust security practices is equally important. With this guide, you can now effortlessly share Excel spreadsheets, ensuring that your team’s workflow is streamlined and your data remains secure.
Can I share an Excel file without using OneDrive?

+
Yes, you can share Excel files using other cloud services like Google Drive, Dropbox, or email attachments, but Microsoft OneDrive provides the most integrated experience with Excel for real-time collaboration.
How can I ensure that only certain people can edit the shared Excel file?

+
Set editing permissions when sharing the file. Use the “Can edit” option for those who need to contribute changes, and “Can view” for those who should only see the document without altering it.
What should I do if someone edits the spreadsheet and I don’t like the changes?

+
You can use the Version History feature to revert back to a previous version before the unwanted changes were made.
Is there a way to prevent others from seeing the comments in the shared spreadsheet?

+
While you can’t hide comments directly, you can limit who has access to the document, or you can delete the comments after they’ve served their purpose.
How do I know if someone else is editing my spreadsheet at the same time?

+
Excel highlights cells in different colors when they are being edited by other users, and you’ll see the names of people who are currently in the file at the top.


