5 Easy Steps to Create a Grade Sheet in Excel

Creating a grade sheet in Excel can seem daunting at first, but it's actually quite straightforward once you understand the basic steps. Whether you're a teacher organizing student marks or a student trying to track your own performance, Excel's versatility makes it an excellent tool for managing grades. Here's how to do it in just five easy steps.
Step 1: Setting Up Your Excel Workbook

- Open Microsoft Excel and create a new blank workbook.
- Name the Worksheet: At the bottom left of the screen, you'll see 'Sheet1'. Right-click this tab, select 'Rename', and type 'Grades' or any name you prefer.
Step 2: Creating the Basic Structure

- In the first row, create headers for your grade sheet. Here's an example:
- Expand this table as necessary to accommodate additional columns like quizzes, homework, etc.
| Student Name | ID | Assignments | Exams | Project | Total | Grade |
|---|

Step 3: Entering Data
- Below your headers, start entering data. Here are some guidelines:
- Student Names: These should be input in the 'Student Name' column.
- ID: Use a unique identifier for each student.
- Scores: Input the scores for each category (assignments, exams, projects).
📌 Note: Keep consistency in formatting. For example, use the same date format throughout the sheet.
Step 4: Calculating Totals and Grades

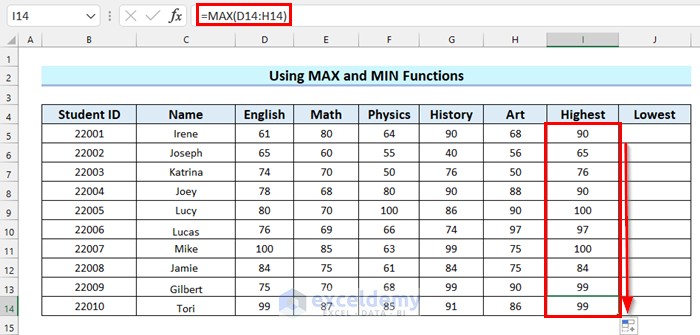
- Total Column: Use Excel formulas to sum up each student's scores. In the 'Total' column, use a formula like this:
- Here, C2, D2, and E2 are the cells containing the scores for assignments, exams, and projects for the first student.
- Grade Calculation: In the 'Grade' column, you can use an IF statement or VLOOKUP to convert the total score into a grade. For example:
=SUM(C2:E2)
=IF(F2 >= 90, "A", IF(F2 >= 80, "B", IF(F2 >= 70, "C", IF(F2 >= 60, "D", "F"))))
📌 Note: Always test your formulas on a few entries to ensure they work as intended.
Step 5: Finalizing and Formatting Your Grade Sheet

- Formatting: Use Excel's formatting options to enhance readability:
- Change cell colors for headers.
- Adjust text alignment.
- Add borders or gridlines for clarity.
- Conditional Formatting: Highlight grades with colors based on their value (e.g., green for A, yellow for B, etc.).
- Sorting and Filtering: Utilize Excel's sorting features to organize the data by student names, grades, or any other criteria.
In summary, setting up a grade sheet in Excel involves creating a structured layout, entering your data accurately, applying formulas for calculations, and then enhancing the sheet's visual appeal and usability with formatting options. These steps not only streamline the process of managing grades but also make it interactive and user-friendly. Whether you're a teacher or a student, understanding how to craft an effective grade sheet can significantly enhance your academic workflow.
Can I use Excel Online for creating a grade sheet?

+
Yes, Excel Online has all the necessary features to create a grade sheet, though some advanced Excel functions might be limited compared to the desktop version.
How do I ensure my formulas update if I add or delete rows?

+
Use absolute cell references (e.g., A1) for fixed values, and Excel will automatically adjust other formulas when you insert or delete rows.
What if my grades don’t fit into a simple A-F grading scale?

+
Adjust the IF statements in your Grade column to accommodate a different scale, or use VLOOKUP with a grade table for more complex grading systems.


