Mastering Excel: Creating a Balance Sheet in Seconds

In today's fast-paced business environment, keeping track of your financial health is crucial. One of the most effective ways to do this is by maintaining a balance sheet. Microsoft Excel, a powerful tool widely used in businesses of all sizes, allows you to create a balance sheet quickly and efficiently. This guide will walk you through the steps of creating a balance sheet in Excel, optimizing your time and financial management skills.
Setting Up Your Excel Spreadsheet

Before diving into the actual creation of your balance sheet, it’s important to prepare your Excel environment:
- Open Excel and create a new workbook.
- Rename the default sheet to “Balance Sheet” for clarity.
- Adjust the row heights and column widths to fit your data comfortably.
Formatting Tips:

- Set up a grid with merged cells for headers to give your balance sheet a professional look.
- Use bold text or change the background color for headers to distinguish them easily.

🔍 Note: Excel’s gridlines can be hidden if you want a cleaner look for your final balance sheet. You can do this under the ‘View’ tab.
Creating the Assets Section

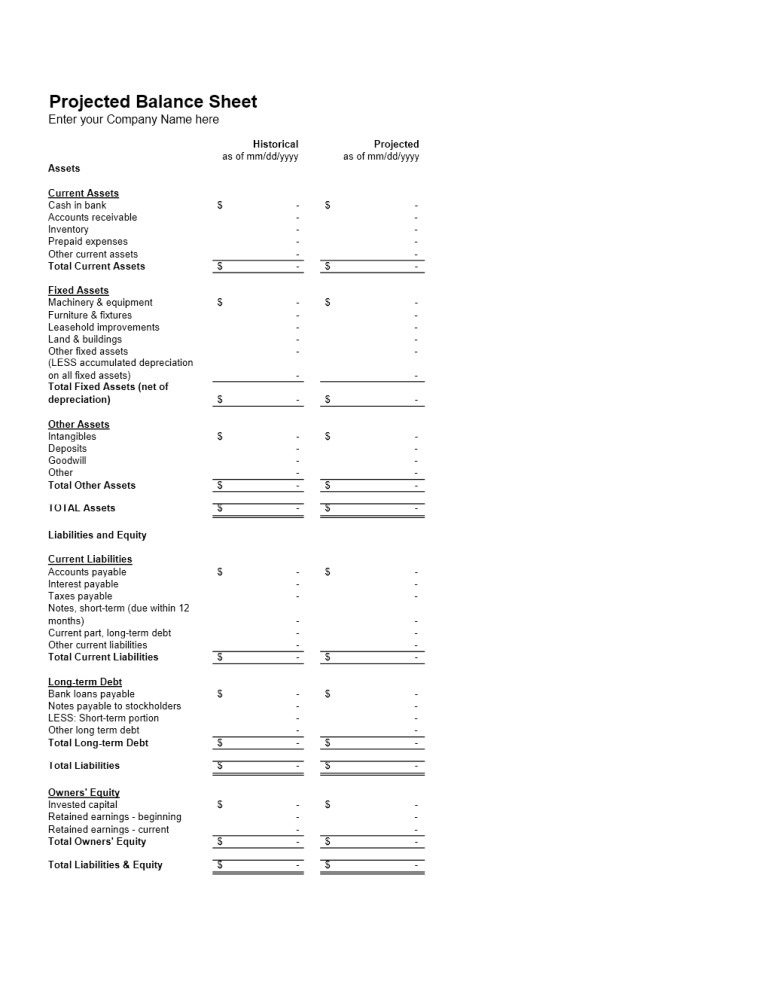
The balance sheet traditionally starts with assets, which are broken down into:
- Current Assets
- Non-Current Assets
Step-by-Step Guide to Adding Assets:

- Under ‘Assets’, create headers for “Cash”, “Accounts Receivable”, “Inventory”, “Prepaid Expenses” under current assets.
- Add a total row to sum up current assets.
- Below current assets, list “Property, Plant, Equipment (PPE)”, “Intangible Assets”, and “Long-term Investments” as non-current assets.
- Again, include a row to total non-current assets.
| Category | Subcategory | Value |
|---|---|---|
| Current Assets | Cash | 10,000</td> </tr> <tr> <td>Accounts Receivable</td> <td>20,000 |
| Inventory | 15,000</td> </tr> <tr> <td>Total</td> <td>45,000 | |
| Non-Current Assets | PPE | 100,000</td> </tr> <tr> <td>Intangible Assets</td> <td>30,000 |
| Total | $130,000 |

Adding Liabilities and Equity

Next to the assets, list out:
- Current Liabilities (Accounts Payable, Short-term Debt, etc.)
- Non-Current Liabilities (Long-term Debt, Deferred Revenue, etc.)
- Equity (Retained Earnings, Common Stock, etc.)
Here’s how to do it:

- Create headers for “Accounts Payable”, “Notes Payable”, “Accrued Expenses” under current liabilities.
- Total the current liabilities.
- Under non-current liabilities, include “Long-term Debt” and “Deferred Revenue”.
- Add a section for equity with lines for “Common Stock”, “Additional Paid-In Capital”, “Retained Earnings”.
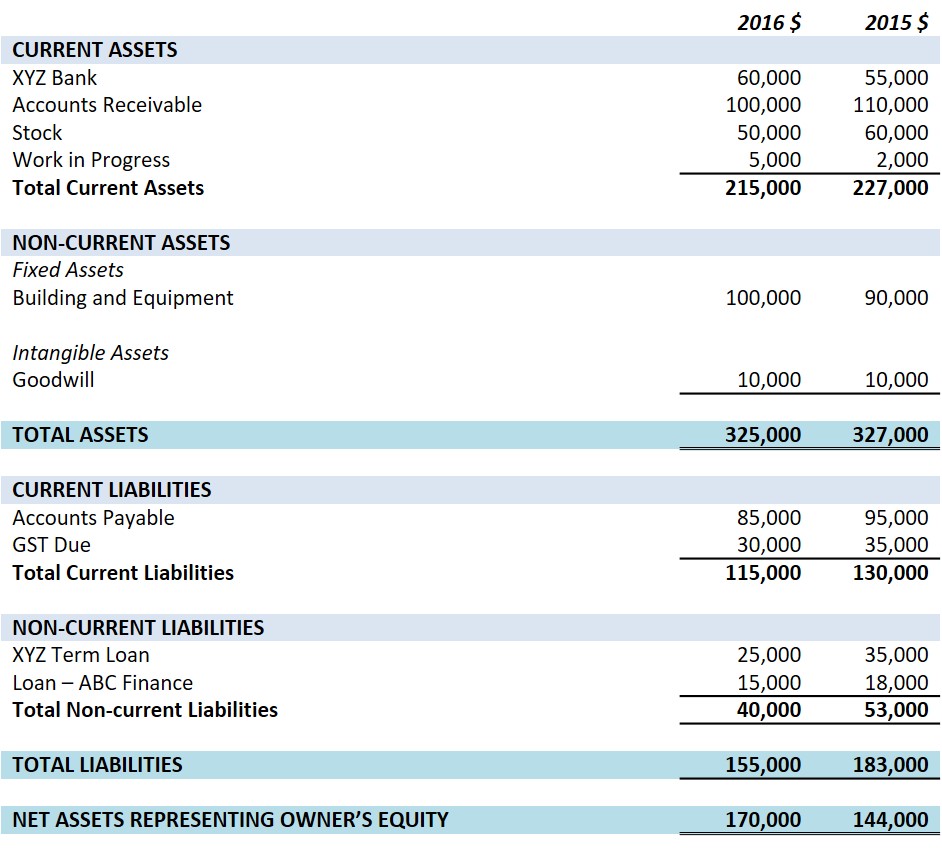
- Sum the liabilities and equity separately, then provide the total liabilities and equity figure.
Automatic Calculations with Formulas

To streamline your balance sheet and ensure accuracy:
- Use Excel formulas to calculate totals automatically. For example,
=SUM(C2:C4)can be used to sum up the values in cells C2 through C4 for total current assets. - Ensure that the total assets equal total liabilities plus equity to confirm the balance sheet balances.

✅ Note: Double-check your formulas to ensure all calculations are correct, especially since balance sheets must balance exactly.
Design and Presentation

After setting up your balance sheet:
- Apply borders, shading, and fonts for a professional look.
- Use conditional formatting to highlight key figures or to draw attention to discrepancies in totals.
- Include a date in the header to track when the balance sheet was prepared.
💡 Note: Consistency in formatting not only makes your balance sheet more readable but also helps in maintaining brand identity across financial documents.
Now that you have a well-structured balance sheet in Excel, you can:
- Quickly review your company’s financial status.
- Make timely decisions based on accurate data.
- Ensure all your assets, liabilities, and equity are properly accounted for and balanced.
To sum up, mastering the creation of a balance sheet in Excel can significantly enhance your ability to manage and present financial data effectively. This guide has covered:
- Setting up your Excel spreadsheet for financial reporting.
- Detailing assets, liabilities, and equity in a clear, structured manner.
- Using Excel’s automation features for accuracy and efficiency.
- Enhancing the balance sheet’s presentation with design elements.
Why is it important to keep my balance sheet updated?

+
Keeping your balance sheet updated provides a snapshot of your company’s financial health, helping in decision-making, attracting investors, and ensuring regulatory compliance.
How often should I update my balance sheet?

+
Ideally, businesses should update their balance sheet at least quarterly or monthly for internal purposes, but annually for formal financial statements.
Can I use Excel to automate other financial statements?

+
Yes, Excel can be used to create and automate income statements, cash flow statements, and other financial reports with its vast array of functions and features.


