Transfer Data Between Excel Sheets Easily: Simple Tips

Moving data between Excel sheets is an essential skill for anyone dealing with data analysis, business operations, or even personal finance management. Whether you're consolidating data, creating summaries, or just reorganizing information, mastering this skill can save you time and reduce errors. This post will walk you through the various methods to transfer data within Excel effectively, ensuring you can manage your spreadsheets with ease.
Understanding Excel Sheets

Before diving into the actual methods of transferring data, let’s understand what Excel sheets are. Each workbook in Excel contains several sheets, which act like separate pages within a notebook. Each sheet can contain its own sets of data, formulas, and charts, allowing for organized and separated information management.
Here are some key points about Excel sheets:
- Sheets can be renamed for clarity.
- They can be colored for visual management.
- Multiple sheets can be linked or grouped for simultaneous editing.
Transfer Data Manually


The most straightforward method for transferring data between sheets involves manual copying and pasting. Here’s how you can do it:
- Select the cells or range of data you wish to transfer.
- Right-click and choose ‘Copy’ or use Ctrl + C (Cmd + C on Mac).
- Navigate to the destination sheet or cell.
- Right-click and select ‘Paste’ or use Ctrl + V (Cmd + V on Mac).
💡 Note: Manual transfer is great for small datasets but can be error-prone and time-consuming for larger datasets.
Use Excel’s ‘Paste Link’ Feature

Instead of copying static data, you can link data between sheets to maintain real-time updates. Here’s how:
- Copy the range you want to link.
- Go to the destination cell.
- Right-click, choose ‘Paste Special’, then select ‘Paste Link’ or press Alt + E + S + F + L.
This method will keep your data in sync across sheets:
- Any changes made in the source cell will automatically reflect in the linked cell.
- Linking can help prevent errors when the same data is required in multiple places.
| Source Sheet | Destination Sheet | Link Formula |
|---|---|---|
| Sheet1 | Sheet2 | =Sheet1!A1 |

Advanced Techniques with VLOOKUP

When you need to transfer data based on a condition or match, VLOOKUP can be incredibly useful:
VLOOKUP(lookup_value, table_array, col_index_num, [range_lookup])
- lookup_value is what you want to look up.
- table_array is where the data resides.
- col_index_num specifies which column’s data to return.
- range_lookup is set to FALSE for exact matches.
This function is particularly useful for:
- Merging data from multiple sheets.
- Populating sheets with data from a main database or table.
🛠 Note: Ensure the lookup value column in the table array is sorted in ascending order when using an approximate match.
Automate with Macros or VBA

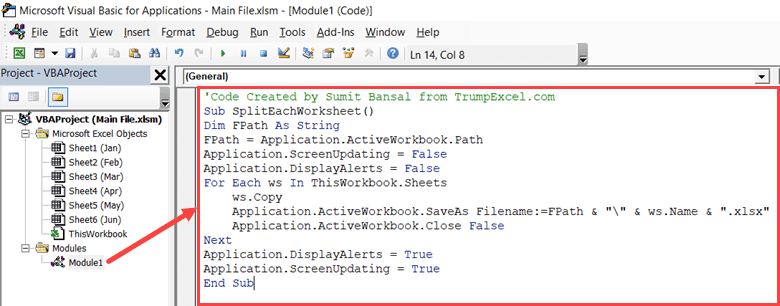
For repetitive tasks, using macros or VBA (Visual Basic for Applications) can automate data transfer:
- Open the Developer tab (or enable it from File > Options > Customize Ribbon).
- Click Record Macro and perform the data transfer manually.
- Stop recording, and you can now run this macro anytime to automate the process.
- Create a Pivot Table from your source data.
- Place this Pivot Table in your destination sheet.
- Use the Pivot Table to summarize or detail data as needed.
- Creating dynamic reports from extensive datasets.
- Quickly analyzing and transferring summarized data.
- Transform data from multiple sheets into a single table.
- Apply filters, merge data, and perform ETL (Extract, Transform, Load) operations.
- Go to the Data tab, select Get Data > From Other Sources > From Microsoft Query.
- Choose Excel Files and select the workbook containing your data.
- Navigate through the sheets to select the data you want to combine or transfer.
- Apply transformations and load the data into your desired sheet.
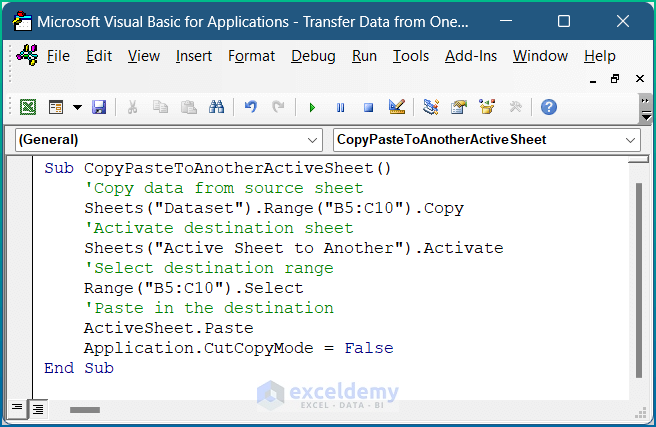
Here’s a simple VBA script for transferring data:
Sub TransferData() Dim SourceSheet As Worksheet, DestinationSheet As Worksheet Set SourceSheet = ThisWorkbook.Sheets(“Sheet1”) Set DestinationSheet = ThisWorkbook.Sheets(“Sheet2”)SourceSheet.Range("A1:A10").Copy DestinationSheet.Range("A1")
End Sub
Remember to save your Excel file as a macro-enabled workbook (.xlsm) if you’re going to use macros or VBA.
Pivot Tables for Data Summarization

Pivot Tables are not just for summarizing data; they can also be used for transferring data across sheets:
This method is particularly effective for:
Use Power Query

Power Query in Excel (introduced in Excel 2016) allows you to extract, transform, and load data across multiple sources including Excel sheets:
Here’s how you can use Power Query for data transfer:
In this post, we've explored various methods for transferring data between Excel sheets, from the most straightforward manual copy-paste techniques to more advanced automation with VBA and Power Query. Each method has its place depending on the complexity of your data and the frequency of your task. By mastering these skills, you can significantly increase your efficiency when working with data in Excel, allowing you to focus more on analysis rather than data manipulation.
Why should I use Power Query instead of VLOOKUP?

+
Power Query allows for more complex data manipulation and automation, particularly when dealing with large datasets or combining multiple data sources. While VLOOKUP is great for basic data lookups, Power Query excels in handling data transformation and loading.
Can I transfer data between sheets in different Excel files?

+
Yes, you can. Most methods discussed here, like manual copy-paste or Power Query, work across different workbooks. Ensure both files are open or linked in Excel to facilitate this transfer.
What’s the advantage of using VBA for data transfer?

+
VBA can automate repetitive tasks, making data transfer quick and less error-prone. It’s particularly useful if you need to perform complex operations or integrate Excel with other applications like databases or web services.