7 Simple Steps to Tally Balance Sheet in Excel PDF

Balancing a balance sheet in Microsoft Excel is an essential skill for anyone involved in financial planning, accounting, or business management. This task ensures that the financial health of a company is accurately portrayed, helping stakeholders make informed decisions. This comprehensive guide will walk you through 7 simple steps to tally a balance sheet in Excel, providing you with insights, tips, and best practices along the way.
Step 1: Set Up Your Balance Sheet Template

Begin by creating or selecting a pre-formatted balance sheet template. Your template should include:
- Assets: Current and Non-Current
- Liabilities: Current and Non-Current
- Equity: Shareholders’ Equity and Retained Earnings
🧰 Note: You can find many free templates online or create one from scratch. Ensure your template includes all the necessary sections to reflect a complete financial picture.
Step 2: Enter Financial Data

Input the relevant financial data into your Excel sheet:
- Total cash on hand, accounts receivable, inventory, and other current assets under “Assets.”
- Accounts payable, short-term loans, and other current liabilities under “Liabilities.”
- Equity details like common stock, preferred stock, and retained earnings under “Equity.”
Step 3: Calculate Totals

Sum up each category to find the total assets, liabilities, and equity:
- Use the SUM function to tally up values in each column.
- Ensure formulas are applied correctly to avoid miscalculations.
Step 4: Cross-Check the Figures

Here’s where the real balance comes into play:
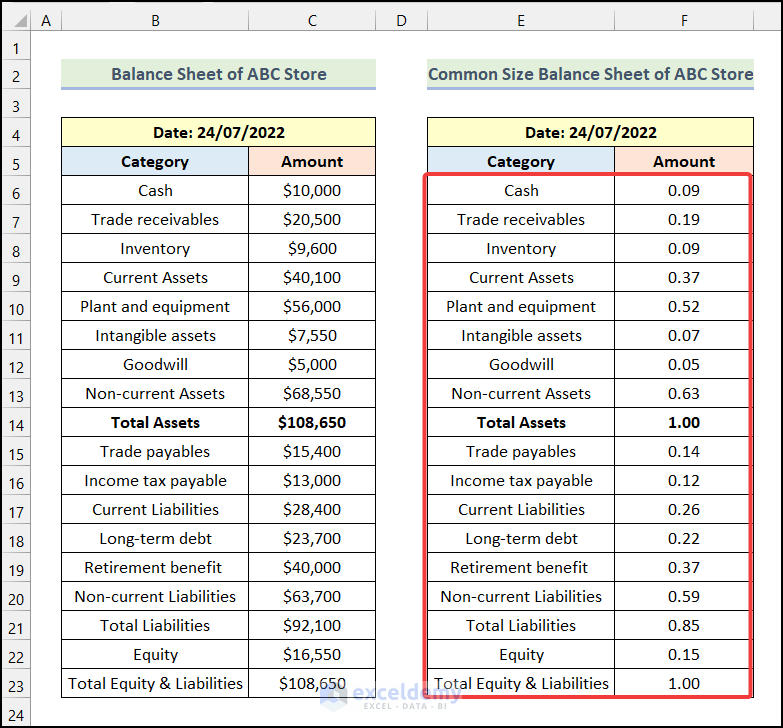
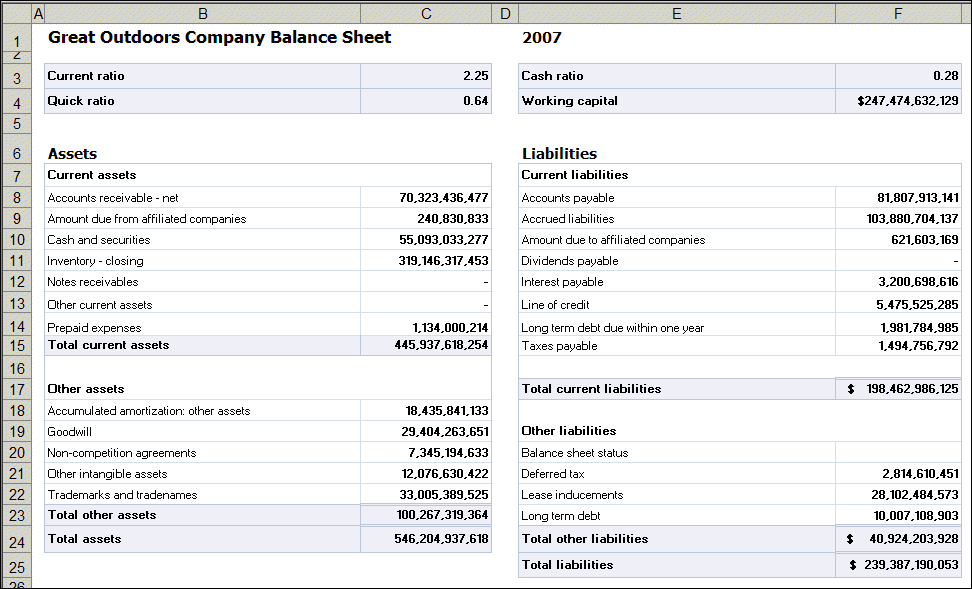
- Total Assets must equal the sum of Total Liabilities and Total Equity. If they don’t match, double-check for errors.
🚫 Note: Common errors include incorrect cell references, duplicate entries, or overlooked values.
Step 5: Format and Analyze

Formatting can make your balance sheet not only look professional but also easier to read:
- Use cell borders, number formatting, and conditional formatting to highlight critical sections.
- Apply styles for headings and totals for clarity.
Step 6: Print or Export to PDF

Finalize your balance sheet:
- Adjust margins, headers, and footers for print layout if needed.
- To export to PDF, go to File > Export > Create PDF/XPS, and select your options.
Step 7: Review and Validate

After exporting:
- Open the PDF to check if all data is correctly displayed.
- Ensure no values are cut off or distorted.
By following these 7 steps, you can accurately balance your company's balance sheet in Excel and export it as a PDF for records or distribution. This process not only ensures that your financial statements are correct but also helps in presenting your business's financial health in a clear, professional manner.
In summary, tallying a balance sheet involves setting up a clear template, entering precise financial data, ensuring calculations are accurate, formatting for readability, exporting to PDF, and reviewing the final document. These steps, when followed with care, will provide you with a reliable financial snapshot that can be crucial for business strategy, planning, and stakeholder communication.
What is the importance of ensuring the balance in a balance sheet?

+
The balance sheet reflects the company’s financial status at a specific point in time. Ensuring that Assets = Liabilities + Equity is crucial for:
- Providing an accurate representation of financial health.
- Supporting credibility with investors and creditors.
- Legal and regulatory compliance.
What are common errors when calculating a balance sheet?

+
Common mistakes include:
- Incorrect cell references or formulas.
- Overlooking or double-counting entries.
- Not considering all accounts or transactions.
How can I ensure my PDF export is high quality?

+
To ensure high-quality PDF:
- Check print settings for appropriate scale and layout.
- Use a PDF editor to adjust text size or formatting if necessary.
- Ensure the PDF is readable and free of visible errors on different devices.