Easily Separate Sheets in Excel Downloads

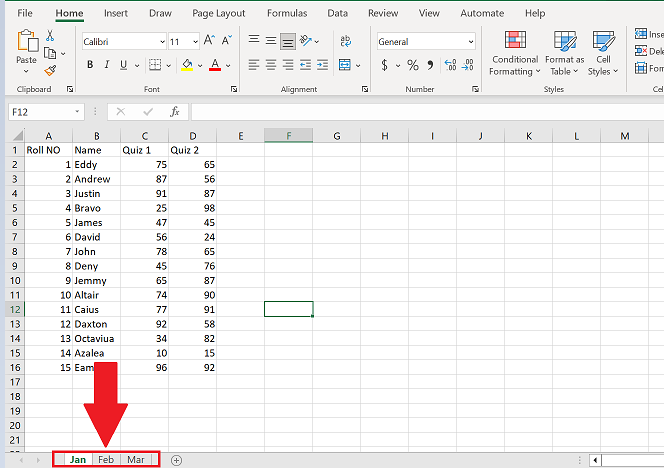
Organizing and managing data in spreadsheets is an essential skill in today's professional environment. Microsoft Excel remains a top choice due to its versatility in data handling. One frequent task users encounter is the need to separate sheets from downloaded Excel files into individual documents. This process can streamline your work significantly, making data management more efficient and organized. Here’s a comprehensive guide on how to easily separate sheets in Excel downloads.
Why Separate Sheets?

Before we dive into the how-to, understanding the benefits of sheet separation can provide valuable context:
- Improved Organization: Each sheet can represent a different data set or project, allowing for clearer separation and easier access.
- Efficiency: Separate files can be more manageable, especially when sharing or collaborating with others.
- Version Control: Individual sheets can be version controlled or used for backups without impacting the entire workbook.
Method 1: Manual Copying

The simplest way to separate sheets is by manually copying:
- Open the Excel file containing multiple sheets.
- Right-click on the sheet you wish to separate and select Move or Copy…
- In the dialog box, choose (new book) from the dropdown menu under “To book”. If you want to create a copy, check the Create a copy box.
- Click OK, and a new Excel workbook will open with the selected sheet.
- Save this new workbook with an appropriate name.
💡 Note: This method is straightforward but can be time-consuming for workbooks with many sheets.
Method 2: Using VBA Macro

For efficiency in handling workbooks with numerous sheets, using a VBA macro can be incredibly beneficial:
- Open your Excel workbook.
- Press ALT + F11 to open the Visual Basic Editor.
- From the menu, choose Insert > Module.
- Paste the following VBA code into the module:
Sub ExportAllSheets() Dim WS As Worksheet For Each WS In ActiveWorkbook.Worksheets WS.Copy With ActiveWorkbook .SaveAs “C:\YourDirectory\” & WS.Name & “.xlsx” .Close False End With Next WS End Sub - Change “C:\YourDirectory\” to the desired location for your saved files.
- Close the VBA editor, return to Excel, and run the macro by going to Developer > Macros or using ALT + F8, selecting ExportAllSheets, and clicking Run.
Using Excel’s Power Query

Power Query, Excel’s data transformation and preparation tool, offers another sophisticated method:
- Open your Excel workbook.
- Go to Data > Get Data > From Other Sources > Blank Query.
- In the Power Query Editor, write M language to load and then split the sheets into separate Excel files. Here’s a simple query to get you started:
let Source = Excel.Workbook(File.Contents(“C:\Path\To\Your\File.xlsx”), null, true), Sheets = Source{[Item=Sheets,Kind=“Table”]}[Data], FilteredSheets = Table.SelectRows(Sheets, each true) in FilteredSheets - Customize this code to match your Excel file’s location, select and load each sheet, then save each one as a separate file.
Important Considerations

When separating sheets, here are some key points to remember:
- Linked Data: If your sheets have linked data or formulas pointing to other sheets, ensure you handle these dependencies properly to avoid #REF! errors in the new documents.
- Names: Provide meaningful names for the new files to facilitate easier data management later on.
- File Path: Always double-check the file path for saving the new sheets, especially when using macros or Power Query.
Alternative Tools for Sheet Separation

While Excel provides robust methods, other tools might offer easier solutions:
- Google Sheets: Offers an easy way to export individual sheets directly from the interface or through Google Apps Script.
- Third-Party Add-ons: Like ASAP Utilities or Kutools for Excel, which can automate sheet separation with just a few clicks.
Summing Up the Process

In this guide, we’ve explored several methods to separate sheets in Excel downloads, from manual copying to using advanced tools like VBA macros and Power Query. These techniques cater to various levels of user expertise and the complexity of the data at hand. By understanding and applying these methods, you can streamline your workflow, enhance data organization, and make sharing or collaborating with others much more manageable.
Can I separate sheets without changing their data?

+
Yes, when you separate sheets using the methods described, the data remains unchanged. Only the structure of how the sheets are organized changes.
Is there a limit to how many sheets I can separate?

+
Technically, there’s no limit set by Excel itself, but practical limitations like your computer’s memory and the performance of Excel might come into play with very large workbooks.
What should I do if my sheets have external references?

+
You’ll need to manually update these references in the new files, or consider using Excel’s Edit Links feature to change references to new locations after separation.