Send Emails Directly from Excel: Easy Steps

The ability to send emails directly from Microsoft Excel can significantly streamline your workflow, saving you time and reducing the risk of errors associated with manual emailing processes. In today's fast-paced business environment, this feature is not just a convenience; it's a necessity for those looking to enhance productivity and efficiency. In this comprehensive guide, we will explore how you can seamlessly integrate Excel with email applications, particularly focusing on Microsoft Outlook, to automate email communications. Here's how you can get started:
Setting Up Your Email Environment


Before you dive into automating emails from Excel, ensuring your environment is correctly set up is crucial:
- Check Email Compatibility: While Microsoft Outlook is highly recommended for this integration, you might also use other email clients like Gmail with a bit more setup. Ensure your Outlook or email client version supports the required functionalities.
- Install Necessary Add-ins or Updates: Sometimes, additional tools or updates might be needed. For Outlook, ensure you have the latest version and add-ins like VBA or the Microsoft Outlook Security Update installed.
- Configure Security Settings: Adjust Outlook’s security settings to allow VBA to interact with email functions. This might involve changing macro settings to enable macros.
Preparing Excel Data for Email

The accuracy of your email campaign relies on how well your Excel data is organized. Here are steps to prepare your Excel spreadsheet:
- Verify Data Accuracy: Ensure all data is up-to-date and formatted correctly. Inconsistencies in email addresses or content could lead to failed emails.
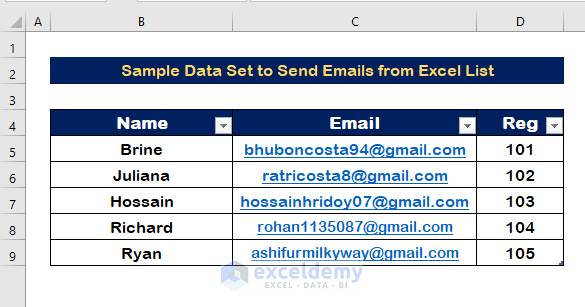
- Structure Your Data: Use columns for different email components like recipient, subject, body, and attachments. This structured approach will facilitate easy data handling during the email sending process.
- Create Named Ranges: Use named ranges in Excel to make your VBA code more readable and less error-prone. For example, name your email list as “RecipientList”.
Automating Email Sending with VBA

Visual Basic for Applications (VBA) is the backbone of automating Excel email sending. Here’s how to set it up:
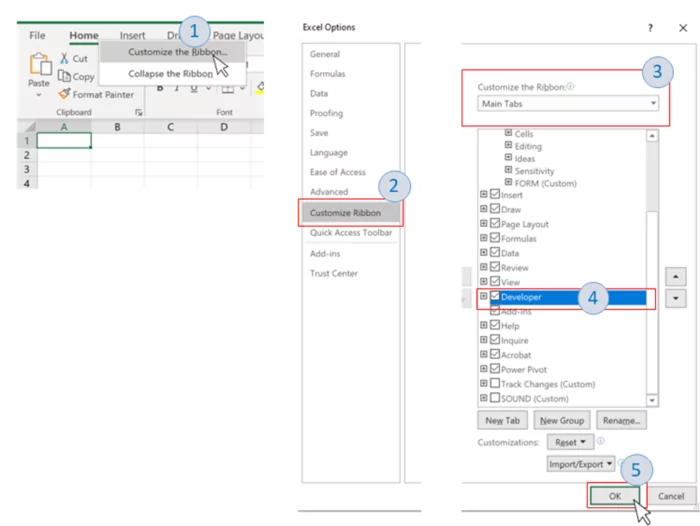
- Open the VBA Editor: Press Alt + F11 to access VBA. This is where you’ll write your macros.
- Create a Module: Right-click on any project in the left panel, select Insert > Module.
- Write the VBA Code: A simple code to send an email could look like this:
Sub SendEmail() Dim OutlookApp As Object Dim OutlookMailItem As Object Set OutlookApp = CreateObject(“Outlook.Application”) Set OutlookMailItem = OutlookApp.CreateItem(0) With OutlookMailItem .To = Range(“A2”).Value ‘ Recipient .Subject = “Subject Line” .Body = “Email body” .Send End With Set OutlookMailItem = Nothing Set OutlookApp = Nothing MsgBox “Email has been sent!” End Sub - Run the Macro: After writing the code, you can run it by pressing F5 in the VBA editor or assign it to a button for easier access.
⚙️ Note: Your antivirus software might block macros from running. Ensure you adjust the settings to trust VBA macros or add the macro file to your trusted locations.
Enhancing Your Email Automation

With the basics in place, you can now enhance your email sending:
- Using Variables: Dynamic content can be pulled from Excel cells using variables, enabling personalized emails.
- Error Handling: Implement error handling in your VBA to manage cases where the email fails to send or if there are issues with the data.
- Attachment Management: You can attach files dynamically from a directory or a specific Excel column, making your emails more comprehensive.
Advanced Techniques for Email Automation

To take your email automation to the next level:
- Scheduling Emails: Combine VBA with Windows Task Scheduler or third-party tools to send emails at predefined times.
- HTML Emails: For richer email content, you can design HTML emails within Excel or reference HTML files stored locally or on a server.
- Integration with Other Services: Use APIs or web services to pull real-time data into your emails, such as stock prices or weather updates, enhancing the value of your emails.
The process of sending emails from Excel can revolutionize how you handle communications in your business. From automating routine updates to sending personalized emails, this integration can save countless hours. The key points to remember include: - Proper Environment Setup: Ensuring compatibility and secure settings for smooth operation. - Data Preparation: Structuring your Excel data correctly to prevent errors. - VBA Mastery: Learning to write and debug VBA macros for various email tasks. - Continuous Improvement: Enhancing your email automation with features like scheduling or real-time data integration. By following these steps, you can make your email sending process as efficient as possible, reducing manual labor and increasing accuracy in your communications.
Do I need a Microsoft account to use Outlook?

+
Yes, you need a Microsoft account to set up and use Outlook, although you can also configure it with other email services if supported.
Can I send emails to multiple recipients at once?

+
Absolutely! Your VBA script can loop through a list of recipients in Excel to send bulk emails efficiently.
Is there a limit to how many emails I can send through Excel?

+
The limit depends on your email provider’s restrictions. Ensure you comply with these policies to avoid account suspension.
📝 Note: Always ensure you have the recipient’s permission to send emails, particularly in bulk, to comply with anti-spam laws like CAN-SPAM or GDPR.