5 Easy Steps to Convert Excel Files to Google Sheets

Microsoft Excel has been the go-to software for many businesses, students, and data analysts for years. However, with the rise of cloud computing, Google Sheets has become a popular alternative, offering real-time collaboration, free access, and seamless integration with other Google services. Converting Excel files to Google Sheets can streamline your workflow and make sharing and collaboration easier. Here's a comprehensive guide on how to perform this conversion in five easy steps.
Step 1: Upload Your Excel File to Google Drive

The first step in converting your Excel file is to get it onto Google Drive. Follow these steps:
- Open Google Drive in your web browser.
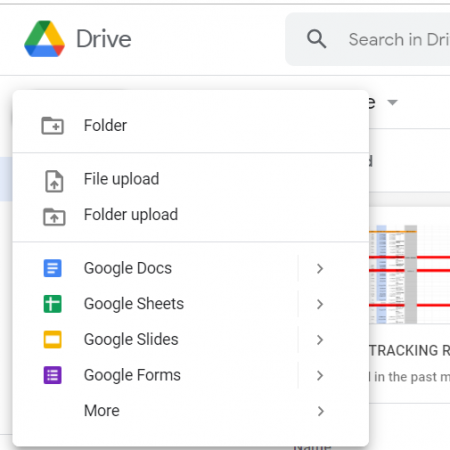
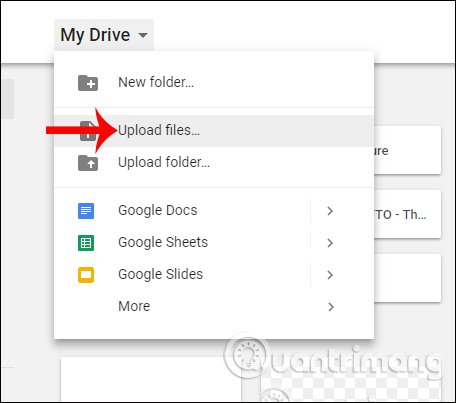
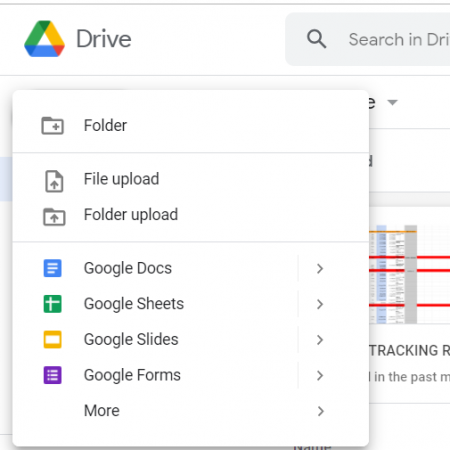
- Click on the "New" button on the left side of the screen and select "File upload."
- Choose the Excel file (.xlsx, .xls, or .csv) from your computer and upload it to your Google Drive.
Ensure you have a stable internet connection to upload files smoothly.
Step 2: Open the Excel File with Google Sheets

Once your file is uploaded, it's time to open it within Google Drive:
- Right-click on the uploaded Excel file in Google Drive.
- From the context menu, choose "Open with" and then select "Google Sheets."
This action will open your Excel file in Google Sheets for viewing or further editing.
Step 3: Convert the File

Google Sheets automatically converts your Excel file into its format:
- The conversion happens in the background as the file opens, converting Excel formulas, charts, and formatting where possible.
- Be aware that complex Excel functions might not have a direct equivalent in Sheets, requiring manual adjustments.
⚠️ Note: Some Excel features or macros might not be compatible with Google Sheets, which could affect the document's functionality.
Step 4: Save as Google Sheets

After the conversion, save the file as a Google Sheets document:
- Click on "File" in the top-left corner of Google Sheets.
- Select "Save as Google Sheets."
- A new Google Sheets document will be created, leaving the original Excel file as is in your Google Drive.
Step 5: Manage Your Converted File

Now that you have your Google Sheets version, consider the following management steps:
- Collaborate: Share the file with others for real-time editing by clicking on the "Share" button.
- Format: Adjust formatting as needed, since some Excel formatting might not carry over perfectly.
- Integrate: Take advantage of Google Sheets' integration with other Google services like Google Forms or Google Data Studio for enhanced functionality.
💡 Note: To ensure data integrity, periodically review and update any formulas or links to external data sources.
This process of converting Excel to Google Sheets unlocks the benefits of cloud-based tools, fostering better teamwork and accessibility. The transition might have minor hiccups due to the differences in software capabilities, but overall, the switch is straightforward. Regularly check and update the spreadsheet to maintain data consistency and accuracy.
Will formatting from Excel carry over to Google Sheets?

+
Yes, basic formatting like fonts, cell colors, and borders usually transfers over well. However, some advanced Excel formatting features might not have a direct equivalent in Google Sheets, requiring manual adjustments.
What happens to Excel macros in Google Sheets?

+
Macros and VBA scripts do not transfer to Google Sheets. You would need to recreate any functionality using Google Sheets’ scripting language, Google Apps Script.
Can I revert back to Excel if needed?

+
Yes, you can download your Google Sheets file back into an Excel format at any time by selecting “File” > “Download” > “Microsoft Excel (.xlsx).” However, be aware that any Google Sheets-specific features might not carry back seamlessly.