5 Simple Steps to Remove Blank Rows in Excel

Introduction to Removing Blank Rows in Excel

Microsoft Excel is a powerful tool that is widely used in various industries for data analysis, organization, and reporting. However, when working with large datasets, you might often encounter blank rows that can interfere with your analysis or simply make your data look messy. Removing these blank rows can streamline your data, make your spreadsheets cleaner, and improve efficiency in data processing. In this comprehensive guide, we’ll walk you through 5 Simple Steps to Remove Blank Rows in Excel to help you manage and clean your data effectively.
Step 1: Identify Blank Rows

The first step in managing blank rows in Excel is to identify them. Here are ways to do so:
- Visual Inspection: Scroll through your spreadsheet to spot any blank rows manually.
- Sorting: Sort your data by one or more columns. Often, blank rows will appear at the top or bottom after sorting.
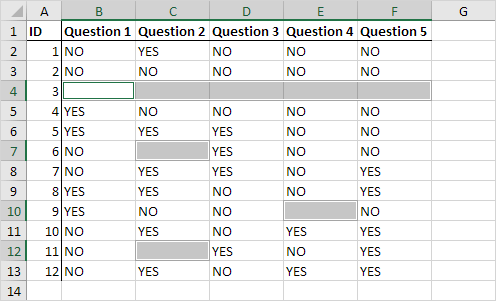
- Using Go To Special:
- Press Ctrl + G (or F5 for Windows), or Option + Command + G for Mac users.
- In the “Go To” dialog box, click on “Special”, then select “Blanks”.
- Click “OK”, and Excel will select all the blank cells in your dataset.
Step 2: Use Excel’s Find & Select Feature

Instead of going through each row manually, Excel offers a more automated approach:
- Go to the “Home” tab.
- Click on “Find & Select” in the Editing group.
- Choose “Go To Special” from the dropdown menu.
- Select “Blanks” and click OK. All blank cells will be highlighted.
This method is particularly useful when dealing with a large number of rows where visual inspection would be time-consuming.
Step 3: Deleting Blank Rows

Once the blank rows are identified and selected, you can proceed to delete them:
- Right-click on one of the highlighted cells within the selected blank cells.
- Choose “Delete” from the context menu.
- From the options in the Delete dialog box, select “Entire Row” to delete the rows containing the selected blank cells.
- Click “OK”.
⚠️ Note: Always ensure you have a backup of your data before making such changes to avoid data loss.
Step 4: Check for Hidden Rows

Sometimes, blank rows might be hidden, making them less obvious during deletion:
- Select the entire worksheet by clicking the top left corner where the row numbers and column letters meet.
- Press Ctrl + Shift + 0 to unhide all rows. If nothing happens, there are no hidden rows.
- If rows become visible, repeat Steps 2 and 3 to delete these now-unhidden blank rows.
Step 5: Use Filtering to Remove Blank Rows

For a more automated approach, you can use Excel’s filter functionality:
- Select your data range or the entire table.
- Go to the “Data” tab and click on “Filter.”
- Click the dropdown arrow in one of the column headers.
- Uncheck the “(Blanks)” option.
- Click “OK” or just close the dropdown. This filters out all rows with blank cells in that column.
- Now, select the visible rows (those without blanks) and copy them to a new worksheet or another part of your current sheet.
- Disable the filter to see your clean dataset without blank rows.
Remember that cleaning your data often involves several methods depending on the dataset's complexity. Here are some additional points to consider:
- Backup your data: Before you start cleaning your data, make sure to create a backup. Sometimes, operations can go awry, and having a backup ensures you won't lose important information.
- Data integrity: Ensure that the removal of blank rows doesn't affect the integrity or logic of your dataset. For example, if the blanks are placeholders for calculations or summaries, you might want to consider leaving them or replacing them with a meaningful value.
This guide has provided you with five straightforward steps to efficiently remove blank rows from your Excel spreadsheets. By using these methods, you'll be able to keep your data clean, ensuring better accuracy in analysis and improved presentation of your work. Remember to apply these techniques with care, understanding your dataset's specifics, and always keep a backup before making significant changes.
How can I ensure I don’t delete useful data along with blank rows?

+
Always review your data carefully before deletion. Use the filter method which allows you to preview the rows to be removed, or check for hidden rows that might contain critical data.
Is there a way to undo the deletion of rows?

+
Excel does have an undo feature, but it’s best to backup your data first. Undo can sometimes revert only the last few actions, and mass deletions can complicate recovery.
What if my data has blank rows that contain formulas or hidden values?

+
Check for hidden rows using Ctrl + Shift + 0. Also, consider using the filter method or manually reviewing each row before deleting. Remember, if there are formulas in blank cells, deleting these might cause errors in your calculations.
Can I automate the removal of blank rows with macros?

+
Yes, you can create an Excel macro to automate this process. Macros can record your actions, like filtering and deleting rows, and then execute these steps with a single button click or shortcut key.