Remove Duplicates from Excel: Easy Steps

Have you ever worked with a dataset in Microsoft Excel and realized it was cluttered with duplicate entries? Removing duplicates can help streamline your data, making analysis and reporting much more straightforward. In this detailed guide, we'll walk you through various methods to remove duplicates in Excel with ease, ensuring your data is clean and consistent.
Understanding the Importance of Removing Duplicates in Excel

Before we dive into the methods, let’s understand why removing duplicates in Excel can be crucial:
- Accuracy in Data Analysis: Duplicate entries can skew your results, leading to inaccurate analytics.
- Improved Readability: Cleaner data is easier to read, understand, and work with.
- Data Consistency: Removes the chance of having multiple records for the same information.
How to Remove Duplicates Using the Built-in Feature

Excel has a built-in feature that allows you to remove duplicates effortlessly. Here’s how you do it:
- Select Your Data: Click anywhere within your dataset or select the specific range containing duplicates.
- Go to the Data Tab: On the Excel ribbon, click on the “Data” tab.
- Choose ‘Remove Duplicates’: Click on the “Remove Duplicates” button in the “Data Tools” group.
- Select Columns: A dialog box will appear. Choose which columns you want to check for duplicates or leave all selected for the entire dataset.
- Confirm: Click ‘OK’. Excel will then remove all duplicate entries, leaving only unique values.
Advanced Method: Conditional Formatting for Visualizing Duplicates

If you prefer a more visual approach before removing duplicates, use conditional formatting:
- Select Your Data: Highlight the range where you want to find duplicates.
- Conditional Formatting: Under the “Home” tab, click “Conditional Formatting”.
- Create a New Rule: Go to “New Rule”, then choose “Use a formula to determine which cells to format.”
- Formula: Enter
=COUNTIF($A$2:A2,A2)>1. Adjust the cell reference to match your data range. - Format Cells: Choose a color or highlight to mark duplicates.
- Apply: Click “OK” to apply the formatting. Duplicates will be highlighted for easy identification.
🧠 Note: Conditional Formatting does not remove duplicates but visually identifies them, which can be helpful for manual review or if you need to verify data before removing duplicates.
Using Formulas to Identify and Remove Duplicates

Sometimes, you might need a more manual control over the process or to keep a record of duplicates. Here are two formulas you can use:
- COUNTIF: Use this to count duplicates:
    =COUNTIF(A2:A2, A2)>1</pre>
    This will show TRUE for duplicates and FALSE for unique entries.
    </li>
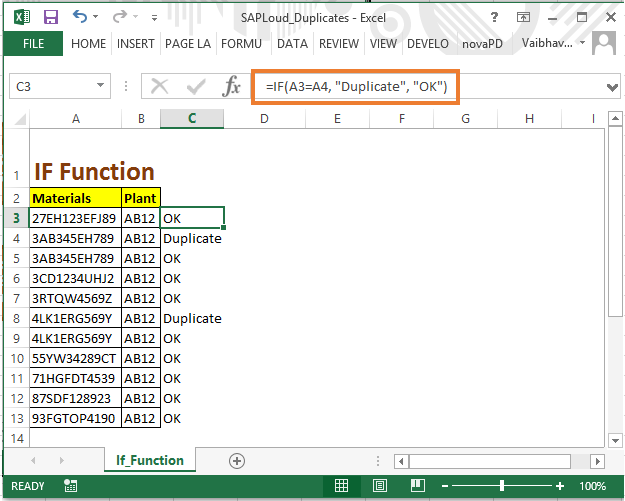
    <li><strong>IF with COUNTIF:</strong> Combine these to visually mark duplicates:
<pre>    =IF(COUNTIF(A2:A2, A2)>1, “Duplicate”, “Unique”)
This formula will label entries as either “Duplicate” or “Unique”.
💡 Note: These formulas can be placed in an adjacent column to help you decide which entries to keep or remove manually.
Automate with VBA for Large Datasets

For those comfortable with VBA or dealing with large datasets, automating the removal of duplicates can save significant time. Here’s a simple VBA script to remove duplicates:
Sub RemoveDuplicateRows()
    Dim LastRow As Long
    LastRow = Range("A" & Rows.Count).End(xlUp).Row
    Range("A1:B" & LastRow).RemoveDuplicates Columns:=Array(1, 2), Header:=xlYes
End Sub
Assign this macro to a button or run it directly to remove duplicates from your specified columns.
👨💻 Note: Always backup your data before running macros, as VBA scripts can change your data without the option to undo.
In summary, Excel offers multiple approaches to remove duplicates, whether you prefer using built-in tools, visual aids like conditional formatting, formula-based identification, or automation with VBA. Each method has its advantages, depending on your comfort level with Excel, the dataset size, and the required analysis. By maintaining clean data, you not only save time but also ensure the accuracy and reliability of your subsequent analysis, making your work with Excel more efficient and productive.
Can I undo removing duplicates in Excel?

+
No, once duplicates are removed, you cannot revert this action. Always ensure you have a backup of your data before making significant changes.
How can I identify duplicates without removing them?

+
You can use conditional formatting or formulas like COUNTIF to highlight or label duplicates without removing them.
What should I do if Excel shows an error when removing duplicates?

+
Ensure there are no blank rows, hidden columns, or merged cells in your data range. Also, check if your Excel version supports the “Remove Duplicates” feature or if your dataset is too large for your Excel’s processing capabilities.