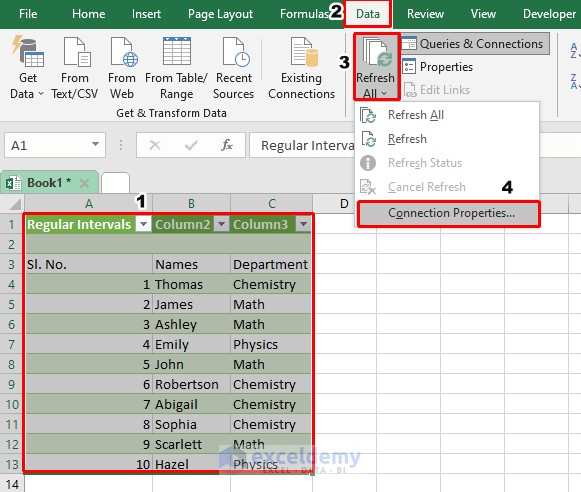
Refresh Excel Sheets with One Click Macro

The need for rapid data management and efficiency in data handling in today's fast-paced work environments is crucial. Traditional methods of refreshing Excel sheets can be time-consuming and error-prone, particularly when managing multiple spreadsheets. This article aims to explore the development of a One Click Refresh Macro for Excel, offering a streamlined approach to updating data, reducing human error, and enhancing productivity.
What is a Macro in Excel?

A macro in Excel is essentially a sequence of commands or keystrokes that automate repetitive tasks. These tasks can range from formatting text to performing complex calculations. By creating a One Click Refresh Macro, you can automate the process of updating or recalculating data in Excel spreadsheets, making the workflow significantly smoother for users.
Advantages of Using Macros

- Automation: Macros run predefined tasks automatically, reducing the time spent on manual operations.
- Consistency: Macros ensure that tasks are performed in a consistent manner, minimizing errors due to manual inputs.
- Productivity: Freeing up time from mundane tasks allows users to focus on more strategic activities.
- Customization: Macros can be tailored to specific workflows, making them highly adaptable for various data handling scenarios.
Disadvantages of Using Macros

- Security Risks: Macros can pose a security risk if they are sourced from untrusted locations as they have the capability to execute potentially harmful code.
- Complexity: Creating effective macros requires some knowledge of Visual Basic for Applications (VBA), which can be challenging for non-programmers.
- Maintenance: As Excel files evolve, macros might need updates to function correctly, which can be time-consuming.
How to Create a One Click Refresh Macro

Creating a One Click Refresh Macro involves several steps that blend Excel’s functionalities with VBA scripting:
Step 1: Enable Developer Tab

To start creating macros, you must first enable the Developer tab:
- Go to File > Options > Customize Ribbon.
- Check the box next to Developer under the main tabs.
- Click OK to save changes.
✏️ Note: The Developer tab provides access to advanced Excel features like VBA, controls, and XML tools.
Step 2: Record a Macro

- Click on the Developer tab.
- Select Record Macro.
- Give your macro a meaningful name like “RefreshData”.
- Choose a shortcut key (optional) to run the macro.
- Start recording and manually refresh your data or execute the commands you want to automate.
- Stop recording by selecting Stop Recording in the Developer tab.
Step 3: Edit the Macro

After recording, you can customize your macro to ensure it performs precisely what you need:
- Open the Visual Basic Editor by selecting Macros from the Developer tab, choose your macro, and click Edit.
- Modify the VBA code to refine the macro’s behavior, for example, to handle different sheets or data sources.
Sub RefreshData()
    Application.ScreenUpdating = False
    Workbooks.Open Filename:=“Path to your data source.xlsx”
    ActiveSheet.ListObjects(“YourTableName”).QueryTable.Refresh BackgroundQuery:=False
    ActiveSheet.Calculate
    ActiveWorkbook.Close SaveChanges:=True
    Application.ScreenUpdating = True
End Sub
Step 4: Assign the Macro to a Button

Creating a button for easy access to the macro enhances user experience:
- Under the Developer tab, choose Insert > Button from the Forms Controls section.
- Draw the button on your worksheet, and when prompted, assign it to run your macro.
Testing Your One Click Refresh Macro

Before deploying your macro, it’s imperative to test it thoroughly:
- Try running the macro several times to ensure consistent behavior.
- Simulate different data conditions to verify the macro’s reliability.
- Test on different machines to ensure compatibility.
- Check error handling, making sure your macro can handle unexpected issues gracefully.
The process of creating and implementing a One Click Refresh Macro in Excel leverages the power of automation to make data management more efficient. While there are challenges, particularly in security and maintenance, the benefits far outweigh these issues when macros are properly managed. By automating mundane tasks, you not only increase productivity but also reduce the potential for human error, allowing for a smoother workflow in handling data. This guide has walked you through the steps to create your own macro, from enabling the Developer tab to testing your creation. With this tool at your disposal, you're well on your way to mastering Excel's automation capabilities, which can transform your daily work processes.
What are the common uses for macros in Excel?

+
Macros can automate numerous tasks in Excel like data entry, formatting, complex calculations, chart generation, and data analysis.
How do I ensure my macro runs every time I open the spreadsheet?

+
To have your macro run automatically when the workbook opens, use the Workbook_Open() event in the ThisWorkbook module of VBA.
Can I share a macro-enabled workbook without security warnings?

+
To avoid security warnings, you can digitally sign your macro or configure Excel to trust access to the VBA project object model, though this reduces security.