Easily Reference Cells in Another Excel Sheet

Mastering Excel isn't just about understanding how to input data or perform basic calculations; it's about leveraging its full potential to streamline your data management process. One of the essential skills in this regard is knowing how to reference cells in another Excel sheet. This technique can significantly enhance your productivity by allowing you to organize and reference data across multiple sheets efficiently. Let's delve into how you can achieve this with ease.
Understanding Cell References

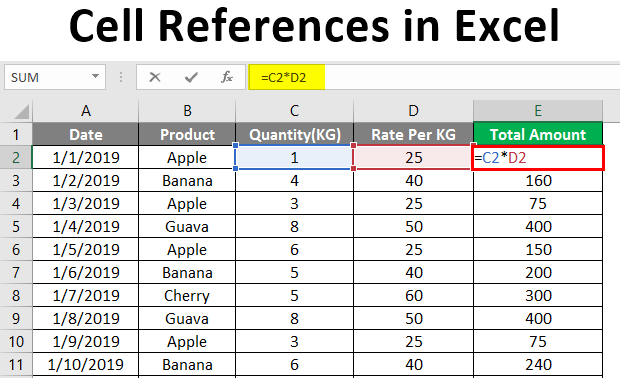
Before we dive into the specifics, it’s crucial to understand what cell references are:
- Absolute references use a dollar sign before the column and row identifiers, like A1, keeping the reference constant when copied across cells.
- Relative references change when you copy or drag formulas across cells, allowing for dynamic data management.
- Mixed references either the column or row is fixed, while the other part adjusts when formulas are copied.
Referencing Cells in Another Sheet

Referencing cells from one sheet to another is straightforward. Here’s how you do it:
- Click on the cell where you want to place the reference.
- Type the equal sign (=), which indicates the start of a formula.
- Click on the sheet tab where the target cell resides.
- Select the cell in that sheet you want to reference.
- Press Enter or Return to complete the formula.
Your formula will look something like this:
=SheetName!CellReference
For example, to reference cell A1 from 'Sheet2' in your current sheet, you would enter:
=Sheet2!A1
🔍 Note: Be precise with sheet names to avoid reference errors.
Advanced Referencing Techniques

Excel’s versatility extends to more complex referencing techniques:
Using Named Ranges

Named ranges simplify references:
- Select the range of cells you want to name.
- Go to Formulas > Define Name.
- Enter a name for the range and confirm.
Now, you can reference the named range instead of cell coordinates. For instance, if you named cell A1 in ‘Sheet2’ as “SalesData,” you could reference it by typing:
=Sheet2!SalesData
Referencing Entire Sheets

To reference all data in another sheet, you can use:
=SheetName!
For example, to sum all data in 'Sheet2,' use:
=SUM(Sheet2!A:A)
This sums all values in column A of 'Sheet2'.
Dynamic Data References

Using Excel functions like OFFSET or INDIRECT can make your references dynamic:
- OFFSET allows you to reference a range of cells offset from a base cell:
- INDIRECT lets you reference cells using text strings, allowing for dynamic sheet selection:
=OFFSET(Sheet2!A1,0,0,5,2) references a 5x2 range starting from A1.
=INDIRECT(“Sheet” & A1 & “!A1”) where A1 contains a number specifying the sheet.
Utilizing References for Data Management

Effective use of cell references can enhance your data management:
| Scenario | Use Case |
|---|---|
| Consolidation | Summarize data from multiple sheets into one master sheet for quick analysis. |
| Consistency | Ensure data consistency across various reports or sheets by pulling from a central location. |
| Automation | Automate data updates by dynamically referencing data that changes in another sheet. |

🔮 Note: Use caution with circular references, which can lead to calculation errors.
Protecting Your References

Data integrity can be maintained by:
- Locking cells that contain references to prevent accidental changes.
- Using Data Validation to ensure data entered into reference cells is consistent.
- Implementing Workbook Protection to secure the structure and formulas of your Excel file.
These steps will help you maintain your references in a controlled and protected environment.
With these techniques, you can effectively reference cells in another Excel sheet, streamline your workflow, and harness the full power of Excel for data management.
Can I reference cells from different Excel files?

+
Yes, you can reference cells from another workbook using the following syntax:
=‘[WorkbookName]SheetName’!CellReference
What if the sheet names contain spaces?

+
If the sheet name has spaces, use single quotes around the name:
=‘Sheet Name’!A1
What are the benefits of using named ranges for references?

+
Named ranges make formulas easier to read, understand, and manage. They also reduce errors by using descriptive names for complex data sets, making your formulas less prone to manual input mistakes.