Lock Excel Cells Easily: Ultimate Protection Guide

In the dynamic world of spreadsheets, Excel stands as a powerful tool for data analysis, calculations, and organization. Whether you're managing business finances, creating project timelines, or maintaining any kind of data, the need for safeguarding your work is paramount. This comprehensive guide will delve into various methods to lock Excel cells, ensuring your data remains secure yet accessible to those who need it.
Why Secure Excel Cells?

- Data Integrity: Protecting cells ensures the data isn’t altered, maintaining the accuracy of your calculations and reports.
- User Management: By locking cells, you can control who can edit specific parts of the spreadsheet, ideal for collaborative environments.
- Data Confidentiality: Locking cells can hide formulas or sensitive data, preserving privacy and business secrets.
How to Lock Cells in Excel

Here are several straightforward methods to lock cells in Excel:
Basic Cell Locking

- Select the cells you want to lock.
- Right-click and choose ‘Format Cells’ or press Ctrl + 1.
- Navigate to the ‘Protection’ tab, check the ‘Locked’ option, and click OK.
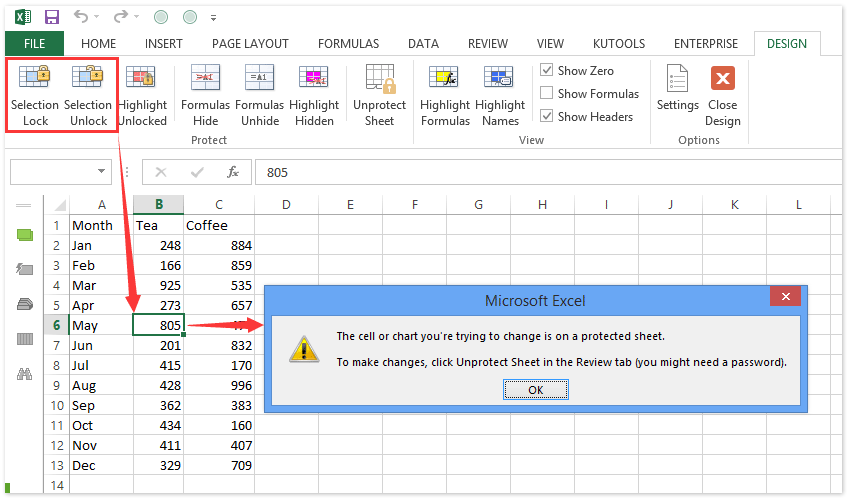
- Go to the ‘Review’ tab, then click ‘Protect Sheet’. This will lock the cells and make your worksheet read-only.
🔒 Note: By default, all cells in Excel are locked, but this doesn’t mean they are protected. They only become protected when you enable sheet protection.
Advanced Cell Protection Techniques

Locking Specific Cells
To lock only certain cells:
- Unlock all cells by selecting the entire sheet (Ctrl+A), then use Format Cells to uncheck the ‘Locked’ option.
- Select the cells you want to protect and lock them as described above.
- Protect the sheet from the ‘Review’ tab.
Protecting Formulas
When sharing spreadsheets, protecting formulas can prevent others from altering them:
- Select the cells containing formulas.
- Go to ‘Home’ > ‘Find & Select’ > ‘Formulas’.
- Format these cells to be locked, then protect the sheet.
Conditional Locking
Use Excel’s power to conditionally lock cells based on specific criteria:
| Condition | Action |
|---|---|
| When a cell’s value exceeds a threshold | Lock the cell using VBA to prevent further edits |
| Based on user interaction | Set macros to lock cells after specific user actions |

Additional Protection Features

Sheet and Workbook Protection

Besides locking cells, Excel offers:
- Sheet Protection: Prevents changes to the structure of the worksheet or formula deletion.
- Workbook Protection: Stops users from adding, moving, or deleting sheets within the workbook.
Data Validation

Implement data validation to ensure that only allowable data types or values can be entered:
- Select the cells where you want to set validation rules.
- Go to ‘Data’ > ‘Data Validation’.
- Choose your criteria and customize the error alerts.
Locking Comments

To keep explanatory notes or annotations safe:
- Select a cell with a comment.
- Right-click the comment and select ‘Edit Comment’.
- Go to ‘Review’ > ‘Protect Sheet’ and ensure ‘Edit comments’ is unchecked.
With these methods in place, you can tailor your Excel file's security to your specific needs, safeguarding your data while still allowing collaboration where appropriate.
Can I password protect individual cells?

+
Excel doesn’t offer a feature to password protect individual cells, but you can lock cells using protection as described above, and protect the entire sheet with a password.
How do I remove cell protection in Excel?

+
To remove protection, go to the ‘Review’ tab, click ‘Unprotect Sheet’, and enter the password if one was set. Then, you can unlock the cells through the ‘Format Cells’ dialog.
Is there a way to allow specific users to edit protected cells?

+
Yes, by using the ‘Allow Users to Edit Ranges’ option under the ‘Review’ tab, you can specify which users have permission to edit certain cells or ranges.


