Secure Excel Columns with Password Protection Easily

Whether you're a business professional dealing with sensitive company data, an accountant managing financial records, or a teacher needing to organize student information, securing your Excel data is paramount. Microsoft Excel offers robust tools to protect your information from unauthorized access or accidental changes. Here’s how you can secure specific columns in your Excel spreadsheet with password protection.
Why Secure Excel Columns?

Before diving into the how-to of securing Excel columns, it’s worth understanding why you might want to do this:
- Privacy: Ensure personal or sensitive data remains confidential.
- Data Integrity: Prevent accidental modifications that could compromise your data.
- Collaboration: Allow colleagues to edit certain parts of a document while protecting other areas.
Step-by-Step Guide to Secure Columns

Follow these steps to password-protect specific columns in your Excel spreadsheet:
1. Open Your Excel Worksheet

Launch Excel and open the worksheet where you wish to protect certain columns.
2. Select the Columns

Choose the columns you need to protect. Click the header of the first column, hold down the Shift key, and select additional column headers to the right. Ensure the columns are highlighted.
3. Access the Protection Settings

Go to the Home tab on the Ribbon, click on Format in the ‘Cells’ group, then under ‘Lock Cell’, select Format Cells. In the Format Cells dialog, navigate to the Protection tab.
4. Lock the Selected Columns

Here, you will see two options:
- Locked: Make sure this box is checked. By default, all cells in Excel are locked, but this only has an effect when the worksheet is protected.
- Hidden: Check this box if you also want to hide the formulas in the selected cells. When protected, the contents won’t be visible in the formula bar even if the cells are visible.
5. Protect the Worksheet

After setting the protection parameters:
- Close the Format Cells dialog by clicking OK.
- Go to the Review tab and select Protect Sheet.
- A ‘Protect Sheet’ dialog box will open. Here, you can:
- Enter a password for the sheet.
- Choose what users can do while the sheet is protected (e.g., select locked or unlocked cells, format cells, etc.).
6. Confirm Your Password

Make sure to confirm the password by typing it again. Once done, click OK.
🔐 Note: Keep your password secure. Excel does not provide a method to recover a forgotten password, meaning the sheet could be locked forever if you lose it.
Additional Tips for Enhanced Security

Here are some additional steps to bolster your Excel spreadsheet security:
- Use Strong Passwords: Incorporate numbers, special characters, and a mix of upper and lower case letters.
- Share Selectively: Only share the protected workbook with users you trust, as they might still view the column contents if they access the file through another method.
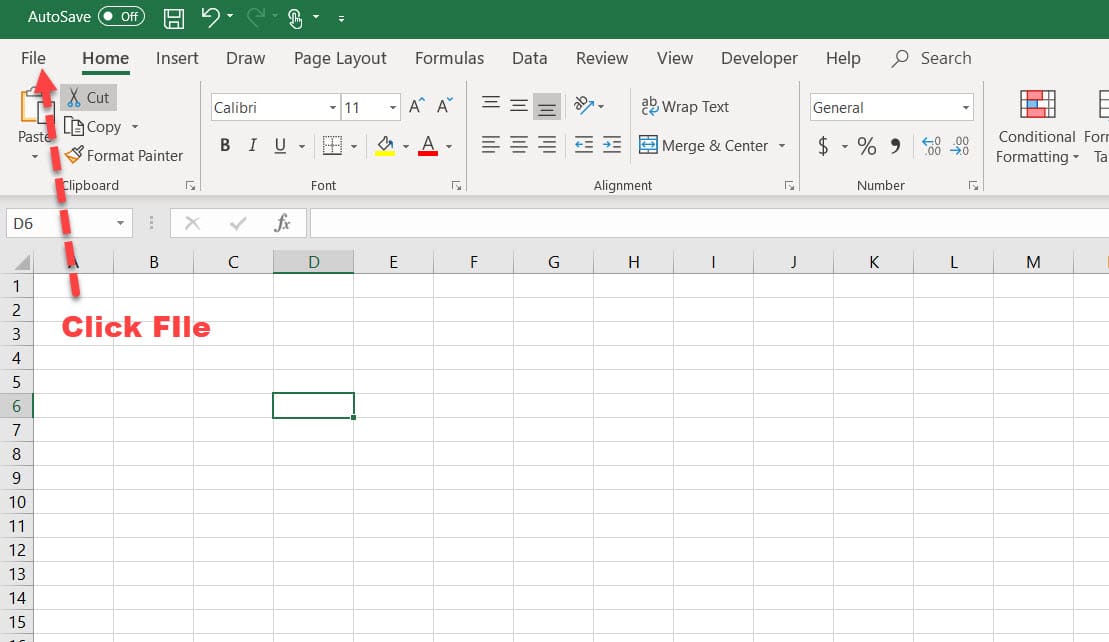
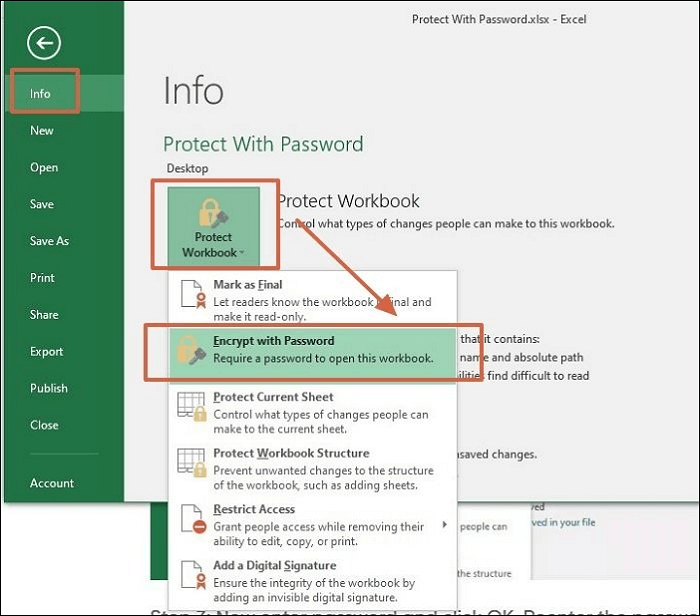
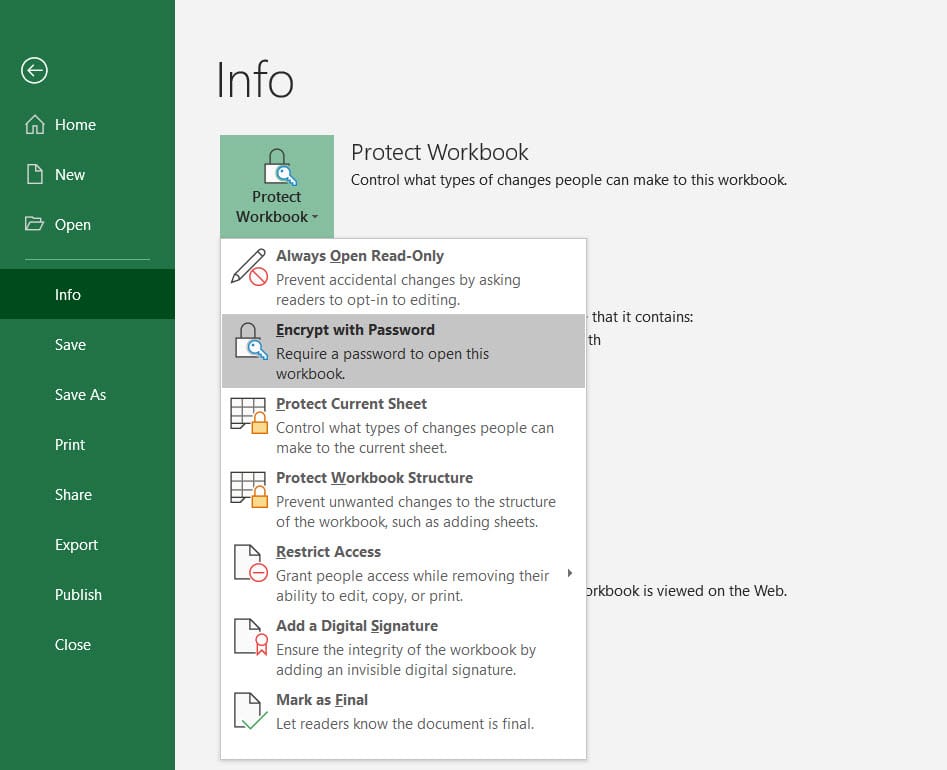
- File Encryption: Consider encrypting the entire Excel file for an extra layer of security by going to File > Info > Protect Workbook > Encrypt with Password.
Troubleshooting Common Issues

Here are a few common problems you might encounter, along with their solutions:
Users Can’t Edit Unprotected Cells

- Ensure that the unprotected cells have the Locked option unchecked when you’re protecting the sheet.
Password Lost

- Without the password, you won’t be able to unlock the sheet unless you have a backup. Consider using password management tools or writing down passwords in a secure location.
Encrypted Files

- If you encrypt the entire workbook, remember the password or use a reliable method to store it safely.
By securing your Excel columns with password protection, you are taking a crucial step in protecting your data. While this method provides a layer of security, always remember that it's not foolproof against professional attempts at access. Therefore, continuous vigilance and the use of additional security measures are advisable.
Can I protect just one cell in Excel?

+
Yes, you can protect individual cells by selecting them, locking them in the Format Cells dialog, and then protecting the worksheet.
What happens if I forget the password to unlock my Excel sheet?
+If you forget the password, Microsoft Excel does not provide a recovery option. You would need to restore from a backup or seek professional data recovery services, which might not always be successful.
Is there a limit to the number of columns I can protect?
+No, there's no limit. You can protect as many columns as you need by adjusting the range selection prior to applying the protection.
Can I still sort or filter the data if I've protected the columns?
+If you allow users to sort or filter when you protect the sheet, they can still perform these actions, but the protected columns' data integrity will be maintained.
How secure is Excel's column protection?
+While Excel’s column protection offers basic security against casual users or accidental changes, it is not considered highly secure against professional hacking attempts. For critical data, consider additional layers of security.
To recap, securing specific columns in Excel with password protection not only ensures data privacy but also maintains data integrity, making collaborative work smoother. By following the outlined steps and implementing additional security measures, you can significantly reduce the risk of unauthorized access or accidental changes to your vital information. Remember, although Excel provides these tools for protection, always use strong passwords, back up your data, and consider additional security methods for sensitive data.