5 Ways to Lock Excel Cells Securely

Excel spreadsheets are critical tools in businesses, academic institutions, and personal use, often containing sensitive data that requires protection. Locking cells in Excel helps prevent accidental changes, ensure data integrity, and maintain confidentiality. In this comprehensive guide, we'll explore five methods to securely lock cells in Excel, safeguarding your vital information from unauthorized modifications.
Understanding Excel Cell Protection

Before we delve into the methods, let's understand what cell protection in Excel does:
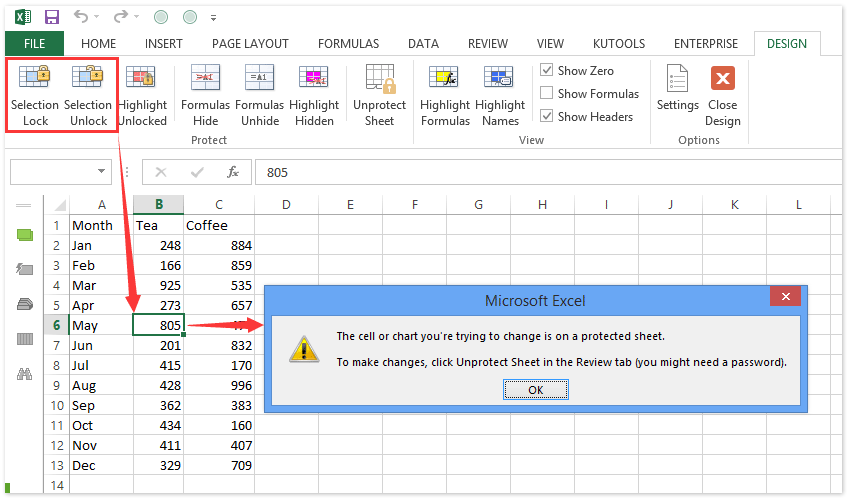
- Prevents Editing: Locked cells cannot be edited until the sheet is unprotected.
- Maintains Formulas: It keeps formulas safe from tampering, reducing errors.
- Data Consistency: Ensures data remains unchanged for consistent reports and analyses.
Method 1: Basic Cell Locking


This is the simplest way to lock cells:
- Select the cells you wish to lock.
- Right-click and select 'Format Cells' or press Ctrl+1.
- Go to the 'Protection' tab, ensure 'Locked' is checked, and click OK.
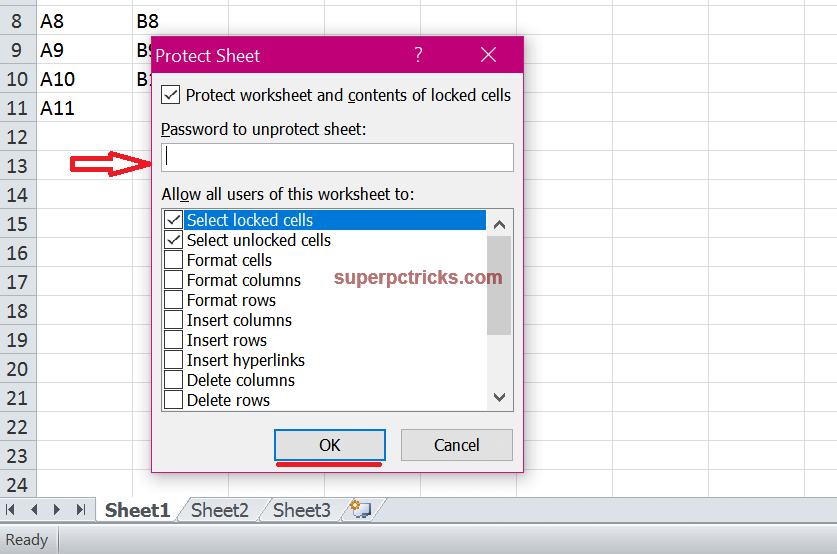
- Then, from the Review tab, click 'Protect Sheet'. You can set a password here for added security.
⚠️ Note: By default, all cells are locked, but this protection only applies when the sheet is protected.
Method 2: Using Conditional Formatting to Visually Indicate Protection


To highlight locked cells visually:
- Select the cells or ranges you've locked.
- Go to Home > Conditional Formatting > New Rule.
- Choose 'Use a formula to determine which cells to format'.
- Enter the formula =GET.CELL(16,B1), where B1 is the top-left cell of your selection.
- Set a fill color for the locked cells.
📌 Note: The GET.CELL function is an undocumented Excel function, which can only be used in Conditional Formatting.
Method 3: Protect Specific Ranges with Allow Editing

If you want some users to edit certain locked ranges:
- Select the range you want users to edit.
- Go to Review > Allow Users to Edit Ranges.
- Add or edit a range, set permissions, and optionally, set a password.
- Then protect the sheet with 'Protect Sheet' from the Review tab.
Method 4: Protecting Entire Workbooks with Workbook Protection


For protecting all sheets in a workbook:
- Go to Review > Protect Workbook > Encrypt with Password.
- Enter a password, confirm it, and click OK.
- You can also use Review > Protect Workbook to prevent adding, moving, deleting, hiding, or unhiding sheets.
🔒 Note: Workbook protection also includes structure and window protection options which control sheet manipulation and window arrangements.
Method 5: Locking VBA Macros


To secure your VBA macros:
- In the VBA editor, click Tools > VBAProject Properties.
- Select the 'Protection' tab and check 'Lock project for viewing'.
- Set and confirm a password.
In securing Excel data, it's essential to employ these methods judiciously. Each provides different levels of control and security, allowing you to tailor the protection to your needs. From the basic cell locking to the intricate protection of VBA code, these methods help ensure your data's safety, reduce the risk of unauthorized changes, and uphold the integrity of your work.
Can I lock cells and allow some users to edit them?

+
Yes, you can use the ‘Allow Users to Edit Ranges’ feature to define who can edit specific locked cells.
Will protecting my Excel workbook prevent people from copying data?

+
Workbook protection mainly focuses on structural changes. For data copying prevention, consider using worksheet protection with the ‘Copy’ option unchecked.
What if I forget the password I set for a protected sheet?

+
There isn’t an official way to recover forgotten passwords. Microsoft does not store these passwords, but there are third-party tools to unlock sheets or workbooks.