Easily Print Wide Excel Sheets: Tips and Tricks

When working with extensive data sets in Microsoft Excel, one common challenge users face is dealing with wide Excel sheets. Whether you're compiling financial records, managing inventory, or preparing detailed reports, printing these wide spreadsheets in a readable format can be quite daunting. This article dives into a variety of tips and tricks to ensure you can easily print wide Excel sheets without compromising the data's readability or layout.
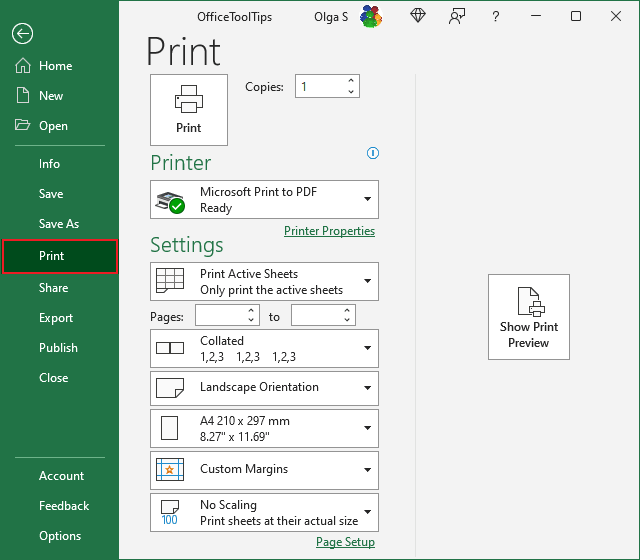
Understanding Excel Print Settings

Before diving into the specific techniques, it’s crucial to have a basic understanding of Excel’s print settings:
- Page Layout: Here, you can adjust the orientation, set margins, and define scaling options.
- Print Area: Set or clear a print area to control which part of the sheet gets printed.
- Scaling: Adjust how your sheet fits on a page by scaling it down or setting it to fit on a specific number of pages.
📝 Note: Excel provides a Preview feature that allows you to see how your document will look once printed.
Setting Up the Print Area

The first step in managing printing wide Excel sheets is defining the print area:
- Select the cells you want to print.
- Go to the Page Layout tab.
- Click on Print Area in the Page Setup group, then Set Print Area.
This action tells Excel exactly which part of your wide spreadsheet to print, making sure irrelevant parts are excluded.
Adjusting Scaling and Margins

Scaling your spreadsheet can help in fitting wide data onto a single page:
- Under Page Layout, choose Width and set it to 1 page to fit the data horizontally.
- Adjust the Height similarly if you need it to fit vertically as well.
- Use the Margins settings to reduce margins, allowing more content to fit on each page.
Using Page Breaks

If your data doesn’t fit on a single page:
- Manually insert Page Breaks where you want your data to split across pages.
- Go to View > Page Break Preview to see how your data will divide.
Employing the “Fit All Columns on One Page” Feature

This can be particularly useful for printing wide sheets:
- Select Page Layout.
- Under Scaling, select Fit All Columns on One Page.
This will shrink the text size and layout to ensure all columns appear on a single page.
Repeating Headers and Titles

To maintain readability, especially in long reports:
- Go to Page Layout > Print Titles.
- Select the rows and columns that you want to repeat on each printed page.
💡 Note: This feature helps in keeping reference headers visible across multiple pages, enhancing the data’s usability.
Utilizing Print Preview

Always use the Print Preview to check your settings:
- Review how your data will appear on paper.
- Adjust scaling, margins, and print area if necessary.
After going through these steps, your wide Excel sheets should now be ready to print in a manageable format. With these tips and tricks, you can ensure that your data is presented clearly and efficiently, regardless of its width. The key is to tailor the print settings to your specific needs, using features like page breaks, scaling, and headers to optimize your output.
How can I print wide Excel sheets without losing data?

+
Use the ‘Fit All Columns on One Page’ feature to reduce the size of your data uniformly, or manually adjust your print area and scaling to ensure critical data remains visible.
Why should I use Print Preview before printing?

+
Print Preview allows you to see how your document will look on paper, helping you to make necessary adjustments before wasting resources on printing.
What if my data is still too wide after using scaling?

+
Consider splitting your data into multiple sheets, each with a manageable width, or use page breaks to logically divide your content across pages.
By mastering these print techniques for wide Excel sheets, you’ll enhance your ability to share and present data effectively, making your reports and analyses more digestible and professional.