Easily Print Selected Excel Tables: A Simple Guide

Are you tired of manually selecting and copying data from Excel spreadsheets to use in documents or presentations? Microsoft Excel, a powerful tool for organizing and analyzing data, offers numerous features that can simplify your workflow. One such feature allows you to print selected tables directly from your spreadsheet. This simple guide will walk you through the steps to easily print selected Excel tables, ensuring your data presentation is both professional and hassle-free.
Why Print Selected Tables?

Before diving into the "how," it's worth discussing the "why." Printing only the necessary data:
- Reduces paper and ink waste.
- Makes documents easier to read by excluding irrelevant information.
- Enhances the visual appeal when presenting data to clients or colleagues.
Step-by-Step Guide to Printing Selected Excel Tables

1. Identify and Select Your Table

First, you need to identify the table you wish to print. Here’s how:
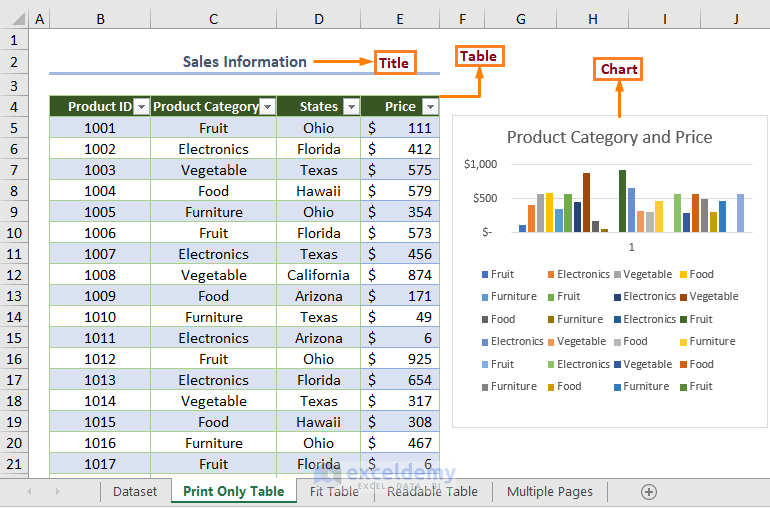
- Click and drag: Click and drag over the range of cells that contain your table. Ensure you include all necessary rows and columns.
- Or use Ctrl+Click: If your table isn’t continuous, hold down the Ctrl key and select individual cells or ranges.
🌟 Note: Make sure you don’t accidentally include any empty cells or hidden rows/columns that might skew your printout.
2. Set Print Area

Now that your table is selected:
- Go to the Page Layout tab.
- Click on Print Area and then choose Set Print Area.
🗒️ Note: This setting can be reset by choosing Clear Print Area from the same menu if you need to adjust your selection later.
3. Adjust Page Layout for Optimal Printing

Excel allows you to adjust how your table appears on the page:
- Choose Margins to fit your table within the page boundaries.
- Set Orientation (Portrait or Landscape) to best display your data.
- Use Print Titles to repeat headers or titles on every printed page.
📈 Note: For large tables spanning multiple pages, consider using Page Break Preview to manually adjust page breaks.
4. Preview and Print

Always preview before printing to avoid mistakes:
- Click File > Print to open the print preview.
- Review the layout, margins, and ensure all data is visible.
- Make final adjustments if necessary.
Once satisfied, click Print to proceed. If you’re printing to a physical printer, make sure it’s connected and has sufficient ink/paper.
Beyond the Basics: Printing Tables for Different Uses

While the above steps cover the basic method to print selected Excel tables, here are some additional tips:
- Printing for Reports: If you’re printing for formal reports, consider including a header/footer, page numbers, and perhaps using a company letterhead background.
- Printing for Data Analysis: Ensure that your headers are clear, and if possible, use conditional formatting to highlight key data points or trends.
- Printing for Presentations: Choose to print in color, use professional fonts, and adjust for readability from a distance.
In summary, printing selected Excel tables efficiently can significantly enhance the quality and professionalism of your data presentations. By following this guide, you’ll master the art of selecting, formatting, and printing just the right data, making your reports, presentations, and documents clearer and more effective. Remember, the key is in the preparation - taking a moment to properly set up your print area and layout can make all the difference in how your information is received.
How do I print multiple non-adjacent tables in Excel?

+
To print multiple non-adjacent tables, select each range while holding the Ctrl key, set each as a print area, and then print. Excel will print each area on a separate page or as set up.
Can I print only the visible cells in an Excel sheet?

+
Yes, before setting the print area, filter or hide rows/columns to show only what you want to print. Excel will only print the visible cells.
How do I ensure my table doesn’t break across pages?

+
In the Page Layout tab, use Page Break Preview to manually adjust where pages should break. Alternatively, check the “Print Titles” to ensure headers or titles appear on every page if the table does break.