Print Excel Sheets Over Multiple Pages Easily

Handling large Excel spreadsheets can often present the challenge of printing them effectively, especially when the data spans across multiple pages. Here's a comprehensive guide to help you print Excel sheets over multiple pages with ease, ensuring your data looks organized and professional on paper.
Adjust Page Layout

The first step in effectively printing your Excel sheets over multiple pages is to adjust the page layout settings. These settings control how your worksheet is spread across pages:
- Page Setup - Navigate to the “Page Layout” tab. Here you can set your paper size, orientation (Portrait or Landscape), margins, and scale. Choose settings that fit your data without overcrowding the pages.
- Print Area - If you only want to print specific parts of your worksheet, you can define a print area:
- Select the range you want to print.
- Go to Page Layout > Print Area > Set Print Area.
- Page Breaks - Excel automatically inserts page breaks, but you might want to manually adjust them for better data placement:
- In the “View” tab, select “Page Break Preview.”
- Drag the blue dotted lines to adjust where pages break.
Scaling and Fitting to Pages

Scaling is crucial for making your data fit into the allotted page space:
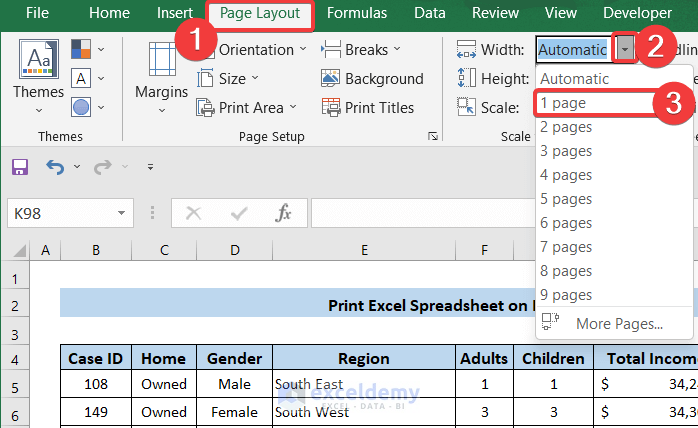
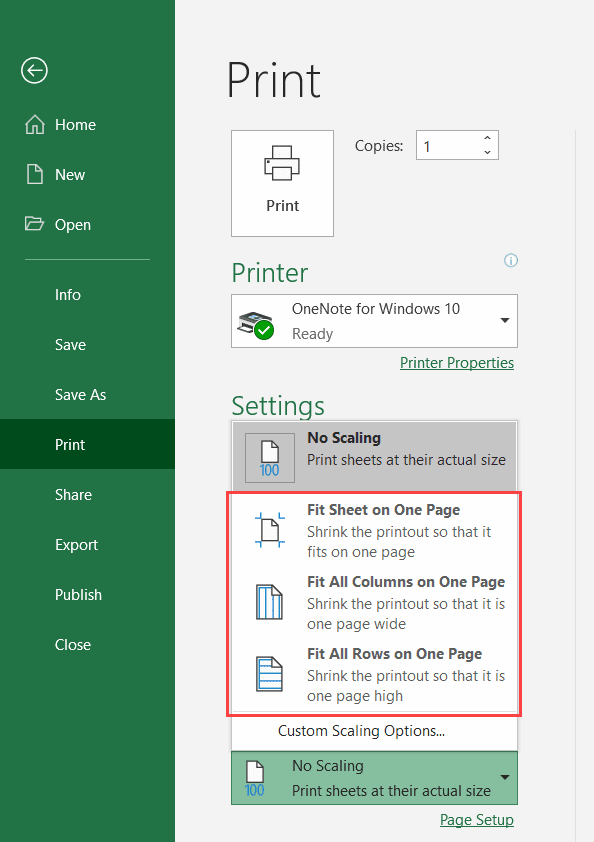
- Fit to Page - If you want to fit all of your data onto a specified number of pages, use “Fit to:” under Page Setup:
- Go to Page Layout > Scale to Fit.
- Set the “Fit to:” drop-down to the number of pages wide by tall.
- Adjust Scaling - Scaling can also be manually adjusted:
- In the same “Scale to Fit” group, you can use “Scale” to zoom in or out to fit your data onto pages.
Print Preview

Always use Print Preview before committing to print:
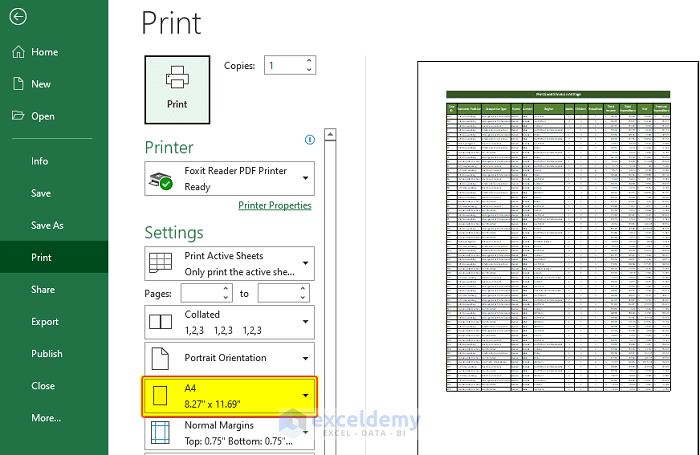
- From the File menu, select “Print” to open the Print Preview window.
- Review how your data will appear on paper, adjusting any settings as needed.
- You can see page breaks, margins, and headers/footers here, making adjustments accordingly.
Printing Options

Excel offers various print options to customize how your sheets are printed:
- Print Range - You can choose to print all sheets, selected sheets, or just the active sheet.
- Print Titles - If your sheets span multiple pages, you can print row and column titles on every page:
- Go to Page Layout > Print Titles.
- Select rows or columns to repeat at the top or on the left of each page.
- Print Gridlines and Row/Column Headers - Decide if you want to include gridlines and headers for better readability:
- Find these options under the Page Layout tab.
🔍 Note: When using "Fit to:" scaling, your document may lose some readability due to smaller text or compressed data. Ensure that your print settings are adjusted for clarity as well as page count.
In summary, effectively printing Excel sheets over multiple pages involves careful preparation and adjustment of your document's layout, scaling, and print settings. By customizing these elements, you can ensure that your data is presented clearly and professionally, whether you're printing a report, a financial statement, or any other multi-page document from Excel. The right settings will help you manage how your data spans across pages, preventing awkward cuts and ensuring that important headers and labels are repeated where necessary.
Why can’t I see my gridlines when I print my Excel sheet?

+
Check under “Page Layout” if the “Print” checkbox under “Gridlines” is ticked. If not, enable it to print gridlines.
How can I adjust the page break to fit a certain amount of data on one page?

+
Use “Page Break Preview” to manually adjust where Excel breaks pages. Drag the blue lines to control where the data splits.
Can I print several Excel sheets at once?

+
Yes, by selecting multiple sheets before you hit print, you can print them all in one go.