5 Tips to Print All Excel Columns on One Sheet

If you've ever struggled with printing your Excel spreadsheets, especially when your data extends across multiple columns and you want it all on one page, you're not alone. Excel's versatility can sometimes make seemingly simple tasks like printing complex. Here are five tips to help ensure that all your columns fit on one printed page, enhancing your document’s readability and functionality.
Adjust Page Layout Settings

The first step in fitting all your Excel columns on one sheet is adjusting the page layout settings. Here’s how you can optimize these settings:
- Page Orientation: Change from portrait to landscape if your data spreads horizontally.
- Scale to Fit: Use the 'Scale to Fit' group under Page Layout to reduce the size of your printout. Adjust the 'Width' to 1 page, and Excel will automatically scale down the document.
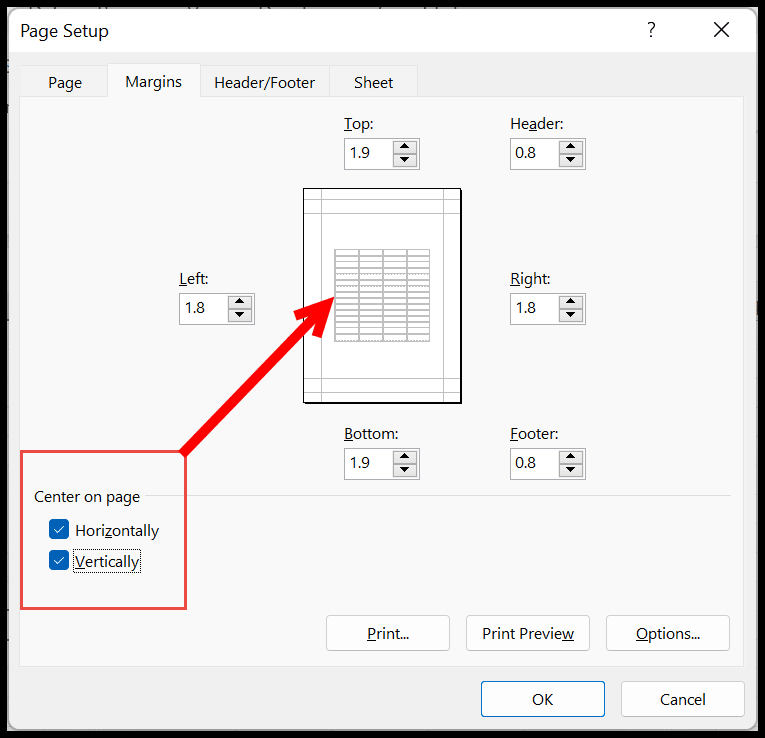
- Margins: Set custom margins or reduce them to gain additional space on your page.
Use Print Preview

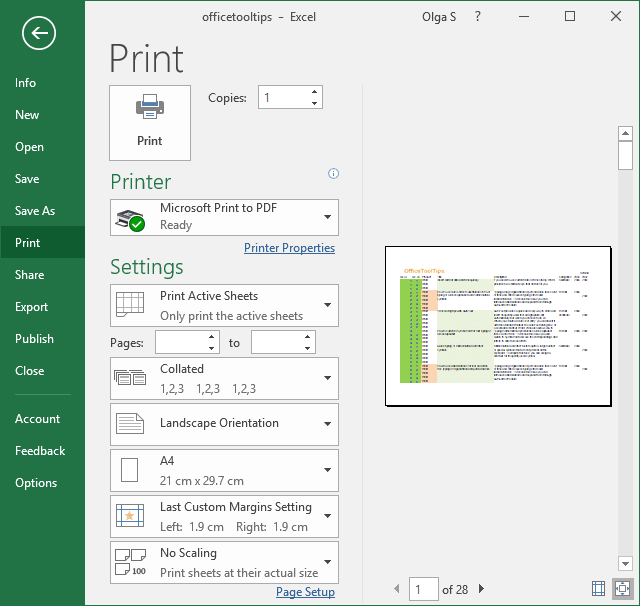
Before printing, always review your document using Excel's Print Preview feature. Here’s why it’s crucial:
- You can see exactly how your spreadsheet will look on the printed page, allowing adjustments before committing to print.
- If your spreadsheet doesn’t fit, you'll see the page breaks and can make necessary changes to your layout or scale.
Adjust Column Widths and Font Sizes

Sometimes, tweaking your Excel sheet itself can help. Here's what to do:
- Reduce the width of columns that have wide content but aren’t necessary for immediate comprehension. Use 'AutoFit' to automatically adjust widths based on content.
- Change font sizes or use a smaller, less bold font to fit more text into less space. Remember, however, not to compromise readability.
| Action | Reason |
|---|---|
| Reduce Column Width | To fit more columns on a single page. |
| Change Font Size | To allow more information in less space while maintaining legibility. |

⚠️ Note: Be careful not to make the content too small or crowded, which can lead to readability issues.
Use Page Breaks Wisely

If some columns must span multiple pages, use page breaks to manage where the break occurs:
- Insert page breaks where they make sense in your data flow.
- You can also insert manual page breaks to control exactly where the page will end.
Optimize for Printing

Finally, some Excel settings can be optimized specifically for printing:
- Print Area: Define the print area to include only what you need.
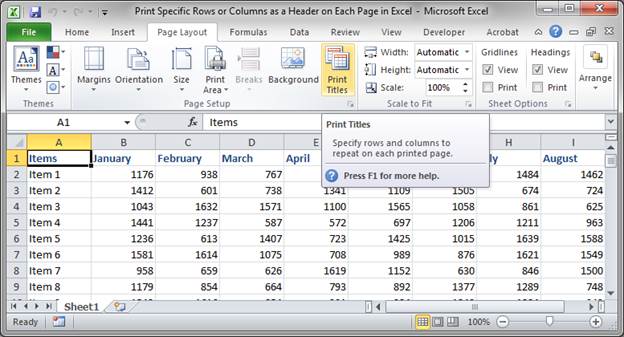
- Print Titles: Set print titles so your headers appear on each page if the spreadsheet spans multiple pages vertically.
- Print Gridlines: Opt to print gridlines if they help with data interpretation.
- Use Page Setup Dialog: Access this through 'File' > 'Print' > 'Page Setup' to tweak every aspect of your printout.
These tips will help you to make your Excel printouts more readable and functional, allowing for better data presentation and analysis. By understanding how to manipulate Excel's printing settings, you can ensure that your work looks its best on paper, just as it does on screen.
How can I make my Excel spreadsheet fit on one page?

+
Use ‘Scale to Fit’ to automatically adjust your spreadsheet’s size. Also, consider changing orientation to landscape, reducing margins, or even adjusting column widths and font sizes to fit all columns on one sheet.
What if I need headers on every printed page?

+
Use the ‘Print Titles’ feature under Page Layout to define rows or columns that should repeat on every page.
Can I print only a specific area of my Excel spreadsheet?

+
Yes, set a print area. Select the area you want to print, go to ‘Page Layout’ > ‘Print Area’ > ‘Set Print Area’.