Move Excel Sheets Easily: A Step-by-Step Guide

Understanding the Basics of Excel Sheet Management

Before delving into the intricacies of moving Excel sheets, it’s essential to understand some fundamentals:
- Workbook: This is the Excel file that contains multiple sheets or worksheets.
- Worksheet or Sheet: This is an individual tab within a workbook where you input and organize your data.
- Active Cell: The highlighted cell that you're currently working on.
- Selection: This refers to a single cell or a group of cells you've selected with your mouse or keyboard.
Why Move Excel Sheets?

- To organize data: Moving sheets can help in logically structuring your data for better readability.
- For collaborative work: If several people are working on different parts of the same project, moving sheets can streamline the workflow.
- Data analysis: By moving sheets around, you might gain new insights or perspectives on the data.
📝 Note: While moving sheets is relatively straightforward, ensure you save your workbook before making changes to avoid any potential data loss.
Step-by-Step Guide to Moving Sheets in Excel

Moving sheets in Excel is not just about dragging and dropping; it’s about understanding the best practices for efficiency. Here’s how you can move sheets within or between workbooks:
Within the Same Workbook

- Open the workbook containing the sheets you want to move.
- Click on the sheet tab you wish to move. You’ll notice the sheet’s name in the tab.
- Hold down the left mouse button on the sheet tab and drag it to the desired position. You’ll see a small triangle indicating where the sheet will be placed.
- Release the mouse button once you’re at the desired location, and the sheet will be moved.
📝 Note: If you want to move multiple sheets, hold down the Ctrl key while clicking on the tabs to select more than one.
Between Different Workbooks

- Open both the source and destination workbooks.
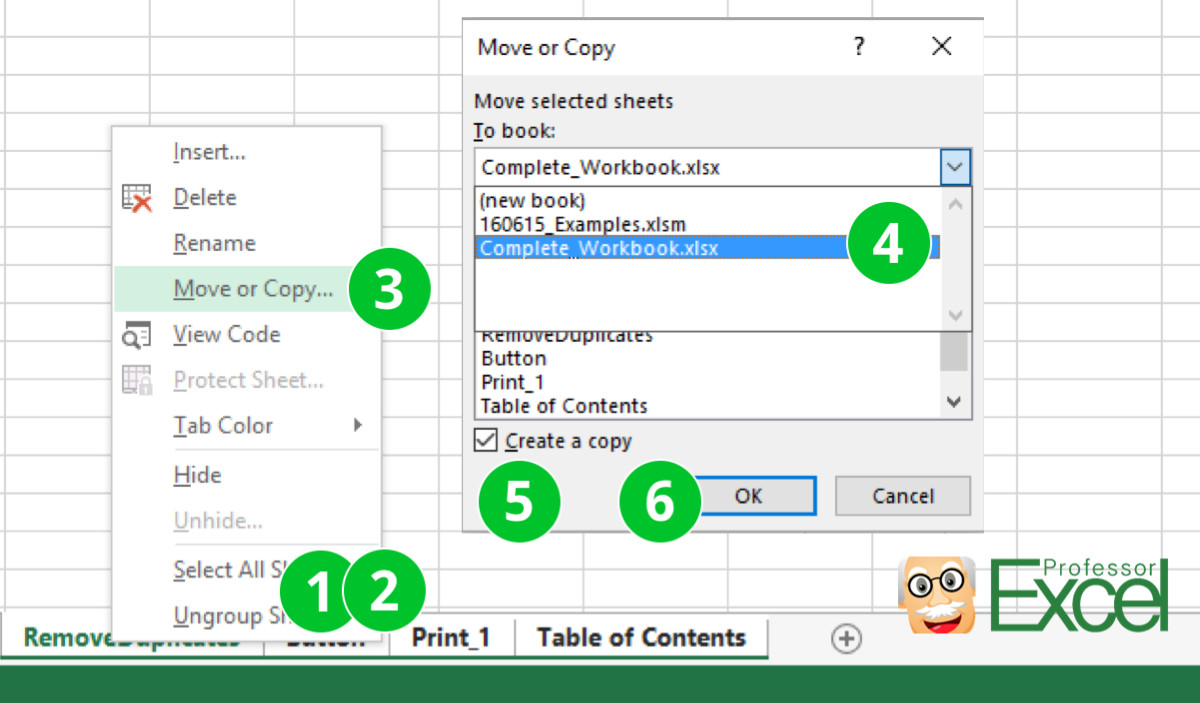
- From the source workbook, select the sheet you want to move. Right-click on the sheet tab.
- Choose “Move or Copy” from the context menu. This opens a dialog box:
- Under “To book,” select the workbook where you want to move the sheet.
- Choose the position in the list of sheets where you want to place it.
- Make sure “Create a copy” is unchecked if you want to move (not copy) the sheet.
- Click “OK.”
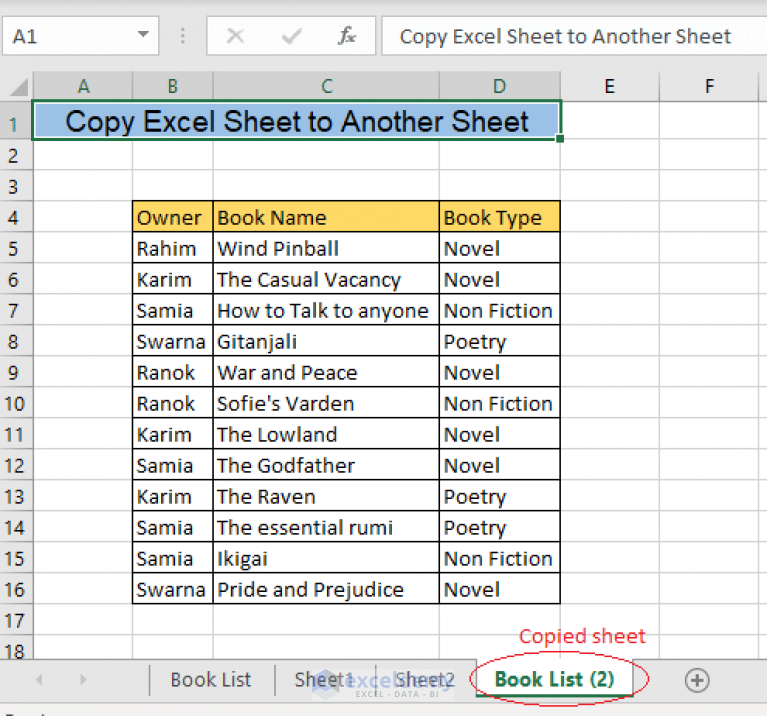
- The sheet will now be moved to the destination workbook, leaving the original workbook without the sheet.
Using Keyboard Shortcuts

- To select multiple sheets: Ctrl + Click
- To move a sheet: Select the sheet and press Ctrl + X to cut, then go to the destination workbook and press Ctrl + V to paste.
📝 Note: Keyboard shortcuts are excellent for speed but require precise knowledge of Excel's interface.
Best Practices for Moving Excel Sheets

Moving sheets in Excel is not just about the mechanics; it’s about ensuring data integrity and maintaining the workflow. Here are some best practices:
Backup Your Work

- Always save your Excel file before moving sheets. This provides a backup in case of errors.
Keep Sheet Names Organized

- Use logical and clear names for your sheets to help others (and yourself) navigate the workbook easily.
Understand the Impact

- Moving sheets can affect references in formulas, pivot tables, or charts. Ensure you understand the implications before moving.
Consistent Color Coding

- If your workbook uses color-coded tabs, maintain that consistency after moving sheets.
📝 Note: After moving sheets, check formulas for broken references or unexpected results. Using "Find and Replace" with names can help.
Common Issues and Troubleshooting

Moving sheets isn’t always seamless. Here are some common issues you might encounter:
Sheet References

- If your formulas or charts reference the sheet you moved, they might break. Re-establish these links if needed.
File Size and Performance

- Large sheets or multiple moves can slow down your Excel. Consider cleaning up or archiving old data if performance issues arise.
Workbook Compatibility
- If you’re moving sheets between different versions of Excel, there might be compatibility issues. Ensure both workbooks are compatible or convert them first.
📝 Note: Always use the latest Excel version for smoother sheet movement and compatibility.
In this comprehensive guide, we’ve explored the various aspects of moving Excel sheets within and between workbooks. From understanding the basics to applying best practices, we’ve covered key strategies to ensure your data management remains efficient and your work organized. Moving sheets can significantly enhance your data analysis process, streamline collaborative efforts, and help in reorganizing data for better insights. Whether you’re an Excel novice or a seasoned pro, these techniques will help you master the art of moving sheets. Remember to always backup your data, use consistent naming conventions, and be aware of how your changes might impact formulas and data references. By following these guidelines, you can navigate Excel with greater ease and proficiency.
Can I move multiple sheets at once within the same workbook?
+Yes, you can move multiple sheets by holding down the Ctrl key while selecting each sheet tab, then dragging them to the desired position.
How do I ensure data integrity when moving sheets?
+Always save a backup before moving sheets. Also, check for and correct any broken references or formula links after the move.
What happens if the Excel workbooks I’m moving sheets between have different versions?
+If the versions differ, you might encounter compatibility issues. To mitigate this, save both workbooks in a common format or ensure you’re using compatible versions.